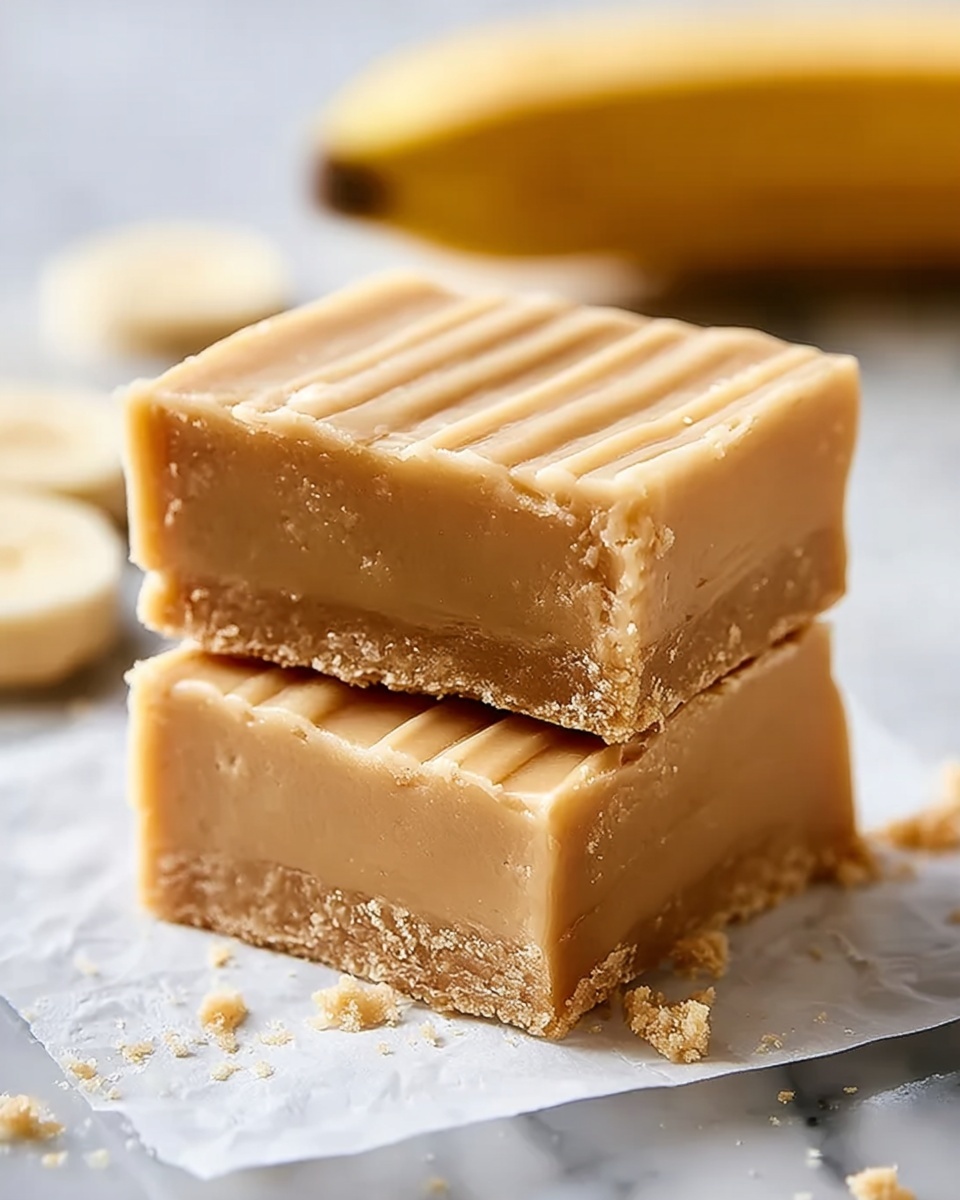
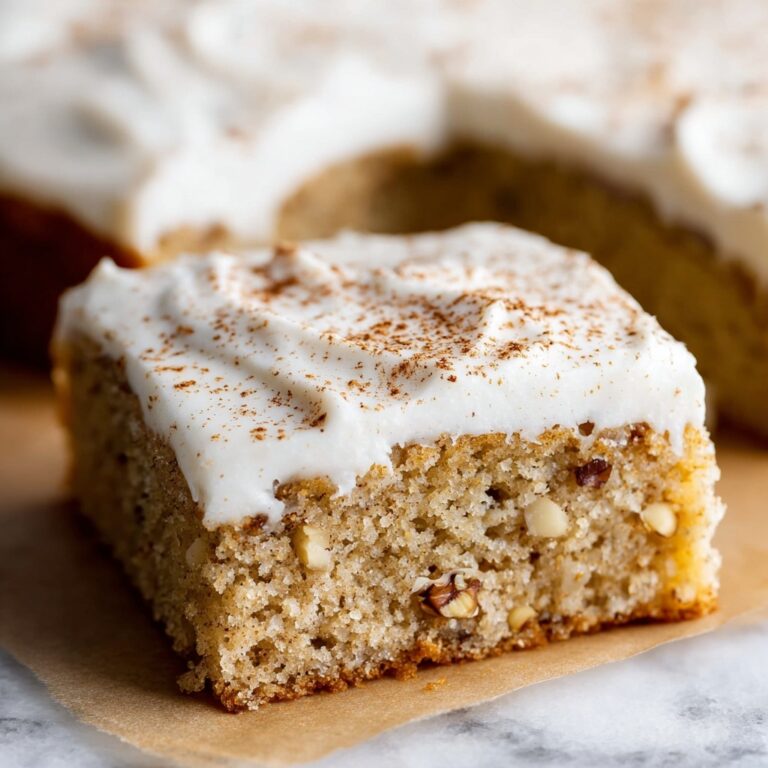
If you have a soft spot for all things banana and crave a dessert that is satisfyingly rich yet tender, you are going to adore this Fudgy and Flavorful Banana Blondies Recipe. These blondies hit that perfect sweet spot where the warmth of ripe bananas meets the buttery, dense texture we all long for in a good blondie. With just a handful of simple ingredients and straightforward steps, this treat promises a luscious bite every time, making it an absolute go-to whenever you want to impress yourself or your loved ones with something delightfully different yet comforting.

Ingredients You’ll Need
Each ingredient in this recipe plays a vital role in creating that irresistible balance of fudgy texture and rich flavor. All you need are basics you likely have on hand, which makes this recipe as accessible as it is delicious.
- Unsalted butter: Melted to infuse the blondies with a rich, creamy base and a hint of nuttiness that sets the tone.
- Light brown sugar: Packed tightly for moisture and a subtle molasses flavor that deepens the overall sweetness.
- Large egg: The glue that binds everything together and contributes to the fudgy texture.
- Vanilla extract: A splash to enhance and round out the sweetness with its warm, aromatic notes.
- Mature bananas: Mashed ripe bananas add natural sweetness, moisture, and unmistakable flavor, making these blondies uniquely luscious.
- All-purpose flour: Provides structure without making the blondies dense, ensuring a tender crumb.
- Baking powder: Just a bit to help the blondies rise slightly and stay soft.
- Salt: A pinch to balance the sweetness and intensify the flavors.
- Optional glaze ingredients: Powdered sugar, milk (or a non-dairy alternative), and vanilla extract combine to create a sweet finishing touch that looks as lovely as it tastes.
How to Make Fudgy and Flavorful Banana Blondies Recipe
Step 1: Preheat and Prepare the Pan
Start by preheating your oven to 350°F (175°C). This ensures the perfect baking temperature is reached by the time your batter is ready. Line an 8×8-inch baking pan with parchment paper or give it a light grease so the blondies don’t stick and come out in perfect squares.
Step 2: Mix the Wet Ingredients
In a medium bowl, whisk together the melted butter and light brown sugar until silky smooth. This step is important because it blends those flavors together and creates the fudgy base you’re aiming for. Then, add the large egg, vanilla extract, and mashed bananas, stirring until everything is beautifully combined into a luscious mix.
Step 3: Combine Dry Ingredients and Fold
Sprinkle the all-purpose flour, baking powder, and salt evenly over the wet mixture. Gently fold the ingredients together just until you no longer see dry streaks. Be careful not to overmix here; you want to preserve the lightness and softness that come from a tender hand.
Step 4: Bake to Perfection
Pour your batter into the prepared pan and smooth the surface with a spatula. Pop it into the oven and bake for about 25 to 30 minutes. The blondies should be set around the edges but still moist in the center. A toothpick inserted should come out mostly clean with a few moist crumbs for that perfect fudgy bite.
Step 5: Cool and Optional Glaze
Allow the blondies to cool in the pan for 10 minutes—you want them to firm up enough to slice prettily. Transfer to a wire rack to cool completely. If you want to add a little extra shine and sweetness, whisk the powdered sugar, milk, and vanilla extract for the simple glaze. Drizzle over the cooled blondies and let the glaze set before slicing into squares.
How to Serve Fudgy and Flavorful Banana Blondies Recipe

Garnishes
These blondies shine on their own, but a light dusting of powdered sugar or chopped toasted walnuts on top can add delightful texture and visual appeal. Fresh banana slices or a sprinkle of cinnamon also elevate the experience for a pretty and tasty touch.
Side Dishes
Pair these blondies with a scoop of vanilla ice cream, a dollop of whipped cream, or a cup of rich coffee or tea. The creamy or warm elements nicely contrast with the dense sweetness, making every bite a sophisticated experience.
Creative Ways to Present
Make your Fudgy and Flavorful Banana Blondies Recipe a star at any gathering by cutting them into mini squares for bite-sized treats or layering them in a parfait with yogurt and fresh berries. You can even sandwich two squares with peanut butter or chocolate spread for a decadent twist.
Make Ahead and Storage
Storing Leftovers
Store your blondies in an airtight container at room temperature for up to three days. This helps maintain their fudgy texture without drying out. If you want to keep them a bit longer, refrigeration is an option but may slightly firm them up.
Freezing
For longer storage, wrap the blondies tightly in plastic wrap and place them in a freezer-safe bag or container. They freeze well for up to two months. Thaw at room temperature before serving to restore their soft, fudgy quality.
Reheating
If you like your blondies warm, pop individual pieces in the microwave for 10-15 seconds or heat them briefly in a low oven. This brings back that freshly baked warmth and melty banana goodness with every bite.
FAQs
Can I use overripe bananas for this recipe?
Absolutely! Overripe bananas are actually perfect because they’re sweeter and softer, which makes your blondies moister and more flavorful.
Can I substitute the all-purpose flour with a gluten-free alternative?
Yes, you can use a gluten-free flour blend that’s designed to be a 1:1 substitute for all-purpose flour. Just be sure it contains xanthan gum or a similar binder for best texture results.
Is it necessary to use butter or can I use oil?
Butter gives the blondies their distinctive richness and slightly nutty flavor, but you can substitute with a mild vegetable oil if you prefer. Keep in mind this might change the final texture slightly.
How do I know when the blondies are done baking?
Look for lightly golden edges and a set top. When you insert a toothpick in the center, it should come out mostly clean but still with a few moist crumbs to keep that fudgy texture.
Can I add mix-ins like nuts or chocolate chips?
Definitely! Chopped walnuts, pecans, or chocolate chips mix in beautifully and add delightful texture and bursts of flavor to your blondies. Just fold them in with the dry ingredients before baking.
Final Thoughts
There is something incredibly comforting about a homemade batch of Fudgy and Flavorful Banana Blondies Recipe. Whether you’re making it for a cozy night in or to brighten someone’s day with a special treat, these blondies deliver joy in every bite. Don’t hesitate to dive in, experiment with garnishes and accompaniments, and most importantly, savor the simple pleasure of baking with love and ripe bananas. Trust me, once you try this recipe, it might just become your new favorite!
Print
Fudgy and Flavorful Banana Blondies Recipe
- Prep Time: 10 minutes
- Cook Time: 30 minutes
- Total Time: 40 minutes
- Yield: 9 to 12 blondies
- Category: Dessert
- Method: Baking
- Cuisine: American
Description
These fudgy and flavorful banana blondies combine the moistness of ripe bananas with a rich brown sugar sweetness, creating a deliciously soft and chewy treat perfect for dessert or snack time. Topped with an optional vanilla glaze, they offer a delightful twist on classic blondies with enhanced banana goodness.
Ingredients
Banana Blondies
- ½ cup unsalted butter, melted
- 1 cup light brown sugar, packed
- 1 large egg
- 1 teaspoon vanilla extract
- 1 cup mashed ripe bananas (about 2 medium bananas)
- 1 cup all-purpose flour
- ½ teaspoon baking powder
- ¼ teaspoon salt
Optional Glaze
- ½ cup powdered sugar
- 1 tablespoon milk or non-dairy alternative
- ¼ teaspoon vanilla extract
Instructions
- Preheat and Prepare Pan: Preheat your oven to 350°F (175°C). Line an 8×8-inch baking pan with parchment paper or lightly grease it to prevent sticking.
- Mix Wet Ingredients: In a medium bowl, whisk together the melted unsalted butter and packed light brown sugar until the mixture is smooth and well combined.
- Add Egg, Vanilla, and Bananas: Beat in the large egg, vanilla extract, and the mashed ripe bananas. Stir until all ingredients are fully incorporated into a smooth batter.
- Combine Dry Ingredients: Sprinkle the all-purpose flour, baking powder, and salt evenly over the wet mixture. Gently fold the dry ingredients into the wet just until no dry streaks remain. Be careful not to overmix to keep the blondies tender.
- Transfer Batter and Bake: Pour the batter into the prepared baking pan, smoothing the top evenly. Bake in the preheated oven for 25 to 30 minutes, or until a toothpick inserted into the center comes out mostly clean with a few moist crumbs.
- Cool Completely: Allow the blondies to cool in the pan for about 10 minutes before transferring them to a wire rack to cool completely, ensuring they set properly.
- Prepare Optional Glaze: In a small bowl, whisk together the powdered sugar, milk (or non-dairy alternative), and vanilla extract until smooth and pourable.
- Glaze and Serve: Drizzle the glaze over the cooled blondies and let it set before slicing into 9 to 12 squares. Enjoy your fudgy banana blondies!
Notes
- Use ripe bananas with brown spots for maximum sweetness and moisture.
- Do not overmix the batter once the flour is added to keep the texture soft and fudgy.
- If you prefer a dairy-free version, substitute butter with coconut oil and use a non-dairy milk for the glaze.
- Store blondies in an airtight container at room temperature for up to 3 days or refrigerate for up to a week.
- To easily remove blondies from the pan, let them cool completely before lifting them using the parchment paper edges.