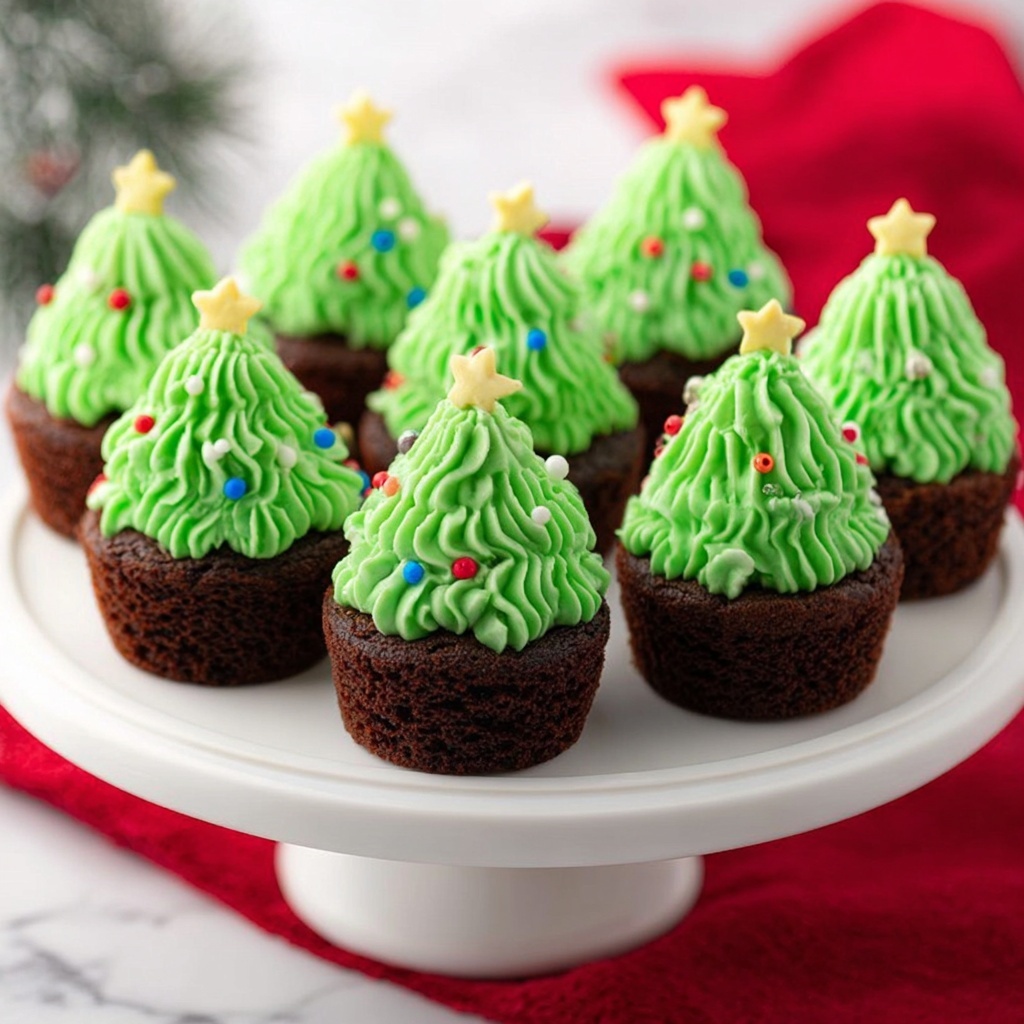
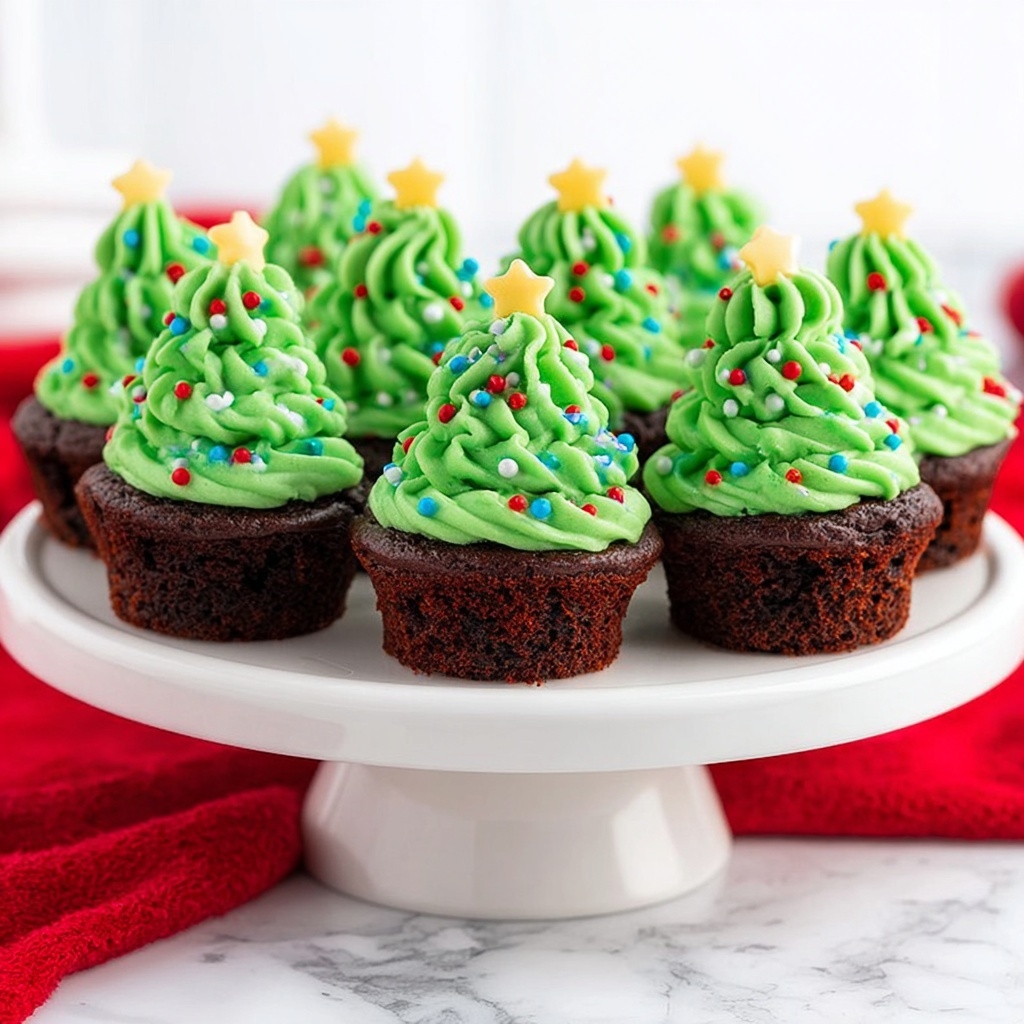
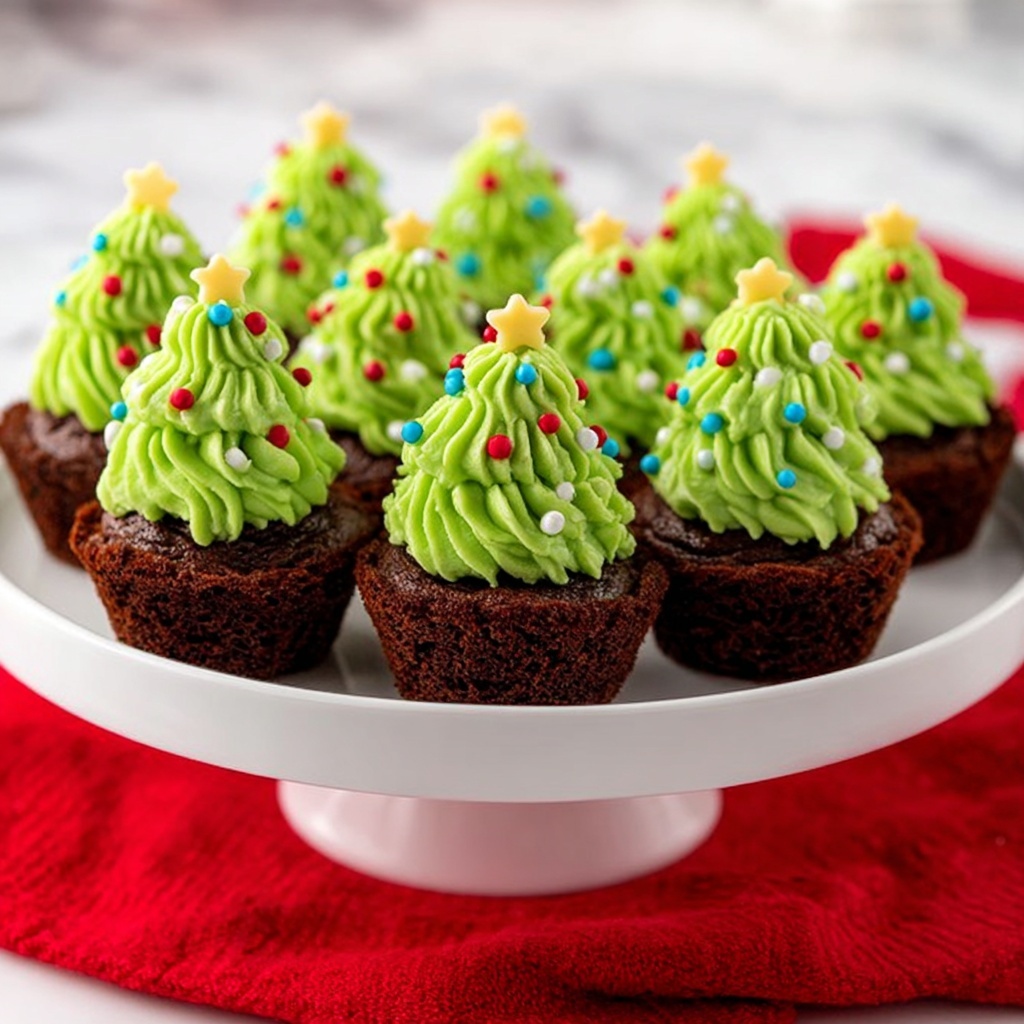
If you are looking for a festive, bite-sized dessert guaranteed to steal the spotlight at any holiday gathering, this Christmas Tree Brownie Bites Recipe is exactly what you need. It transforms simple brownie mix into charming little green Christmas trees bursting with chocolatey goodness and topped with colorful sprinkles that bring holiday magic to every bite. Perfectly fudgy, sweet, and irresistibly cute, these treats will have everyone asking for the recipe before the first batch disappears!
Ingredients You’ll Need
Don’t be intimidated by the holiday magic of the Christmas Tree Brownie Bites Recipe; the ingredients are straightforward, pantry-friendly, and essential for that perfect blend of rich chocolate and creamy frosting. Each element plays a vital role, whether adding fudgy texture, smooth sweetness, or that vibrant green color that brings the trees to life.
- 1 box brownie mix: The quick base provides a deeply chocolatey foundation, so pick your favorite brand for best results.
- Ingredients called for on the box (water, eggs, oil): These add moisture and help your brownies bake up perfectly fudgy.
- 1 cup unsalted butter (softened to room temp): Softened butter is key to a creamy, smooth frosting that spreads easily.
- 3-4 cups powdered sugar: Adjust sweetness and thickness of the frosting with this essential sweetener.
- 3-4 tbsp heavy cream: Adds richness and helps achieve the right frosting consistency.
- 1 tbsp vanilla extract: Enhances the overall flavor with warm, cozy notes.
- ¼ teaspoon salt: Balances sweetness and intensifies the chocolate flavor.
- Green food coloring: The magic touch for transforming plain frosting into festive evergreen color.
- Holiday sprinkles: Colorful and festive decorations to mimic ornaments on your Christmas trees.
How to Make Christmas Tree Brownie Bites Recipe
Step 1: Prepare and Bake the Brownies
Start by mixing the brownie batter according to the instructions on the box, using water, eggs, and oil as required. Pour the batter into a greased baking pan and bake the brownies at the temperature and time specified, usually around 17 minutes for a fudgy texture. The brownies should be just set and a toothpick inserted comes out with a few moist crumbs. Allow them to cool completely before moving on.
Step 2: Make the Green Frosting
In a large mixing bowl, beat the softened unsalted butter until smooth and fluffy. Gradually sift in powdered sugar to avoid lumps, then add heavy cream, vanilla extract, and salt. Mix thoroughly until you get a luscious and creamy frosting. Slowly add green food coloring a few drops at a time until you achieve a vibrant, festive green that looks like fresh evergreen needles.
Step 3: Shape the Brownie Bites
Once the brownies are cool, cut them into bite-sized squares or triangles to resemble the shape of small trees. Making neat cuts will help the final presentation shine. If you want an extra professional touch, use a small cookie cutter shaped like a tree for perfect uniformity.
Step 4: Frost the Brownie Bites
Using a piping bag fitted with a star or leaf tip, pipe the green frosting onto each brownie bite in layers that build up the shape of a fluffy Christmas tree. The textured frosting creates that delightful resemblance to pine branches. If you do not have a piping bag, you can spoon the frosting on and carefully spread it with a small spatula or knife.
Step 5: Decorate with Sprinkles
Finally, sprinkle your holiday sprinkles over the frosted tops, strategically placing red, white, and gold dots to mimic festive ornaments. You can also add edible glitter or tiny candy stars to the tree peak for an extra dash of holiday cheer. Let the frosting set before serving to keep your decorations intact.
How to Serve Christmas Tree Brownie Bites Recipe
Garnishes
To make your Christmas Tree Brownie Bites pop even more, consider garnishing with a dusting of powdered sugar for a snow-kissed effect or adding a tiny bit of shredded coconut around the base as “snow.” Fresh rosemary sprigs can mimic pine needles and add a fragrant touch that complements the holiday theme beautifully.
Side Dishes
These brownie bites pair wonderfully with warm drinks like hot cocoa, spiced apple cider, or a rich cup of coffee. For an elegant touch, serve them alongside a scoop of vanilla ice cream or a dollop of whipped cream to balance the rich chocolate and sweet frosting.
Creative Ways to Present
Enhance your presentation by arranging the brownie bites into a large Christmas tree shape on a festive platter. You can use small candy canes as the trunk and edible gold beads to resemble twinkling fairy lights. Wrapping individual bites in clear cellophane tied with red ribbons makes for adorable gifts that guests will adore.
Make Ahead and Storage
Storing Leftovers
Keep any leftover Christmas Tree Brownie Bites in an airtight container at room temperature for up to three days. This helps maintain the brownie’s fudgy texture and keeps the frosting from drying out, ensuring every bite stays as delicious as when freshly made.
Freezing
For longer storage, freeze the brownie bites unfrosted by placing them in a single layer on a baking sheet. Once firm, transfer them to a freezer bag or container. When ready to enjoy, thaw overnight in the refrigerator and then frost just before serving to maintain the best texture and flavor.
Reheating
Brownie bites are best enjoyed at room temperature or slightly chilled. If you prefer warming them up, gently microwave for 10-15 seconds but be cautious not to melt the frosting or dry out the brownies. Alternatively, serve with warm drinks to enjoy that cozy holiday feel without the fuss.
FAQs
Can I make the frosting without butter?
Butter creates the rich, creamy texture that holds the green color well, but you can substitute with cream cheese for a tangier twist or use a non-dairy margarine if needed. Just keep in mind that texture and flavor will vary slightly.
What if I don’t have green food coloring?
You can use natural alternatives like spinach or matcha powder to tint your frosting green, though these will add subtle flavors and a more muted green shade. Gel food coloring typically gives the brightest, most vibrant results.
How do I keep the frostings from melting quickly?
Make sure the brownies and the surrounding environment are cool before frosting. Also, using butter-based frosting avoids melting faster than cream cheese or whipped frosting when left at room temperature.
Can I use homemade brownies instead of a box mix?
Absolutely! This Christmas Tree Brownie Bites Recipe works great with any brownie base, homemade or boxed, just be sure they are dense and fudgy to hold the shape when cut.
Are these suitable for kids to help make?
Yes! Kids will love piping the frosting and adding sprinkles. It’s a fun, festive activity that gets everyone into the holiday spirit while making delicious treats.
Final Thoughts
I genuinely hope you fall in love with this Christmas Tree Brownie Bites Recipe as much as I have. These little creations bring so much joy with their delightful flavors and cheerful appearance. Whether for a party, a cozy family evening, or a gift, they brighten the season in every way. So grab your ingredients and start baking—your sweet little Christmas trees are waiting to spread festive happiness!
Print
Christmas Tree Brownie Bites Recipe
- Prep Time: 30 minutes
- Cook Time: 17 minutes
- Total Time: 47 minutes
- Yield: 36 brownie bites
- Category: Dessert
- Method: Baking
- Cuisine: American
Description
These Christmas Tree Brownie Bites are festive, bite-sized treats perfect for holiday celebrations. Featuring rich, fudgy brownies topped with creamy, vibrant green buttercream frosting and decorated with colorful holiday sprinkles, they are both delightful to look at and delicious to eat. An ideal dessert for parties, family gatherings, or as a fun holiday baking project.
Ingredients
Brownie Base
- 1 box brownie mix (plus ingredients required on the back of the box, typically water, eggs, and oil)
Buttercream Frosting
- 1 cup unsalted butter, softened to room temperature
- 3–4 cups powdered sugar
- 3–4 tablespoons heavy cream
- 1 tablespoon vanilla extract
- ¼ teaspoon salt
- Green food coloring, as needed
Decoration
- Holiday sprinkles, as desired
Instructions
- Prepare Brownie Batter: Follow the instructions on the brownie mix box to prepare the batter, combining the brownie mix with the necessary ingredients such as water, eggs, and oil. Mix until smooth.
- Bake Brownie Bites: Preheat your oven to the temperature specified on the brownie mix box. Using a mini muffin pan or silicone molds, pour the brownie batter into each cavity about ¾ full. Bake for approximately 17 minutes or until a toothpick inserted into the center comes out with moist crumbs but no raw batter. Allow to cool completely before frosting.
- Make Buttercream Frosting: In a large bowl, beat the softened unsalted butter until creamy and smooth. Gradually add 3 cups of powdered sugar, mixing well. Add the heavy cream, vanilla extract, salt, and green food coloring a few drops at a time until you reach the desired shade of green and a smooth, spreadable consistency. Adjust with more powdered sugar or cream as needed. For stiffer frosting, add more powdered sugar; for a smoother texture, add more cream.
- Frost Brownie Bites: Using a piping bag fitted with a star-shaped tip, pipe the green buttercream frosting onto each cooled brownie bite in the shape of a Christmas tree, starting with a larger base and tapering to a pointed top.
- Decorate: Immediately decorate the frosted brownie bites with holiday sprinkles to resemble ornaments and stars on the Christmas tree.
- Chill and Serve: Place the decorated brownie bites in the refrigerator for at least 15 minutes to set the frosting before serving. Enjoy your festive Christmas Tree Brownie Bites!
Notes
- If you don’t have a piping bag and tip, you can use a zip-top plastic bag with a small corner cut off to pipe the frosting.
- Allow brownies to cool completely to prevent the frosting from melting.
- Buttercream consistency can be adjusted by adding more powdered sugar for stiffness or more cream for smoothness.
- Store leftover brownie bites in an airtight container in the refrigerator for up to 4 days.
- For a vegan version, use a vegan brownie mix and dairy-free butter and cream substitutes.


