
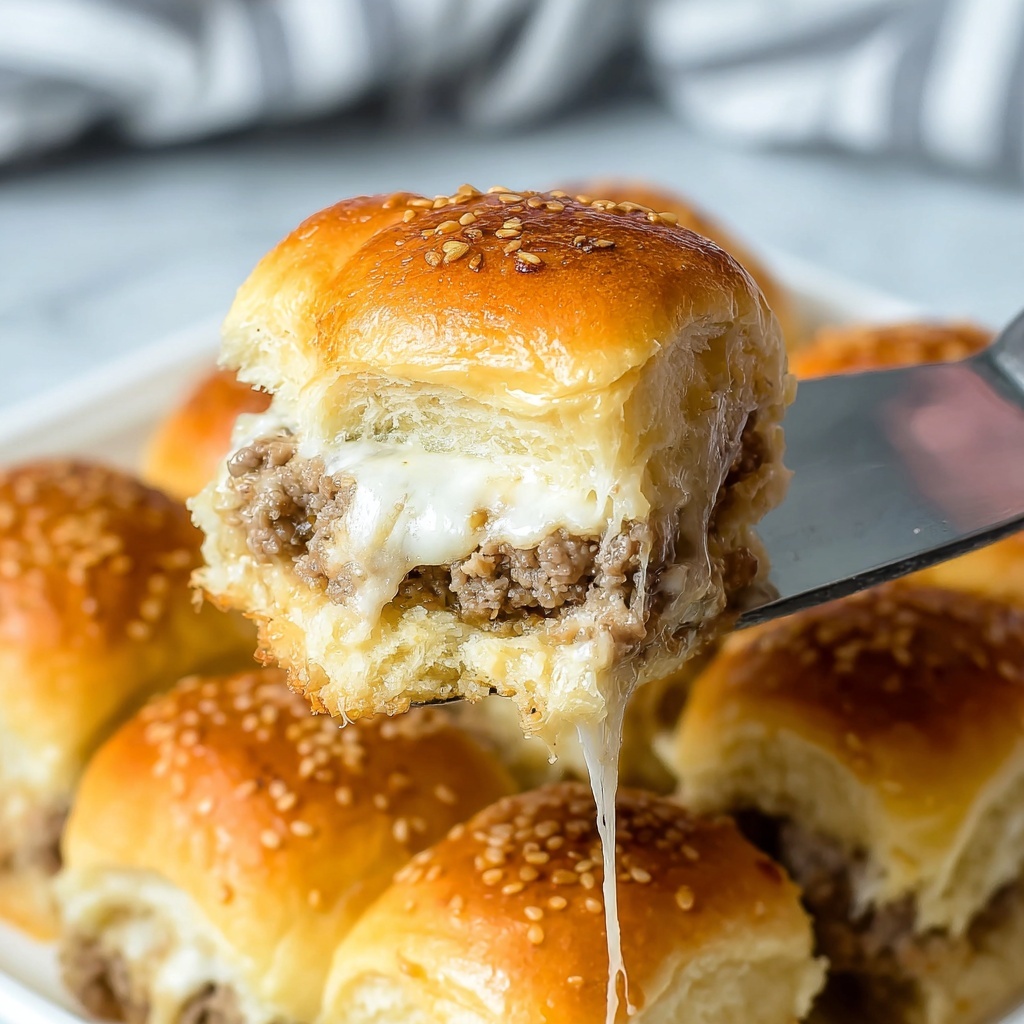
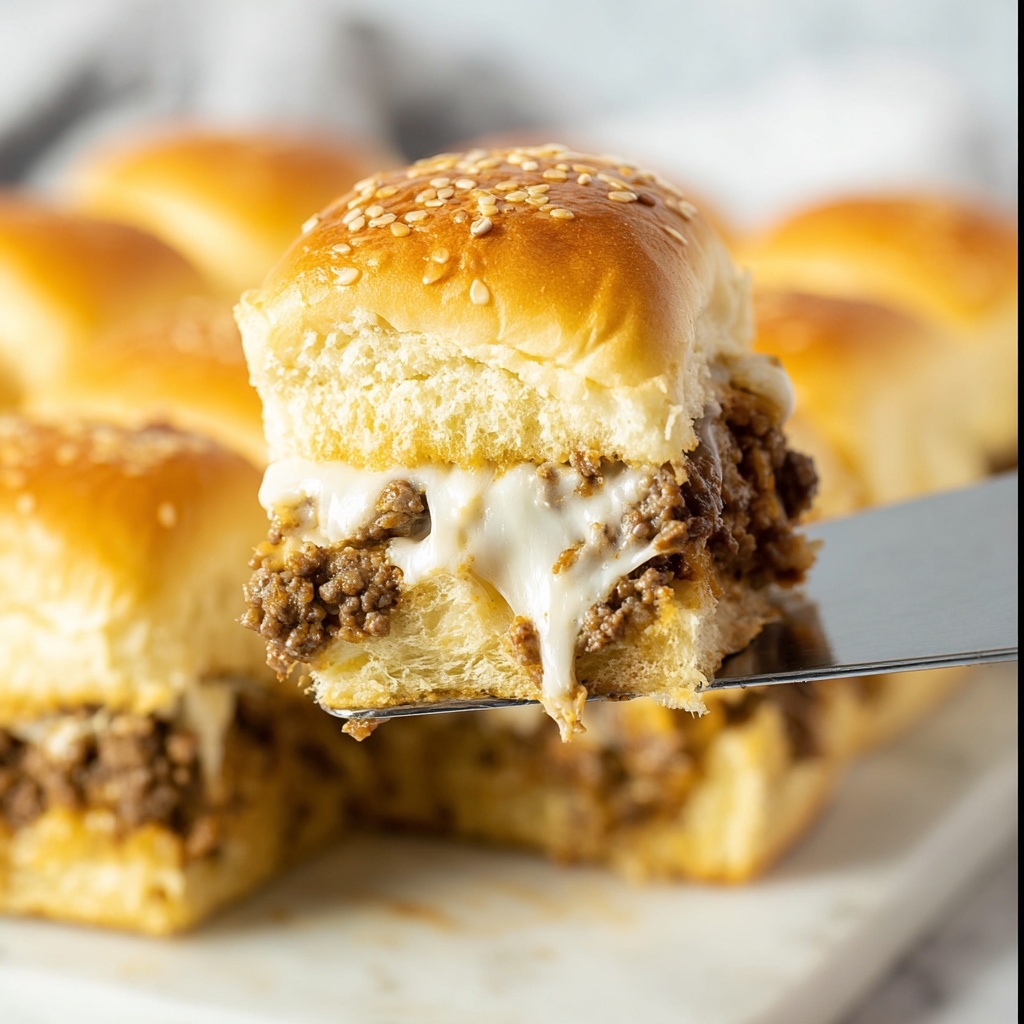
If you are searching for a fun, flavorful crowd-pleaser, this Philly Cheesesteak Sliders Recipe is going to steal your heart and your appetite. These mini sandwiches pack all the savory goodness of a classic Philly cheesesteak into perfectly sized slider buns, blending juicy ground beef, melty provolone, and those sweet, sautéed peppers and onions you crave. Whether you’re hosting a game day, family gathering, or just craving a hearty snack, these sliders deliver big flavor in every bite.
Ingredients You’ll Need
This recipe keeps it simple with straightforward ingredients, each bringing a distinct flavor or texture that makes the sliders so irresistible. From the rich, juicy beef to the creamy provolone and the soft yet slightly sweet Hawaiian rolls, every element plays a crucial role.
- 1 pound lean ground beef: Provides the juicy, hearty base that makes these sliders so satisfying.
- 2 cups frozen peppers and onions: Adds vibrant color and a sweet, savory contrast to the meat.
- 1/2 teaspoon pepper: Gives a subtle kick that enhances the beef without overpowering.
- 1/2 teaspoon garlic salt: Infuses the mixture with a savory aroma and balanced flavor.
- 12 slices provolone cheese: Delivers that creamy, melty goodness essential to a true Philly cheesesteak.
- 12 count slider buns (I use Hawaiian rolls): Their soft texture and subtle sweetness complement the savory fillings perfectly.
- 3 tablespoons butter: Brushed on top for a golden, flavorful finish.
- 2 teaspoons sesame seeds: Adds a toasty crunch and an inviting look.
- Parsley (for garnish): Introduces a fresh pop of color and a hint of herbaceous brightness.
How to Make Philly Cheesesteak Sliders Recipe
Step 1: Preheat the Oven
Start by heating your oven to 350 degrees. This might seem basic, but an evenly heated oven makes sure your sliders bake to golden perfection with that irresistible crust on top.
Step 2: Cook the Meat and Veggies
In a large skillet over medium-high heat, brown your ground beef along with the frozen peppers and onions. Keep stirring until the beef is cooked through and the veggies have softened. Drain any excess grease or liquid to keep the sliders from becoming soggy.
Step 3: Melt the Cheese Into the Mixture
Add 6 slices of provolone cheese directly to your skillet’s sizzling meat and veggie mix. Stir continuously until all that creamy cheese melts perfectly into the beef, creating a luscious, cohesive filling. This step is where the real magic happens, turning simple ingredients into a rich, cheesy masterpiece.
Step 4: Prepare the Slider Buns
Slice your slider buns in half horizontally, then place the bottom halves snugly in a 9×13 baking dish. This stable base is perfect for holding the hefty fillings and making the assembly a breeze.
Step 5: Layer the Filling and Cheese
Spread all of that cheesy meat mixture evenly over the bottom buns. Then, layer the remaining 6 slices of provolone cheese on top, adding extra gooey cheesiness that will melt even further during baking.
Step 6: Add the Top Buns
Press the top halves of the slider buns gently over the filling. This seals everything in, readying the sliders to bake beautifully together.
Step 7: Butter and Sprinkle
Melt the butter in a small microwave-safe bowl, then brush it generously over the tops of the buns. Sprinkle with sesame seeds for a charming crunch and that inviting golden finish everyone loves.
Step 8: Bake to Perfection
Pop the baking dish into the oven and bake for 12 to 15 minutes. Watch for the buns to turn just golden brown and the cheese to bubble enticingly—this signals your sliders are ready to devour.
Step 9: Garnish and Serve
For a fresh, pleasing touch, sprinkle chopped parsley over the sliders before serving. It brightens the plate and adds a subtle herbaceous note that balances the rich flavors.
How to Serve Philly Cheesesteak Sliders Recipe
Garnishes
Sprinkling parsley or even finely chopped green onions adds a burst of fresh color and an extra layer of flavor to the sliders. You could also offer spicy mustard or a drizzle of horseradish sauce on the side for guests who want a flavor kick.
Side Dishes
These sliders pair perfectly with classic crispy fries or sweet potato chips, complementing their cheesy, meaty richness. For a lighter accompaniment, a crisp coleslaw or a tangy pickled vegetable salad offers a refreshing balance.
Creative Ways to Present
Try assembling the sliders on a rustic wooden board or a colorful serving platter for parties. Stack them in tiers or line them up with decorative toothpicks topped with olives or cherry tomatoes to elevate their appeal and make grabbing easy.
Make Ahead and Storage
Storing Leftovers
Keep any leftover sliders covered tightly in the fridge for up to three days. This way, you can enjoy quick, tasty bites the next day without losing any of the cheesy, meaty deliciousness.
Freezing
Wrap individual sliders in plastic wrap or aluminum foil and freeze in an airtight container. They’ll maintain their flavor and texture for up to a month, ready to thaw for a convenient and hearty snack anytime.
Reheating
Reheat the sliders in a 350-degree oven for about 10 minutes until warmed through and the cheese is melty again. Avoid microwaving if you want to keep the buns from getting soggy and maintain that perfect texture.
FAQs
Can I use other types of cheese instead of provolone?
Absolutely! While provolone is traditional and melts beautifully, cheeses like mozzarella, cheddar, or even pepper jack can add interesting twists to your sliders’ flavor profile.
Are these sliders spicy?
This recipe is not spicy by default, but you can easily add a dash of hot sauce or mix in chopped jalapeños with your peppers to give it some heat if desired.
Can I make these sliders vegetarian?
Yes! Substitute the ground beef with plant-based crumbles or sautéed mushrooms and use your favorite cheese alternative for a delicious vegetarian version.
What if I don’t have Hawaiian rolls?
Any soft slider buns or dinner rolls will work perfectly. Hawaiian rolls add a nice sweetness, but the choice ultimately depends on whether you want a more traditional or unique flavor.
How long do these sliders take to prepare?
From start to finish, you’re looking at about 40 minutes, including prep and cook time. It’s a relatively quick recipe that packs serious flavor without demanding too much time.
Final Thoughts
If you want to impress your friends or family with a simple yet hearty treat, the Philly Cheesesteak Sliders Recipe is a total winner. Each bite is bursting with cheesy, savory satisfaction wrapped in fluffy buns, guaranteed to bring smiles to any table. Give it a try soon—you might find this recipe becoming your new go-to comfort food favorite.
Print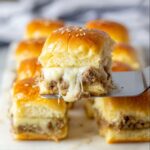
Philly Cheesesteak Sliders Recipe
- Prep Time: 15 minutes
- Cook Time: 25 minutes
- Total Time: 40 minutes
- Yield: 6 servings
- Category: Appetizer
- Method: Baking
- Cuisine: American
Description
These Philly Cheesesteak Sliders are a delicious, easy-to-make appetizer or meal featuring seasoned ground beef, sautéed peppers and onions, melted provolone cheese, and buttery slider buns toasted to perfection. Perfect for game days, parties, or a comforting dinner.
Ingredients
Meat Mixture
- 1 pound lean ground beef
- 2 cups frozen peppers and onions
- 1/2 teaspoon pepper
- 1/2 teaspoon garlic salt
- 6 slices provolone cheese (for mixing)
Sliders
- 12 slices provolone cheese (for topping)
- 12 count slider buns (preferably Hawaiian rolls)
- 3 tablespoons butter
- 2 teaspoons sesame seeds
- Parsley, for garnish
Instructions
- Preheat Oven: Preheat your oven to 350 degrees Fahrenheit to prepare for baking the sliders later.
- Cook Meat and Vegetables: In a large skillet over medium-high heat, add the ground beef along with the frozen peppers and onions. Cook, stirring occasionally, until the beef is browned and cooked through. Drain off any excess grease or liquid to prevent sogginess.
- Melt Cheese into Meat Mixture: Add 6 slices of provolone cheese to the pan with the cooked beef mixture. Stir continuously until the cheese is fully melted and well combined with the meat and vegetables.
- Prepare Buns: Slice each slider bun in half horizontally. Arrange the bottom halves evenly in a 9×13-inch baking dish, creating a base for the sliders.
- Assemble Meat Layer: Spread the cheesy meat mixture evenly over the bottoms of the slider buns in the baking dish.
- Add Cheese and Top Buns: Layer the remaining 6 slices of provolone cheese over the meat mixture, then place the top halves of the slider buns over the cheese to complete the sandwich assembly.
- Prepare Topping: Melt the butter in a small microwave-safe bowl. Use a brush to coat the tops of the slider buns with the melted butter, then sprinkle the sesame seeds evenly over the buttered tops for added flavor and texture.
- Bake Sliders: Place the baking dish in the preheated oven and bake for 12-15 minutes, or until the tops of the sliders become just golden brown and slightly crispy.
- Garnish and Serve: Remove from oven and garnish with fresh parsley if desired. Serve warm and enjoy your delicious Philly Cheesesteak Sliders!
Notes
- Using Hawaiian rolls adds a sweet contrast to the savory filling but regular slider buns work well too.
- Make sure to drain excess grease from the meat mixture to avoid soggy sliders.
- For extra flavor, try adding Worcestershire sauce or a dash of hot sauce to the beef while cooking.
- These sliders can be assembled ahead of time and refrigerated until ready to bake.
- Leftovers keep well refrigerated for 2-3 days and can be reheated in the oven or microwave.

