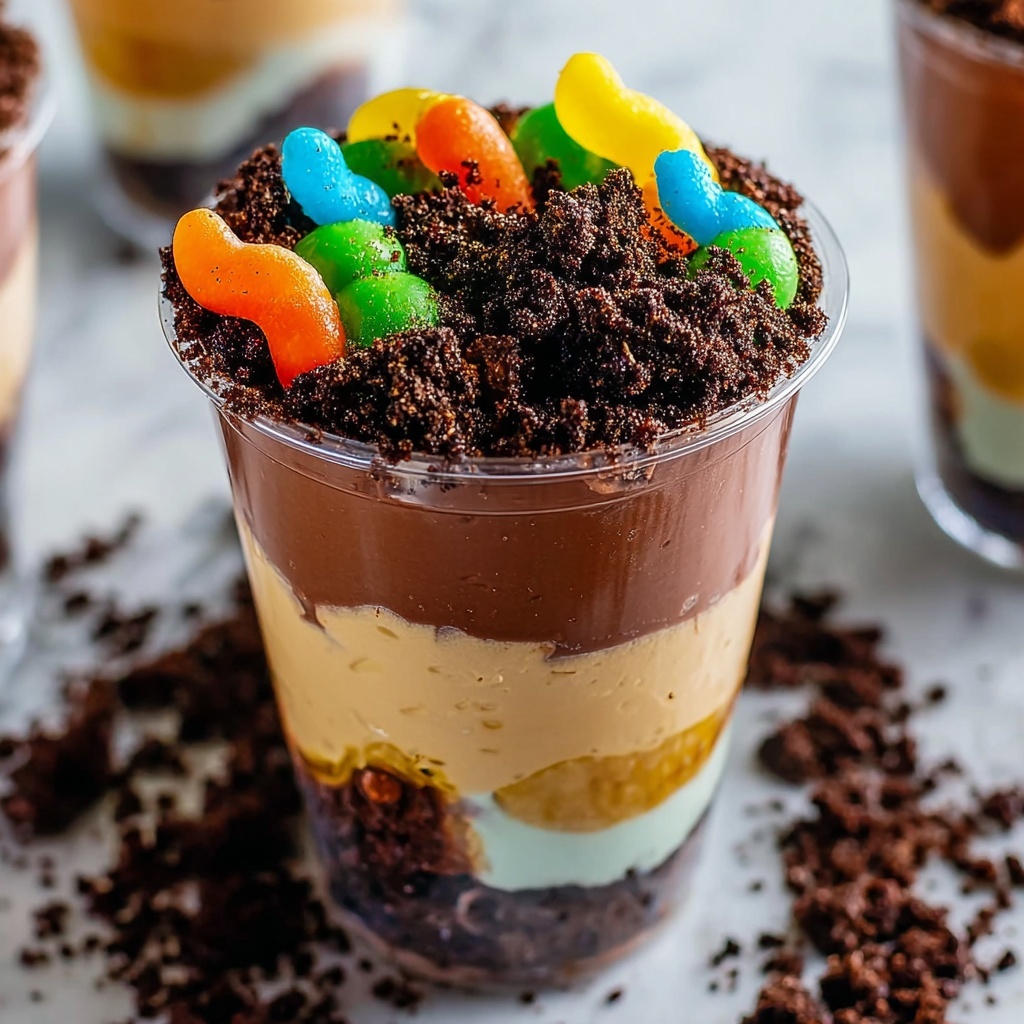
If you’ve ever wanted to combine childhood nostalgia with a dessert that’s both fun and irresistibly delicious, you’re going to love this Dirt Cups Recipe. It’s a playful, no-bake treat that’s creamy, chocolaty, and topped with that wonderfully crumbly cookie “dirt” and those quirky gummy worms that bring a smile to every face. Perfect for easy entertaining or a quick after-dinner sweet, Dirt Cups Recipe turns simple ingredients into a conversation starter and a family favorite all in one.
Ingredients You’ll Need
The magic of this Dirt Cups Recipe lies in its simple but carefully chosen ingredients, each bringing its own special touch to the final dessert. From the rich chocolate pudding to the light whipped topping, and not forgetting the iconic Oreo “dirt” and fun gummy worms, every component adds flavor, texture, or a pop of color.
- 3.4 ounces instant chocolate pudding mix: This is the base of the dirt, offering that deep chocolate flavor and smooth texture.
- 2 cups cold milk: Essential for properly activating the pudding mix and achieving the perfect creamy consistency.
- 8 ounces whipped topping (thawed): Adds lightness and creaminess, balancing the dense pudding beautifully.
- 10-12 Oreo cookies (crushed): Their chocolatey crunch perfectly mimics dirt and brings a textural surprise.
- 32 gummy worms: The whimsical finishing touch that makes this dessert a blast for kids and adults alike.
How to Make Dirt Cups Recipe
Step 1: Prepare the Chocolate Pudding
Start by pouring your cold milk into a medium bowl, then sprinkle the instant chocolate pudding mix evenly over the surface. Whisk the mixture briskly until it’s fully combined and smooth. This step is crucial for a silky pudding without lumps, so take your time.
Step 2: Let It Set
Once whisked, allow the pudding mixture to sit undisturbed for about 5 minutes. This resting period lets the pudding thicken up nicely, reaching that luscious, spoonable texture that makes Dirt Cups Recipe so delightful.
Step 3: Fold in the Whipped Topping
Gently fold the thawed whipped topping into the pudding mixture. This lightens the pudding, making it airy and creamy without losing that rich chocolate taste. Fold with care to keep the fluffiness intact.
Step 4: Spoon Into Serving Glasses
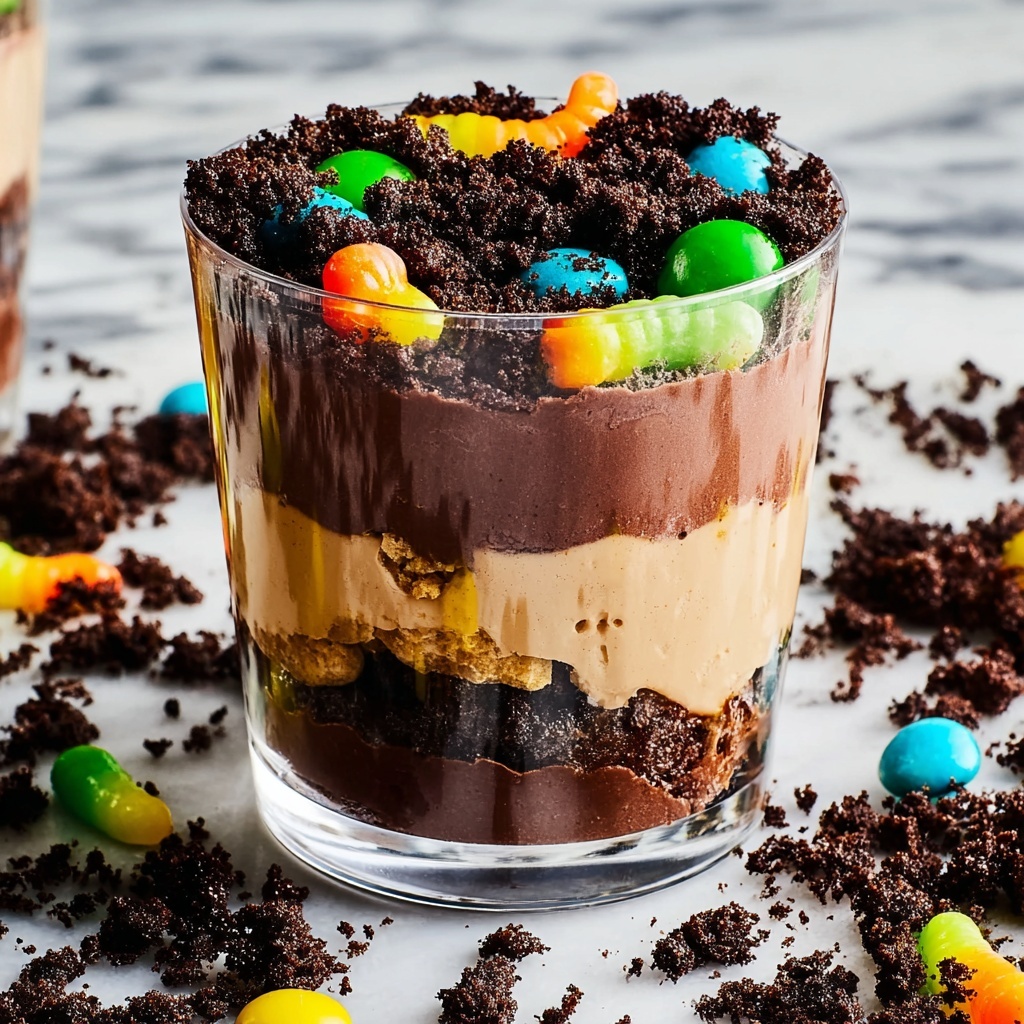
Divide the pudding mixture evenly among your serving glasses or cups. This is where your dessert starts to take shape, so don’t be shy about making each portion generous and inviting.
Step 5: Add the Oreo “Dirt” Topping
Sprinkle the crushed Oreo cookies over each pudding cup. Their dark crumbs look just like soil, adding both crunch and visual appeal, transforming this simple pudding into a playful Dirt Cups Recipe treat.
Step 6: Decorate with Gummy Worms
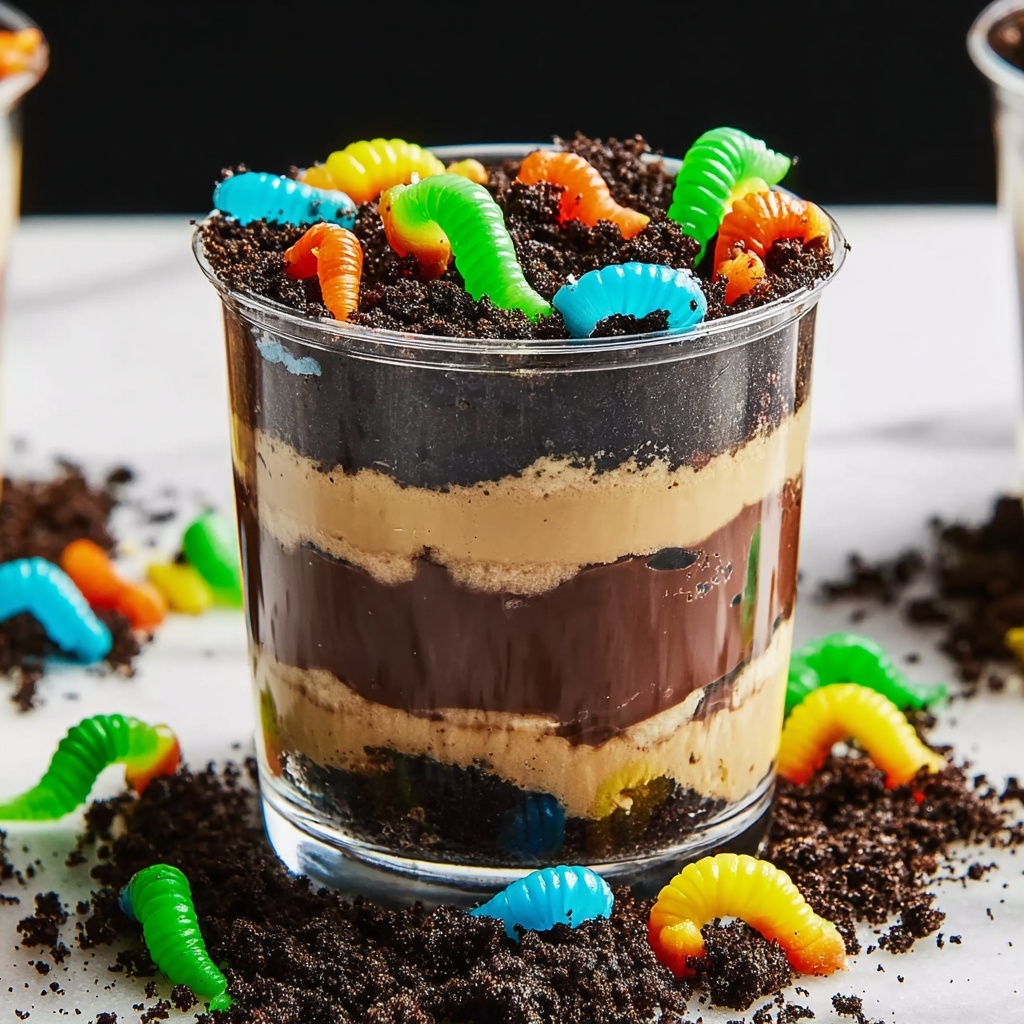
For the final, whimsical touch, arrange four gummy worms on top of each cup. Their vibrant colors and silly shapes bring the dessert to life and are sure to delight anyone digging in.
Step 7: Chill Until Ready to Serve
Pop your cups into the refrigerator to chill until it’s time to serve. This not only enhances the texture but allows all those flavors and textures to come together perfectly.
How to Serve Dirt Cups Recipe
Garnishes
While the classic crushed Oreo and gummy worm combo is perfect, you can get creative with garnishes! Try adding a sprinkling of mini chocolate chips, a few fresh berries for a fruity twist, or a dusting of cocoa powder for extra richness. These additions can elevate the presentation and flavor without complicating the beloved Dirt Cups Recipe.
Side Dishes
Since Dirt Cups are a sweet, playful dessert, pair them with light, complementary dishes like fresh fruit salads or simple vanilla cookies to cleanse the palate. Avoid heavy or overly rich sides so the Dirt Cups remain the star of your sweet spread.
Creative Ways to Present
Presentation can be a whole lot of fun with this dessert. Serve the dirt cups in mini mason jars, clear shot glasses for bite-sized portions, or even inside small flower pots for a quirky garden theme. For parties, setting up a “make your own dirt cup” bar with extra crushed Oreos, gummy worms, and other toppings makes this dish interactive and memorable.
Make Ahead and Storage
Storing Leftovers
Leftover Dirt Cups can be stored in an airtight container in the refrigerator for up to 3 days. Keep the gummy worms separate if possible to prevent them from becoming sticky, then add fresh worms just before serving.
Freezing
Freezing this dessert isn’t recommended because the texture of the pudding and whipped topping can change once thawed, often becoming watery or grainy. For the best experience, enjoy Dirt Cups Recipe fresh or refrigerated within a few days.
Reheating
Since Dirt Cups Recipe is meant to be served cold, reheating isn’t necessary or suggested. Just let refrigerated cups sit at room temperature for a few minutes if they feel too chilled before serving to better enjoy the pudding’s creamy texture.
FAQs
Can I use homemade pudding instead of instant?
Absolutely! Homemade pudding works wonderfully and adds a personal touch, though it may require more preparation time. Just ensure it’s fully cooled before folding in the whipped topping to keep the texture perfect.
Can I substitute whipped topping with whipped cream?
Yes, freshly whipped cream is a delicious substitute. It will add a richer flavor and you can control the sweetness, making your Dirt Cups Recipe even more indulgent.
Are there alternatives to Oreo cookies?
You can try any chocolate sandwich cookie or even crushed chocolate graham crackers if you want a slightly different taste or texture. Just aim for something crumbly and chocolatey to mimic the “dirt.”
Can Dirt Cups Recipe be made dairy-free?
Sure! Use a dairy-free chocolate pudding mix, plant-based milk like almond or oat milk, and a dairy-free whipped topping. The dessert will still be creamy and delicious with those simple swaps.
How far in advance can I prepare Dirt Cups Recipe?
You can prepare these up to a day ahead of serving. Just keep them covered in the refrigerator to maintain freshness and add gummy worms right before serving for the best presentation.
Final Thoughts
Dirt Cups Recipe is a delightful, no-fuss dessert that brings joy with every spoonful. Whether you’re making it for a special occasion, a family treat, or just because you crave something fun and delicious, this recipe is sure to become a go-to favorite. I encourage you to whip up a batch and watch the smiles bloom—just like in a garden!
Print
Dirt Cups Recipe
- Prep Time: 10 minutes
- Cook Time: 0 minutes
- Total Time: 10 minutes
- Yield: 4 servings
- Category: Dessert
- Method: No-Cook
- Cuisine: American
- Diet: Vegetarian
Description
Dirt Cups are a fun and delightful no-bake dessert perfect for kids and adults alike. This recipe combines creamy chocolate pudding with crushed Oreos that resemble soil and playful gummy worms for a creative and whimsical treat that’s easy to prepare and sure to impress.
Ingredients
Chocolate Pudding Mixture
- 3.4 ounces instant chocolate pudding mix
- 2 cups cold milk
- 8 ounces whipped topping (thawed)
Toppings
- 10–12 Oreo cookies (crushed)
- 32 gummy worms
Instructions
- Prepare Pudding: In a medium bowl, add cold milk and sprinkle the instant chocolate pudding mix over it. Whisk thoroughly until fully combined and smooth.
- Thicken Pudding: Let the pudding mixture sit for about 5 minutes at room temperature to allow it to thicken properly.
- Fold in Whipped Topping: Gently fold the thawed whipped topping into the pudding mixture until well blended, creating a creamy texture.
- Assemble Dessert: Spoon the pudding mixture evenly into 4 serving glasses or cups.
- Add Crushed Oreos: Sprinkle the crushed Oreo cookies over the top of each pudding cup to mimic the appearance of dirt.
- Decorate with Gummy Worms: Place four gummy worms on top of each cup to create a fun, ‘worm-infested dirt’ look.
- Chill: Refrigerate the assembled dirt cups until ready to serve, to ensure they are cool and set.
Notes
- Use cold milk to ensure the pudding sets properly.
- Be gentle when folding in the whipped topping to keep the mixture light and fluffy.
- Crushing Oreos finely will give a better soil effect.
- You can substitute gummy worms with other fun candy decorations if desired.
- These can be prepared a few hours in advance and stored covered in the refrigerator.

