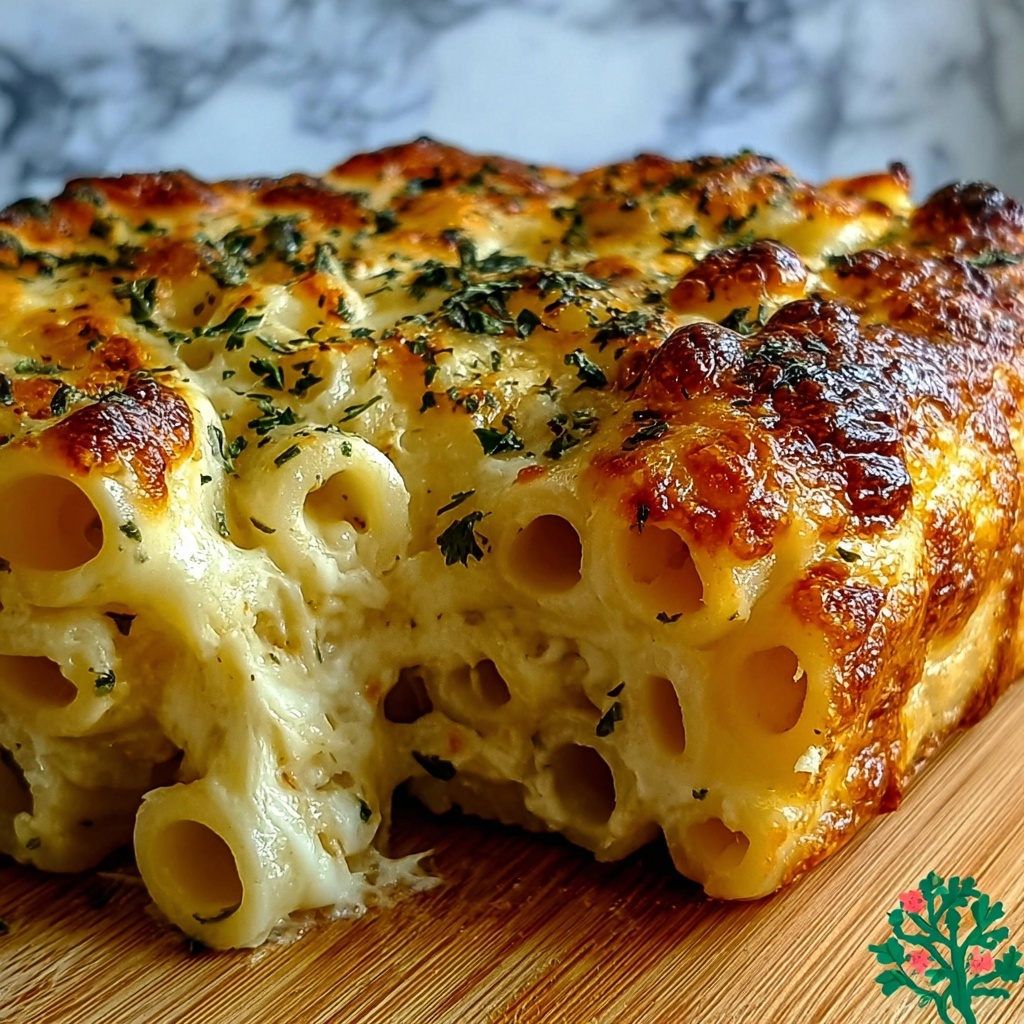
If you’re craving that ultimate comfort food that feels like a warm hug from the inside, you are absolutely going to love the Creamy Instant Pot Mac and Cheese Bliss Recipe. This dish is everything you want in macaroni and cheese: luscious, dreamy, and cooked to perfection in the Instant Pot for maximum creaminess and minimal fuss. The velvety cheese sauce clings to every noodle and the ease of the Instant Pot means you get dinner on the table without breaking a sweat. Whether it’s a cozy weeknight or a special gathering, this recipe guarantees a satisfied smile and second helpings all around.
Ingredients You’ll Need
Getting the ingredients right is the secret to making this mac and cheese not just good, but unforgettable. Each component plays a starring role — from the cheeses that melt together beautifully, to the simple pasta that takes on that gorgeous creamy texture.
- Elbow Macaroni: Classic bite-sized pasta that’s perfect for holding onto all that cheesy goodness.
- Butter: Adds richness and silkiness to the sauce and keeps everything luscious.
- All-Purpose Flour: Essential for thickening the cheese sauce to that perfect creamy consistency.
- Milk: Creates the smooth, velvety base for the cheese sauce; whole milk gives the richest flavor.
- Sharp Cheddar Cheese: The star cheese, packing bold flavor and amazing melty texture.
- Parmesan Cheese: Adds a subtle nutty kick and enhances the overall depth of flavor.
- Salt and Pepper: Simple seasonings that round out the flavors just right.
How to Make Creamy Instant Pot Mac and Cheese Bliss Recipe
Step 1: Cook the Pasta
Start by pouring the elbow macaroni into your Instant Pot, then cover it with water — just enough to submerge the pasta completely. Seal the lid and cook on high pressure for 4 minutes. Quick release the pressure when the timer goes off, and drain the pasta thoroughly. This method ensures perfectly tender noodles that aren’t mushy and ready to soak up all that cheese sauce.
Step 2: Prepare the Cheese Sauce
Switch your Instant Pot to sauté mode and melt the butter. Whisk in the flour and cook for a minute or two until the mixture is bubbling and golden, but not burnt. Slowly pour in the milk, whisking continuously to avoid lumps. Let the sauce thicken gently, then stir in the sharp cheddar and Parmesan cheeses until melted smooth. Season with salt and pepper to taste. This cheese sauce is where the magic happens, transforming ordinary into extraordinary.
Step 3: Combine Pasta and Sauce
Add the cooked pasta back into the cheese sauce and stir well to coat every single piece. The sauce should cling magnificently, creating that signature creamy texture that defines the Creamy Instant Pot Mac and Cheese Bliss Recipe. Adjust seasoning if needed — maybe a little extra cheese or a pinch more salt for perfect balance.
Step 4: Optional Finish
If you love a crunchy topping, transfer the mac and cheese to a baking dish, sprinkle with extra cheddar and a few breadcrumbs, then broil for a few minutes until golden and bubbly. Otherwise, enjoy it straight from the pot for a cozy, saucy delight.
How to Serve Creamy Instant Pot Mac and Cheese Bliss Recipe
Garnishes
To elevate your dish, try garnishing with freshly chopped parsley or chives for a fresh and mild onion flavor. A light sprinkle of smoked paprika or cracked black pepper also adds an exciting visual pop and a hint of warmth. These simple touches make your mac and cheese feel even more special and inviting.
Side Dishes
The creamy richness of this mac and cheese pairs beautifully with crisp sides that add texture and brightness. Think roasted Brussels sprouts, steamed green beans tossed in lemon butter, or a crisp garden salad with a tangy vinaigrette. These sides balance the indulgence with vibrant freshness.
Creative Ways to Present
Looking for a fun twist? Serve the mac and cheese in mini cast iron skillets or ramekins for personal portions that look charming and keep the dish warm. You can also stuff it into bell peppers and bake until tender, creating a stunning presentation and a tasty twist on the classic. Even topping with crispy bacon or caramelized onions transforms this favorite into an unforgettable meal.
Make Ahead and Storage
Storing Leftovers
This Creamy Instant Pot Mac and Cheese Bliss Recipe stores beautifully in an airtight container in the refrigerator for up to 4 days. The flavors deepen overnight, making it a fantastic make-ahead meal for busy weekdays or leftovers that reheat perfectly.
Freezing
If you want to keep it longer, freeze the mac and cheese in a freezer-safe container for up to 2 months. Be sure to cool completely before freezing. When you’re ready to eat, thaw it overnight in the fridge for best results.
Reheating
Reheat gently on the stovetop or in the microwave, stirring occasionally and adding a splash of milk if the sauce feels too thick. This will bring back that creamy, luscious texture without drying out or separating.
FAQs
Can I use different cheeses in this recipe?
Absolutely! While sharp cheddar and Parmesan are perfect for that classic flavor and texture, you can experiment with gouda, Monterey Jack, or even mozzarella for a milder, stretchier result. Just keep the total cheese amount roughly the same for best creaminess.
Is this recipe suitable for making ahead for parties?
Definitely! You can prepare the mac and cheese up to the combining stage and refrigerate it before serving. When guests arrive, reheat and maybe pop it under the broiler for a bubbly topping. It’s a crowd-pleaser with minimal last-minute effort.
Can I make this recipe dairy-free or vegan?
With some substitutions, yes. Use dairy-free butter, plant-based milk like oat or almond, and vegan cheese alternatives to create a dairy-free version. The creaminess might vary slightly, but it will still be delicious and comforting.
How do I prevent the mac and cheese from turning gluey?
The key is controlling your cooking times and stirring gently. Overcooked pasta or overheating the cheese can cause a gluey texture. The Instant Pot method helps by cooking pasta just right, and adding cheese off heat helps maintain smoothness.
Can I add extras like bacon or vegetables?
Yes! Mix-ins like cooked bacon, caramelized onions, peas, or steamed broccoli add wonderful texture and flavor contrasts. Just fold them in at the end so they don’t get overcooked and lose their freshness.
Final Thoughts
You absolutely owe it to yourself to try this Creamy Instant Pot Mac and Cheese Bliss Recipe. It’s a cozy, indulgent classic that comes together wonderfully fast without sacrificing any of that rich, homemade comfort. Whether feeding family or impressing friends, it hits every note of a true comfort food favorite. So grab your Instant Pot and cheeses, and dive into creamy, cheesy happiness tonight!
Print
Creamy Instant Pot Mac and Cheese Bliss Recipe
- Prep Time: 1 hour 10 minutes
- Cook Time: 30 minutes
- Total Time: 1 hour 40 minutes
- Yield: 6 servings
- Category: Bread
- Method: Baking
- Cuisine: Italian-American
Description
Enjoy a delightful and creamy Instant Pot Mac and Cheese that’s rich, comforting, and made with melty mozzarella and Parmesan cheese. This cheesy, savory dish is perfect for a quick weeknight dinner or a cozy gathering, combining the ease of an Instant Pot with classic flavors for a creamy, irresistible meal.
Ingredients
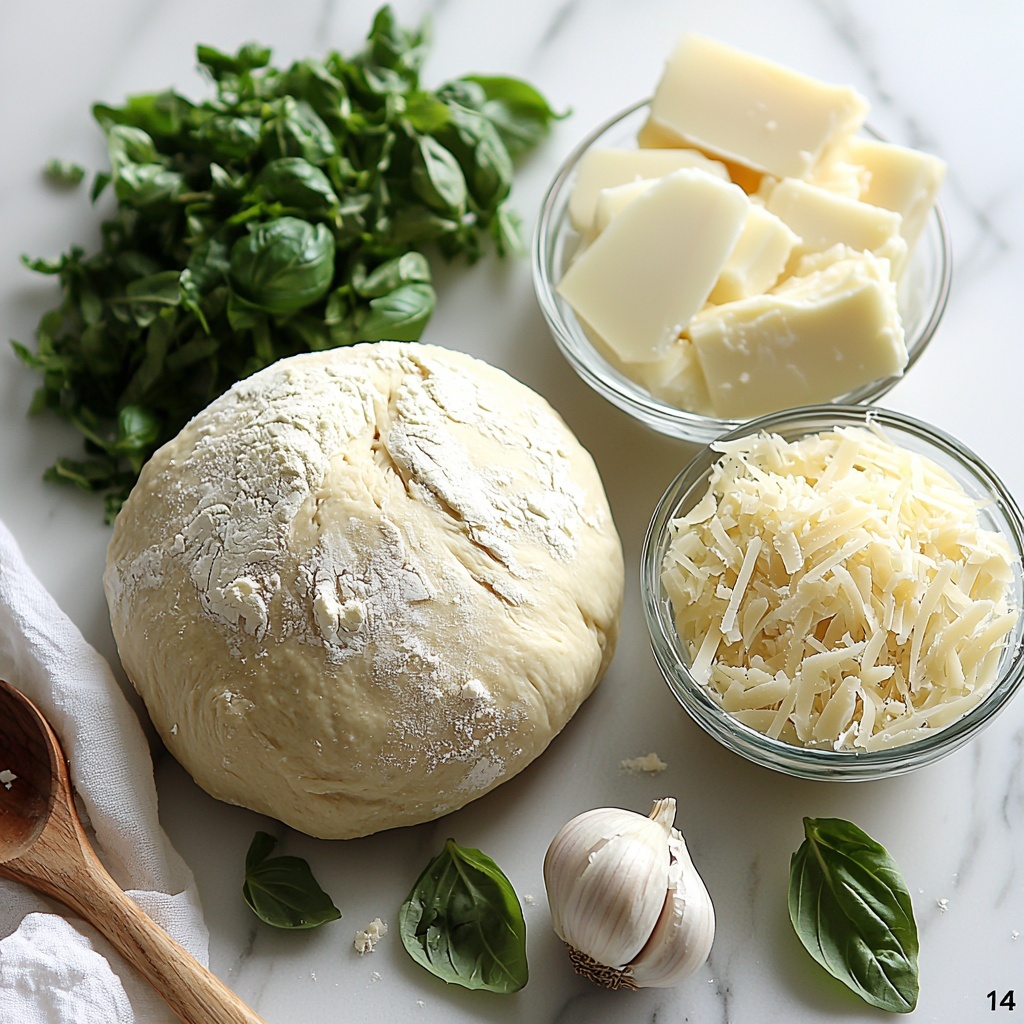
Ingredients
- 1 loaf Bread Dough (homemade or store-bought)
- 3 cloves Minced Garlic
- 1 cup Chopped Fresh Parsley
- 1 cup Chopped Fresh Basil
- 2 cups Shredded Mozzarella Cheese
- 1/2 cup Grated Parmesan Cheese (or sharp cheddar as substitute)
- 1/2 cup Melted Butter
Instructions
- Prepare the Dough: Allow the bread dough to rise in a warm place until it doubles in size, usually about 1 to 2 hours, ensuring a soft and airy base.
- Roll Out the Dough: Lightly flour your surface, punch down the risen dough to release air, then roll it out into a thin rectangular shape about ¼-inch thick for an even bake.
- Make Garlic Herb Butter: Combine the melted butter with minced garlic, chopped parsley, and basil until fully blended and fragrant to infuse the dough with flavor.
- Spread Mixture: Evenly spread the garlic herb butter over the rolled-out dough to distribute flavor consistently.
- Add Cheese: Sprinkle shredded mozzarella and grated Parmesan cheese evenly over the buttered dough to ensure maximum cheesiness.
- Roll and Slice: Carefully roll the dough into a log shape, then slice it into 1 to 2-inch pieces, creating individual swirls of garlic and cheese.
- Arrange in Pan: Place the sliced rolls upright in a greased baking dish, ensuring they hold their shape and bake evenly.
- Bake: Preheat your oven to 350°F (175°C) and bake the rolls for 25 to 30 minutes until they turn golden brown and the cheese is melted and bubbly.
- Serve: Let the rolls cool for a few minutes before serving warm to enjoy the creamy, cheesy goodness.
Notes
- You can substitute Parmesan with sharp cheddar for a stronger cheese flavor.
- Ensure the dough is not too thick when rolled out to allow even baking.
- Use fresh herbs for the best flavor impact in the garlic herb butter.
- Let the bread cool slightly before serving to avoid burns and enhance texture.


