
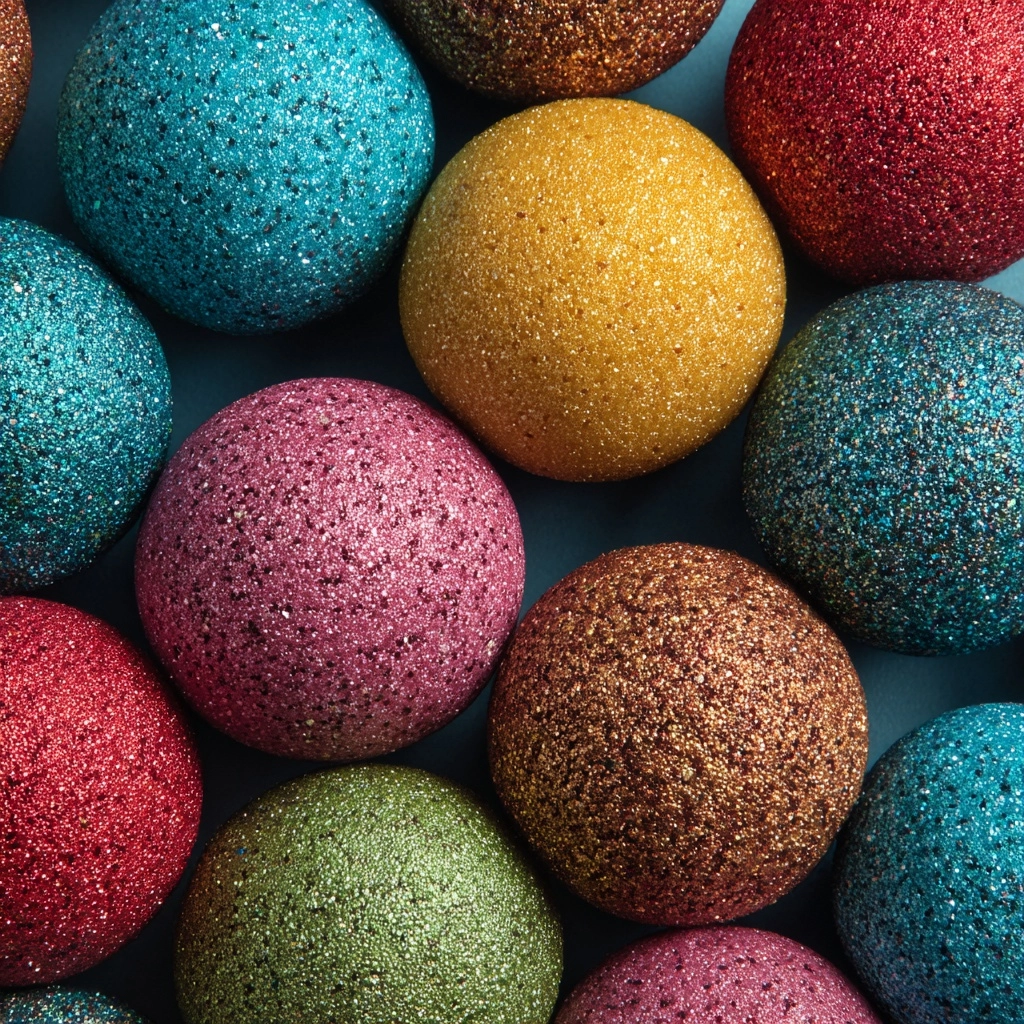
If you’re searching for a dessert that dazzles guests and delivers pure delight, look no further than Glitter Cookie Balls. These magical treats blend creamy, dreamy golden Oreo truffle goodness with a crisp white chocolate shell and a burst of edible glitter that truly sparkles. Whether you’re planning a party, celebrating the holidays, or just wanting to add a little whimsy to your snack table, Glitter Cookie Balls are a showstopper that satisfies sweet cravings and turns any occasion into instant fun.

Ingredients You’ll Need
Success with Glitter Cookie Balls starts with a handful of accessible yet essential ingredients. Each one plays a unique role, ensuring the ultimate blend of flavor, texture, and that iconic edible shimmer everyone adores.
- Golden Oreos (1 14-oz package): The sweet, vanilla-cookie base that creates a nostalgic and irresistible truffle texture.
- Cream Cheese (6 oz, softened): Adds rich, tangy creaminess and binds the crushed cookies for a smooth dough.
- Vanilla Extract (1/2 teaspoon): Enhances the cookie flavor with extra warmth and aroma.
- White Chocolate or Vanilla Candy Coating (10 oz, melted): Provides the glossy, snappy shell that locks in freshness and makes each bite a delight.
- Edible Glitter or Shimmer Dust (various colors): The star of the show, adding a magical, eye-catching sparkle to each ball.
- Optional Sprinkles or Sanding Sugar: For customizable pops of color and extra texture, especially for themed occasions.
How to Make Glitter Cookie Balls
Step 1: Crush the Oreos
Start by placing the golden Oreos in your food processor and pulse them until you have fine, sandy crumbs. This base is essential for the signature smooth interior of Glitter Cookie Balls. If you don’t have a food processor, seal the cookies in a zip-top bag and crush with a rolling pin—just be sure there are no big chunks left.
Step 2: Make the Dough
Pour your Oreo crumbs into a mixing bowl. Add the softened cream cheese and vanilla extract, then mix well. At first, it might look a bit crumbly, but keep mixing! Soon you’ll see everything transform into a soft, cohesive dough that holds together beautifully.
Step 3: Shape into Balls
Scoop out heaping tablespoons of the Oreo mixture and roll each into a smooth 1-inch ball between your palms. Arrange them on a parchment-lined baking sheet, keeping a bit of space between each. You’ll end up with about 24 perfectly portioned truffles, ready for their frosty chill.
Step 4: Freeze Until Firm
Slide the baking sheet into your freezer for 20–30 minutes. This quick chill ensures each ball gets firm enough to dip easily and keeps their round shape when coated in chocolate. Don’t skip this step—the dipping process is much easier when your truffles are well-chilled!
Step 5: Dip in White Chocolate
While the balls firm up, melt your white chocolate or vanilla candy coating according to the package directions. Working one at a time, dip each chilled ball into the melted chocolate, letting the excess drip off. Place each ball back on the parchment quickly, as the chocolate hardens faster on cold spheres.
Step 6: Add the Glitter!
Before the candy coating sets, sprinkle each ball generously with edible glitter or shimmer dust. This is where the Glitter Cookie Balls truly come alive! For even more pizzazz, add sprinkles or sanding sugar to match your party or holiday theme. Allow the decorations to set as the coating hardens fully.
How to Serve Glitter Cookie Balls
Garnishes
For that finishing touch, garnish your Glitter Cookie Balls with a little extra edible glitter just before serving. Small, decorative cupcake liners make each ball look like a tiny gem. If you want to double down on the dazzling effect, a sprinkle of sanding sugar adds dimension and a satisfying crunch.
Side Dishes
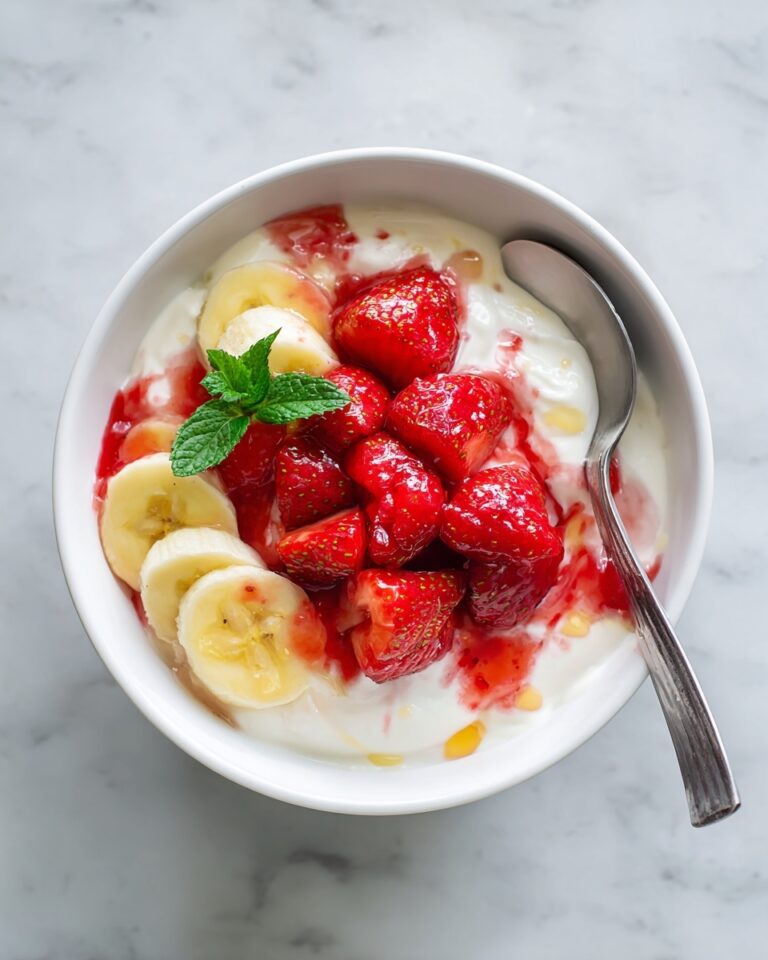
Pair your Glitter Cookie Balls with a simple bowl of fresh berries or a platter of sliced fruit for a refreshing contrast to the sweet richness. They also shine alongside a mug of coffee, hot cocoa, or even bubbly Prosecco for a touch of sophistication at parties or brunches.
Creative Ways to Present
Display your Glitter Cookie Balls on a tiered dessert stand for a dramatic, sparkly centerpiece. For parties, arrange them in rows on a mirrored tray to reflect the edible glitter from every angle. For gifting, nestle them in mini cupcake cups inside a decorative box—add ribbon and a handwritten tag for a heartfelt edible present.
Make Ahead and Storage
Storing Leftovers
Glitter Cookie Balls keep beautifully in an airtight container in the fridge for up to five days. Stack them gently in single layers with parchment between each to preserve their perfect coating and shimmer.
Freezing
Want to get ahead for a party or the holidays? Arrange the finished truffles in a rigid, freezer-safe container with parchment between layers. Freeze for up to two months—just allow them to thaw in the fridge before serving, and refresh with a little extra glitter if needed.
Reheating
No reheating required! Glitter Cookie Balls are meant to be enjoyed chilled or just slightly softened at room temperature. If they’ve been frozen, transfer them to the refrigerator for several hours to gradually defrost and retain their creamy texture.
FAQs
Can I use different flavors of Oreo cookies?
Absolutely! Try chocolate, red velvet, or even seasonal Oreo flavors for a fun twist. Just keep the proportions the same for perfect results every time.
What’s the best way to apply edible glitter?
A small pinch sprinkled over freshly dipped truffles works wonders. For even coverage, use a clean, dry pastry brush to dust on shimmer dust while the coating is still tacky.
How do I prevent the coating from cracking?
Make sure the melted white chocolate isn’t too hot when dipping, and always dip well-chilled, but not rock-hard, truffles. Rapid temperature changes can cause cracking, so work swiftly but gently.
Can I make these gluten free?
Yes! Use gluten-free sandwich cookies in place of golden Oreos. Double-check all your other ingredients to ensure they’re gluten free as well.
Are Glitter Cookie Balls safe for kids?
Definitely, but always use edible, food-grade glitter or shimmer dust, never craft glitter. These treats are a hit with all ages because they’re as fun to make as they are to eat!
Final Thoughts
Bringing Glitter Cookie Balls to your next gathering is sure to create a little bit of magic and a lot of smiles. Each bite is a celebration of sweet, creamy, sparkly joy—so don’t hesitate to try them yourself. Dive in, get creative with colors, and get ready to watch your friends and family light up with every glittering bite!
Print
Glitter Cookie Balls Recipe
- Prep Time: 30 minutes
- Cook Time: 0 minutes
- Total Time: 30 minutes
- Yield: 24 cookie balls
- Category: Dessert
- Method: No-Bake
- Cuisine: American
- Diet: Vegetarian
Description
These Glitter Cookie Balls are a dazzling and delicious treat that’s perfect for parties, holidays, or any time you want a bit of sparkle in your dessert. Made with golden Oreos, cream cheese, and white chocolate, these no-bake treats are easy to make and sure to impress.
Ingredients
For the Cookie Balls:
- 1 (14 oz) package golden Oreos
- 6 oz cream cheese, softened
- 1/2 teaspoon vanilla extract
For Coating and Decoration:
- 10 oz white chocolate or vanilla candy coating, melted
- Edible glitter or shimmer dust (various colors)
- Optional sprinkles or sanding sugar
Instructions
- Prepare the Cookie Mixture: Pulse golden Oreos in a food processor until fine crumbs form. Mix with softened cream cheese and vanilla until a smooth dough forms.
- Shape the Balls: Roll the mixture into 1-inch balls and place on a parchment-lined baking sheet. Freeze until firm, about 20–30 minutes.
- Coat the Balls: Melt white chocolate or candy coating. Dip each ball, letting excess drip off. Sprinkle with edible glitter before the coating sets.
- Set and Serve: Allow the coating to harden before serving or storing in an airtight container.
Notes
- Use gel-based edible glitter for vibrant sparkle.
- Customize colors for different occasions.
- Store in the fridge for up to 5 days.
Nutrition
- Serving Size: 1 cookie ball
- Calories: 130
- Sugar: 11g
- Sodium: 75mg
- Fat: 7g
- Saturated Fat: 4g
- Unsaturated Fat: 2g
- Trans Fat: 0g
- Carbohydrates: 14g
- Fiber: 0g
- Protein: 1g
- Cholesterol: 10mg

