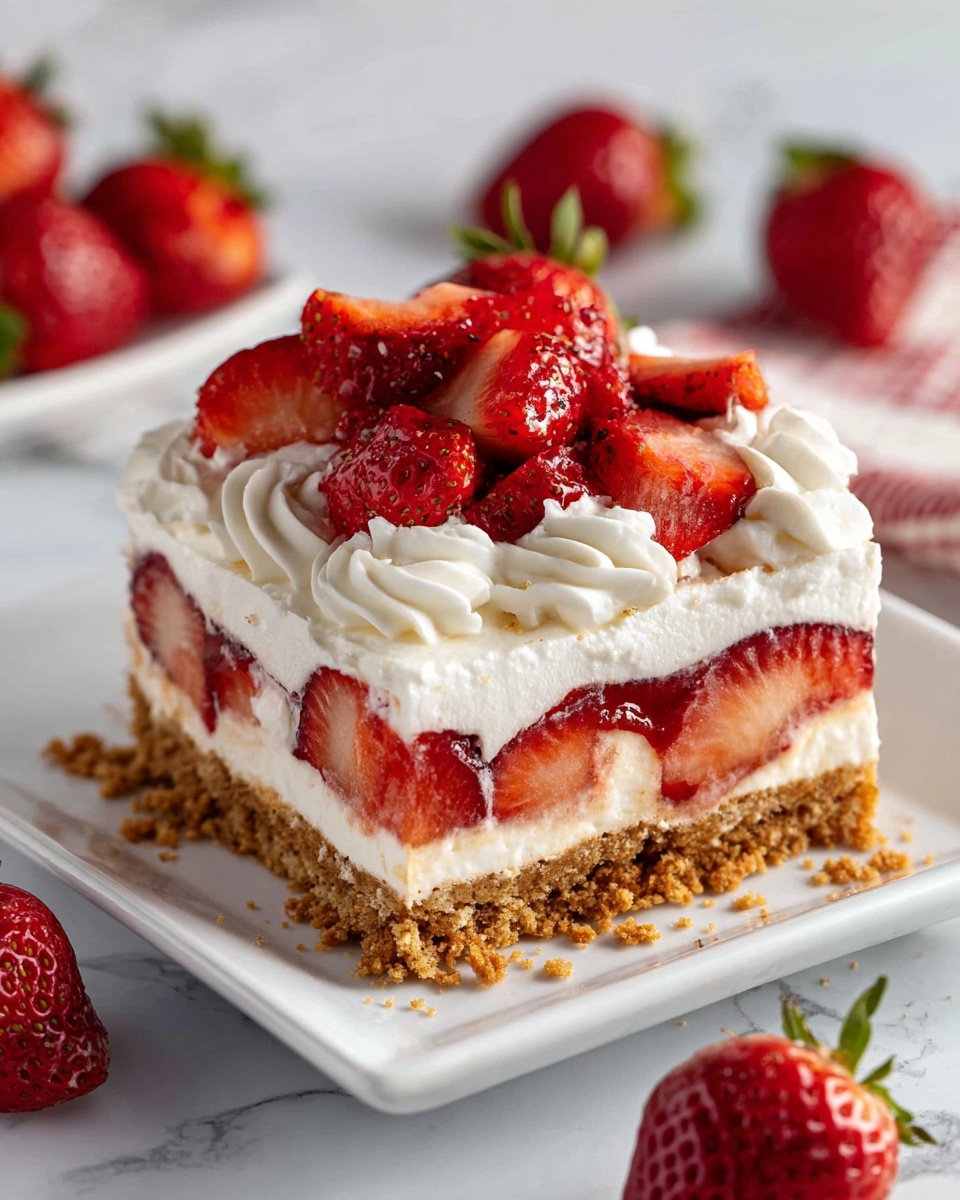
If you are searching for a dessert that is effortlessly delightful and perfect for warm days, the No-Bake Icebox Cake: The Easiest Summer Dessert Recipe is your new best friend. This layered masterpiece combines the lightness of whipped cream with the satisfying crunch of graham crackers or cookies, softened to perfection by chilling, and enhanced with luscious fruit or chocolate. It’s a show-stopper that requires no oven time, minimal prep, and always steals the spotlight at any gathering or quiet night in. Let me walk you through making this incredibly simple yet indulgent treat that feels like summer on every forkful.
Ingredients You’ll Need
The magic of this No-Bake Icebox Cake lies in its straightforward ingredients, each carefully chosen to contribute to a harmonious blend of texture and flavor. From the creamy richness of the heavy whipping cream to the sweet crunch of graham crackers or chocolate wafers, every component plays a crucial role.
- 2 cups heavy whipping cream (chilled): Chilling it well is key for thick, dreamy whipped cream that holds the layers together beautifully.
- 1/4 cup powdered sugar: Adds the perfect touch of sweetness without any graininess.
- 1 teaspoon vanilla extract: Enhances the cream’s flavor with a warm, inviting aroma.
- 2 cups graham crackers or chocolate wafer cookies: The crunchy layers that soften just enough in the fridge, delivering texture and flavor.
- Optional: fresh fruit (strawberries, blueberries, bananas) or chocolate chips: These add bursts of color, freshness, and extra flavor that personalize the cake.
- 1 cup chocolate ganache (or chocolate pudding or fruit preserves): Adds a rich, indulgent layer for those who love a more decadent bite.
- 1/2 cup fresh berries (or fruit of choice): For garnishing and an eye-catching finish on the final presentation.
How to Make No-Bake Icebox Cake: The Easiest Summer Dessert Recipe
Step 1: Whip the Cream to Perfection
Begin by beating the well-chilled heavy whipping cream using an electric mixer until it thickens and starts forming soft peaks. Then, add your powdered sugar and vanilla extract, and continue beating until stiff peaks form—a texture that is fluffy yet stable enough to hold up the cake layers. This freshly whipped cream is the star that brings dreamy lightness and sweetness.
Step 2: Create the Base Layer with Cookies
Lay down a single layer of graham crackers or chocolate wafer cookies in the bottom of an 8×8 or 9×9-inch dish. This base sets the foundation for the many layers to come, and using sturdy cookies ensures they soften just enough without falling apart.
Step 3: Spread Whipped Cream and Add Optional Toppings
Gently spread a generous layer of whipped cream over the cookie base, smoothing it evenly. If you love the extra pop of flavor, sprinkle some fresh fruit pieces or chocolate chips on top. These little bursts of sweetness add personality and memorable texture contrasts.
Step 4: Build the Layers with Cookies, Cream, and Extras
Repeat your layering: more cookies, a thick blanket of whipped cream, and your choice of fruits or chocolate chips. Keep going until the dish is filled, finishing with a final whipped cream layer that promises a luscious finish.
Step 5: Refrigerate for the Cookies to Soften
Cover your creation and place it in the refrigerator for at least 4 hours, preferably overnight. This chilling time allows the cookies to absorb moisture from the cream, turning soft and cake-like, while the flavors blend beautifully.
Step 6: Slice, Garnish, and Serve
When ready to serve, slice your icebox cake into squares using a sharp knife. Add final garnishes such as fresh berries, chocolate shavings, or an elegant caramel drizzle for that remarkable finishing touch sure to impress your loved ones.
How to Serve No-Bake Icebox Cake: The Easiest Summer Dessert Recipe
Garnishes
Fresh berries, mint leaves, or a lightly dusted cocoa powder can elevate the cake’s appearance and flavor profile. Bright strawberries or blueberries add vibrant color and refreshing tartness, balancing the sweetness perfectly.
Side Dishes
Pair this icebox cake with a simple scoop of vanilla ice cream, a small bowl of mixed fresh fruits, or even a cup of lightly brewed coffee or tea to contrast the dessert’s creaminess and round out the experience delightfully.
Creative Ways to Present
Try serving the cake in elegant glass trifle dishes for a stunning layered effect visible from the sides. Or assemble individual portions in small mason jars for a fun, portable twist that your guests will adore. Presentation adds to the charm and invites everyone to dig in enthusiastically.
Make Ahead and Storage
Storing Leftovers
This dessert keeps wonderfully in the refrigerator for up to 3 days. Make sure to cover it tightly with plastic wrap or keep it in an airtight container to prevent it from drying out or absorbing other fridge odors.
Freezing
While the No-Bake Icebox Cake: The Easiest Summer Dessert Recipe is best enjoyed fresh, you can freeze it for up to one month. Wrap portions well to avoid freezer burn and thaw overnight in the fridge before serving to maintain its creamy texture.
Reheating
Since this is a cold dessert, reheating is not recommended. Instead, let it thaw naturally in the refrigerator if previously frozen. This preserves the cake’s perfect, creamy consistency and prevents any unpleasant changes in texture.
FAQs
Can I use other types of cookies besides graham crackers?
Absolutely! Chocolate wafer cookies, vanilla wafers, or even thin ladyfingers work beautifully. Just choose sturdy cookies that soften nicely without turning mushy, balancing texture and flavor.
Is it necessary to chill the cream before whipping?
Yes, cold cream whips up faster and achieves stiff peaks more reliably. Chilling your bowl and beaters also helps make the process even easier and ensures your whipped cream holds its shape.
How long should the icebox cake chill before serving?
Chilling for at least 4 hours is crucial to allow the cookies to soften and the flavors to meld wonderfully. Overnight refrigeration is ideal when possible for the best texture and taste.
Can I make this dessert vegan or dairy-free?
Definitely! Substitute dairy cream with coconut cream or a vegan whipping alternative, and choose vegan cookies. The texture and flavor will differ slightly but still be delicious and refreshing.
What fruit works best in this recipe?
Strawberries, blueberries, and bananas are the classic picks because they blend well with the cream and cookie layers. However, feel free to experiment with raspberries, peaches, or mangoes for unique, seasonal twists.
Final Thoughts
There’s just something wonderfully nostalgic and utterly satisfying about the No-Bake Icebox Cake: The Easiest Summer Dessert Recipe. It evokes memories of warm afternoons and simple homemade treats, yet feels elegant enough to share with friends or family during special occasions. With its minimal prep, customizable layers, and irresistible texture, I encourage you to give this recipe a try and discover your own favorite twist. Your summer dessert lineup will thank you!
Print
No-Bake Icebox Cake: The Easiest Summer Dessert Recipe
- Prep Time: 20 minutes
- Cook Time: 0 minutes
- Total Time: 4 hours 20 minutes
- Yield: 8 to 10 servings
- Category: Dessert
- Method: No-Cook
- Cuisine: American
- Diet: Vegetarian
Description
This No-Bake Icebox Cake is the perfect summer dessert that’s incredibly easy to make and requires no baking. Layers of crisp cookies, fluffy whipped cream, and fresh fruit meld together in the refrigerator to create a creamy, luscious treat that’s both visually stunning and delicious. Ideal for warm days when you want a refreshing, light dessert without heating up your kitchen.
Ingredients
Whipped Cream
- 2 cups heavy whipping cream (chilled)
- 1/4 cup powdered sugar
- 1 teaspoon vanilla extract
Cake Layers
- 2 cups graham crackers or chocolate wafer cookies
- 1 cup chocolate ganache (or chocolate pudding or fruit preserves)
Fruit and Toppings (Optional)
- Fresh fruit such as strawberries, blueberries, bananas
- 1/2 cup fresh berries or fruit of choice
- Chocolate chips
- Chocolate shavings or caramel drizzle for garnish
Instructions
- Whip the Cream: Using an electric mixer, beat the chilled heavy whipping cream until it begins to thicken. Add powdered sugar and vanilla extract, then continue beating until stiff peaks form, creating a light, fluffy whipped cream base.
- Arrange Base Layer: Place a layer of graham crackers or chocolate wafer cookies evenly on the bottom of an 8×8 or 9×9-inch dish to form the foundation of the cake.
- Spread Whipped Cream and Add Fruit: Spread a generous layer of whipped cream over the cookies. Sprinkle with fresh fruit or chocolate chips if desired to add sweetness and texture.
- Continue Layering: Repeat the layering process by alternating cookies, whipped cream, and optional fruit or chocolate until the dish is filled, finishing with a final layer of whipped cream on top for a smooth, creamy finish.
- Chill to Set: Cover the dish with plastic wrap or a lid and refrigerate for at least 4 hours or overnight. This chilling step allows the cookies to soften as they absorb moisture from the cream, resulting in a cake-like texture.
- Serve and Garnish: Slice the chilled icebox cake into squares. Garnish with additional fresh fruit, chocolate shavings, or a drizzle of caramel if desired before serving for an elegant presentation.
Notes
- Use chilled heavy cream for better whipping results.
- Allowing the cake to set overnight enhances the flavor and texture.
- Feel free to customize with your favorite fruits or toppings.
- Substitute chocolate ganache with pudding or fruit preserves for variation.
- Store leftover cake covered in the refrigerator for up to 3 days.


