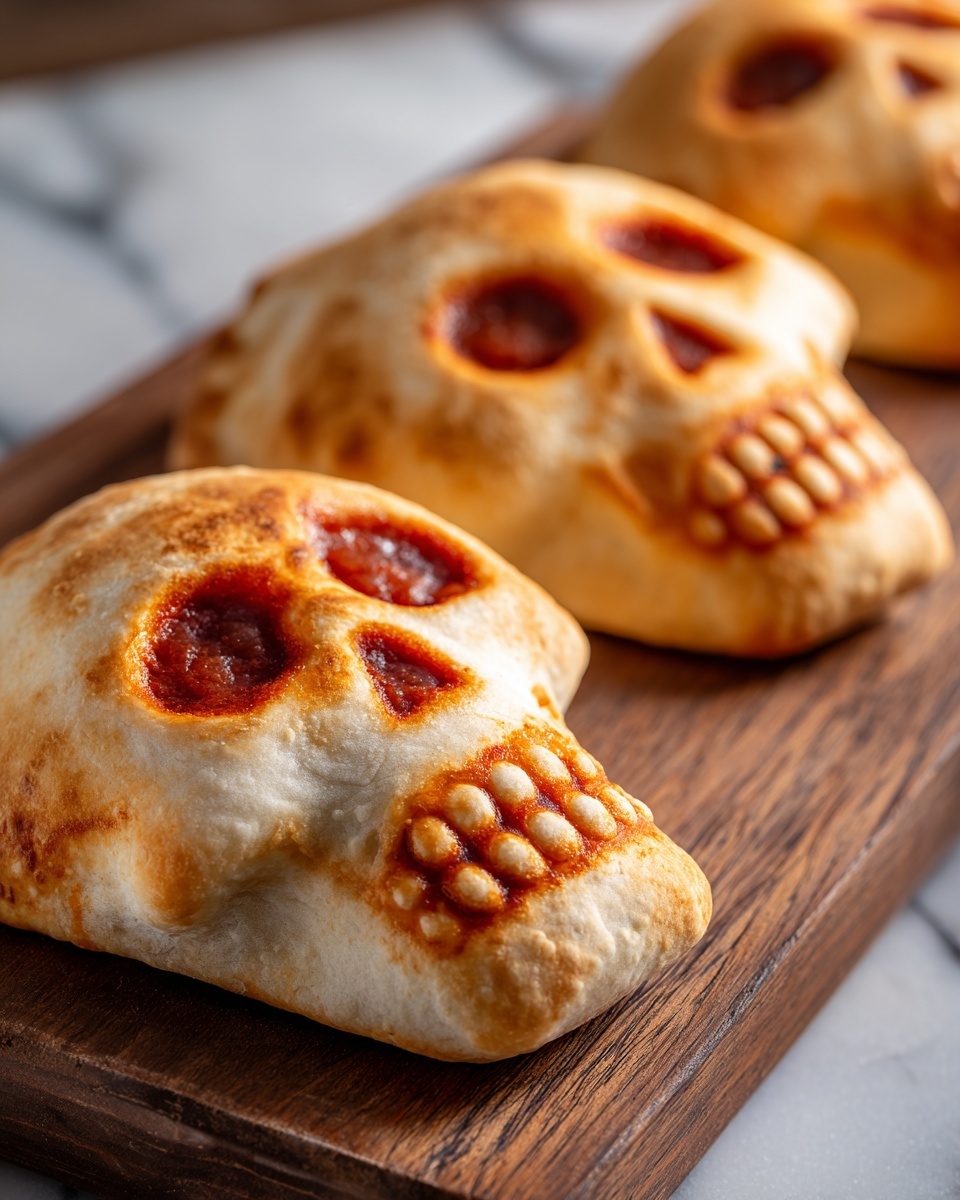
If you’re looking to bring some festive fun and irresistible flavor to your Halloween party, this Cheesy Halloween Pizza Skulls Recipe is an absolute must-try. Imagine gooey, melty mozzarella tucked inside crispy, golden-baked skull-shaped pockets, bursting with savory pizza sauce and pepperoni goodness. Each bite perfectly balances cheesy indulgence with the spooky charm that makes Halloween so special. Whether you’re cooking for kids or grown-ups who love a playful twist on classic pizza, this recipe will be your new go-to for festive snacking.
Ingredients You’ll Need
These simple, essential ingredients come together effortlessly to create a deliciously cheesy, perfectly textured snack. Each component plays its part to ensure great flavor, tantalizing aromas, and that iconic pizza charm in a unique Halloween shape.
- 1 can refrigerated pizza dough: Acts as the soft, golden crust that holds all the delicious fillings inside perfectly.
- 1 cup shredded mozzarella cheese: Provides that wonderful stretch and melty texture everyone loves in pizza.
- 1/2 cup pizza sauce: Adds a bright, tangy base that infuses every bite with classic Italian flavor.
- 1/2 cup mini pepperoni slices or chopped pepperoni: Gives a salty, savory kick and perfect meaty texture.
- 1/4 cup grated Parmesan cheese: Sprinkled on top for a nuttier flavor and golden finish.
- 1 teaspoon Italian seasoning: A fragrant herb blend that enhances the overall flavor profile beautifully.
- Nonstick cooking spray: Essential for greasing the skull-shaped mold so your pizza pockets release easily after baking.
- Optional: chopped vegetables or cooked sausage: For those who want to get creative and add extra filling variety, like mushrooms, olives, or sausage.
How to Make Cheesy Halloween Pizza Skulls Recipe
Step 1: Prepare Your Oven and Mold
Preheat your oven to 375°F to get that perfect baking temperature ready. Meanwhile, take your skull-shaped silicone baking mold and lightly spray each cavity with nonstick cooking spray. This prevents sticking and makes it easier to pop out your pizza skulls when they’re done.
Step 2: Shape the Pizza Dough
Roll out the refrigerated pizza dough on a lightly floured surface and cut pieces large enough to line each skull cavity fully, including sides. Leave a little extra dough aside because you’ll need some to seal the tops later. Press the dough gently but firmly into each mold cavity, ensuring the edges are covered so the fillings won’t leak out during baking.
Step 3: Layer the Filling
Spoon a small dollop of pizza sauce into the bottom of each dough-lined cavity. Then layer in the shredded mozzarella cheese followed by your mini pepperoni slices or chopped pepperoni. If you’re adding extra veggies or cooked sausage, tuck those in here as well. Finish with a generous sprinkle of mozzarella on top along with grated Parmesan and a dash of Italian seasoning.
Step 4: Seal and Bake
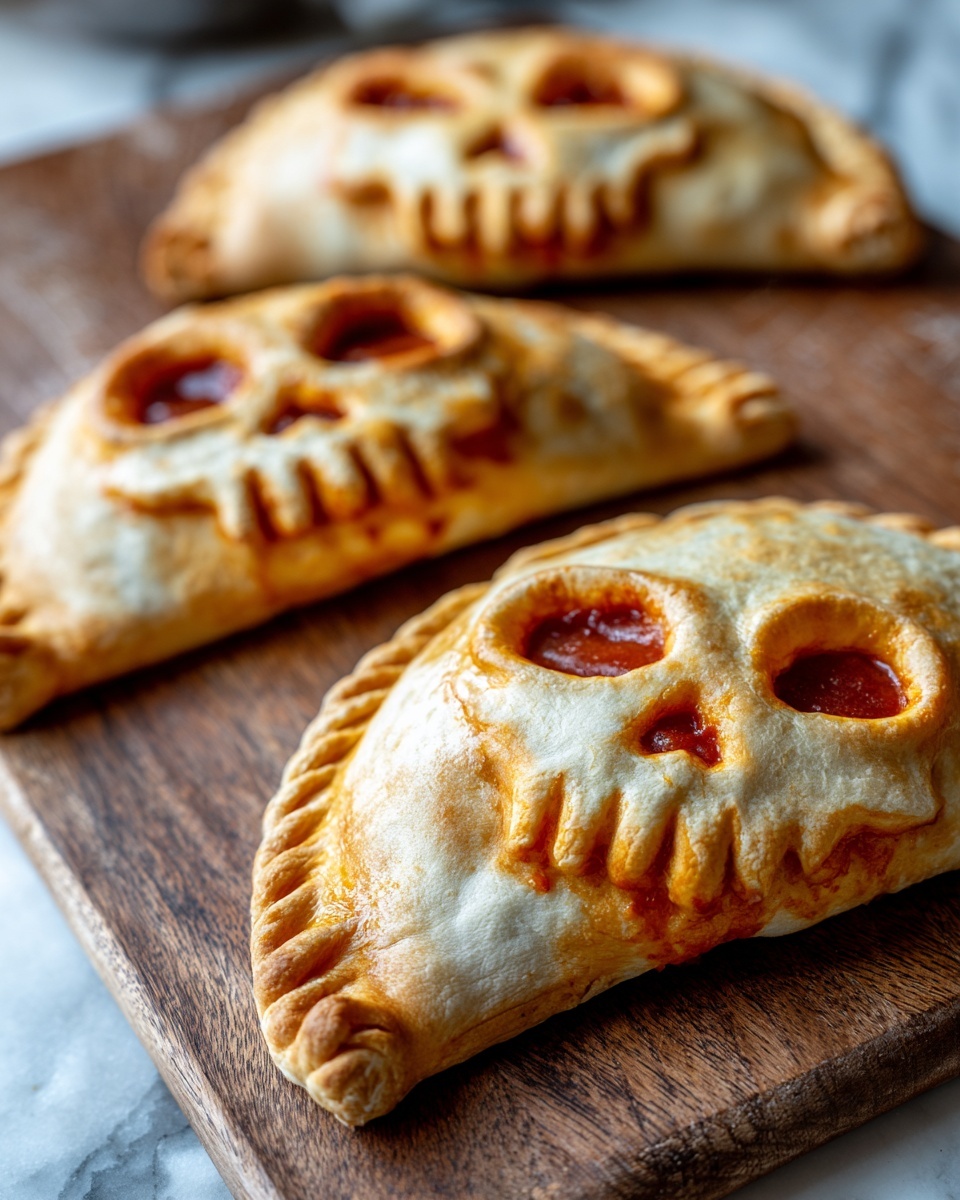
Fold the excess dough over the fillings carefully, pressing the edges to seal tightly. Once sealed, place the mold on a baking sheet and bake in the preheated oven for 18 to 22 minutes. You’re looking for golden brown dough that’s cooked all the way through with bubbly melted cheese inside.
Step 5: Cool and Remove
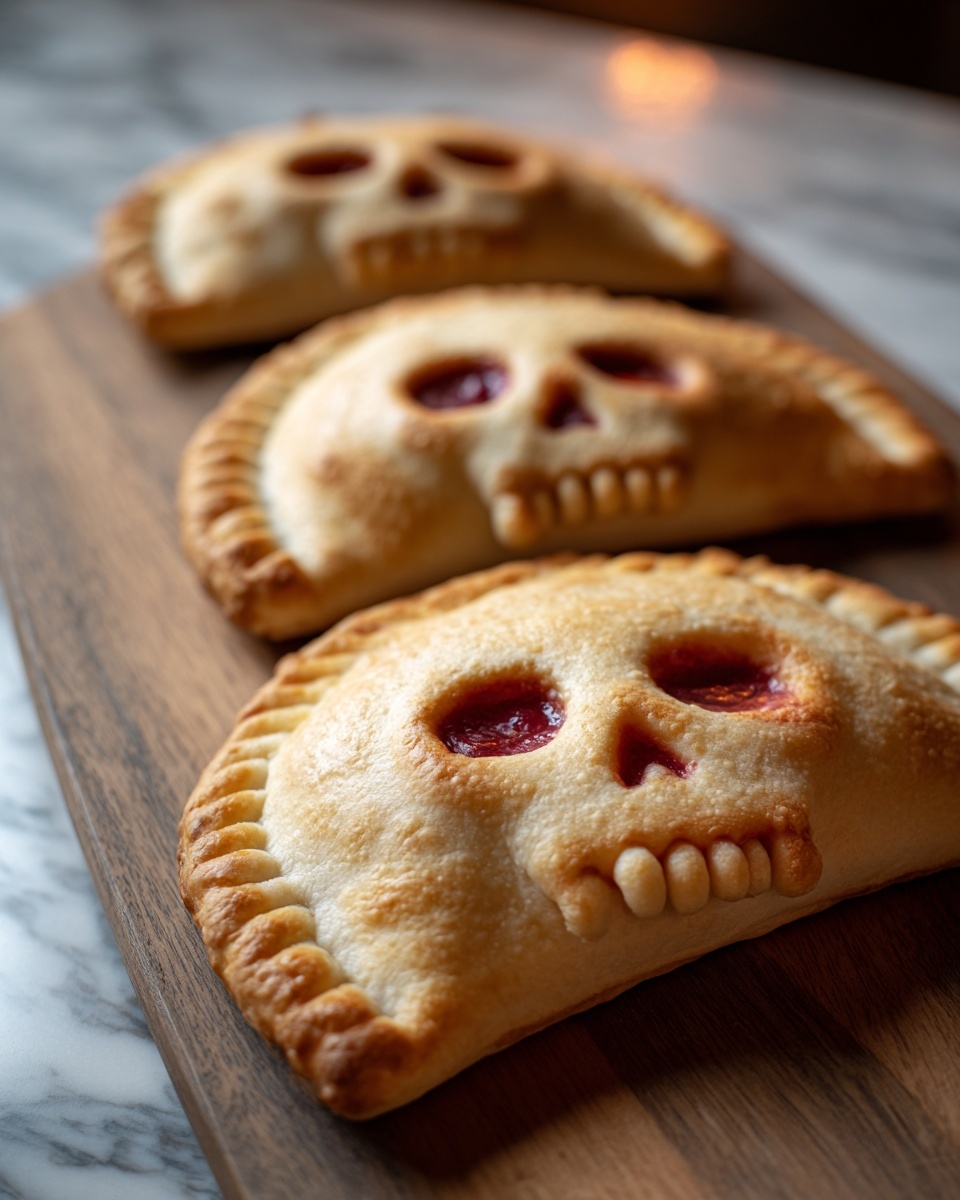
Allow your pizza skulls to cool in the mold for a few minutes after baking. This helps everything set and makes removal easier without breaking the delicate shapes. Carefully pop the skulls out and get ready to serve these spooky cheesy delights warm and fresh!
How to Serve Cheesy Halloween Pizza Skulls Recipe
Garnishes
Add a festive touch by brushing the tops with extra pizza sauce after baking for a “bloody” illusion that’s fun and playful. Fresh basil leaves or a sprinkle of red pepper flakes can also add a pop of color and a little zing.
Side Dishes
Pair your pizza skulls with a crisp green salad dressed in balsamic vinaigrette or a bowl of roasted garlic-infused vegetables. A simple side of carrot sticks and ranch dip also works great if you’re serving kids. These sides help balance the richness of the cheesy pockets without overpowering their flavor.
Creative Ways to Present
Set your skulls on a dark-colored platter surrounded by faux spider webs or mini pumpkins for a truly spooky centerpiece. For party fun, serve them alongside small bowls of marinara sauce for dipping, and don’t forget little Halloween-themed toothpicks or napkins to complete the vibe.
Make Ahead and Storage
Storing Leftovers
Wrap leftover pizza skulls tightly in plastic wrap or place them in an airtight container. Store them in the refrigerator for up to 3 days to keep them fresh and flavorful. They make a delicious snack or quick lunch when reheated.
Freezing
If you want to save some for later, freeze the pizza skulls before baking or after completely cooling. Place them on a baking sheet to freeze individually, then transfer to a freezer-safe bag or container. They’ll keep for up to 2 months, allowing you to enjoy this Cheesy Halloween Pizza Skulls Recipe anytime you want a festive treat.
Reheating
To reheat, bake the pizza skulls in a 350°F oven for about 10 minutes until warmed through and the crust is crispy again. You can also microwave them, but the oven method keeps the crust from getting soggy. Reheating freshly baked pizza skulls this way brings back the melty cheese magic perfectly.
FAQs
Can I use homemade pizza dough instead of refrigerated dough?
Absolutely! Homemade dough works wonderfully if you want to add your personal touch. Just make sure it’s rolled out evenly and soft enough to press into the skull molds without tearing.
What can I use to make the skull shapes if I don’t have a silicone mold?
If you don’t have a skull-shaped mold, you can try cutting pizza dough into skull shapes using a cookie cutter or a knife and fold them over a filling to create pocket pizzas with a Halloween flair.
Can I make these pizza skulls vegetarian?
Yes! Simply skip the pepperoni and add your favorite vegetables like mushrooms, olives, spinach, or bell peppers. You’ll still get all the cheesy, delicious flavors with a veggie twist.
Is it okay to prepare these ahead of time and bake later?
You can assemble the pizza skulls ahead of time, cover, and refrigerate them for up to 24 hours before baking. This makes party prep easier and still delivers fresh, hot pizza pockets when baked.
How spicy are these pizza skulls?
The basic recipe is mild and kid-friendly, but you can spice it up by adding crushed red pepper flakes, spicy sausage, or pepperoni to suit your taste.
Final Thoughts
There’s something so delightfully fun about the Cheesy Halloween Pizza Skulls Recipe that makes it more than just a snack—it’s a festive experience that lights up any Halloween gathering. From the exciting shape to the perfect blend of gooey cheese and savory fillings, this recipe is sure to become a cherished tradition. Trust me, once you try it, you’ll want to make it every Halloween season and maybe even beyond. So go ahead, get baking, and share the spooky, cheesy love with everyone around you!
Print
Cheesy Halloween Pizza Skulls Recipe
- Prep Time: 15 minutes
- Cook Time: 20 minutes
- Total Time: 35 minutes
- Yield: 6 pizza skulls
- Category: Snack
- Method: Baking
- Cuisine: American
- Diet: Vegetarian
Description
Celebrate Halloween with these fun and spooky Cheesy Halloween Pizza Skulls! Made with easy-to-use refrigerated pizza dough and filled with classic pizza toppings like mozzarella, pepperoni, and pizza sauce, these adorable skull-shaped snacks are perfect for parties or festive family treats. They’re crispy on the outside, gooey and cheesy on the inside, and fully customizable with your favorite fillings.
Ingredients
Pizza Dough
- 1 can refrigerated pizza dough
Cheese & Sauce
- 1 cup shredded mozzarella cheese
- 1/2 cup pizza sauce
- 1/4 cup grated Parmesan cheese
Toppings
- 1/2 cup mini pepperoni slices or chopped pepperoni
- 1 teaspoon Italian seasoning
- Optional: chopped vegetables or cooked sausage for extra filling
Other
- Nonstick cooking spray
Instructions
- Preheat Oven: Preheat your oven to 375°F (190°C) and lightly spray a skull-shaped silicone baking mold with nonstick cooking spray to ensure easy release of the pizza skulls.
- Prepare Dough: Roll out the refrigerated pizza dough on a clean surface and cut into pieces large enough to line each mold cavity fully, leaving extra dough around the edges to seal the tops later.
- Line Molds: Press the dough pieces into each skull cavity gently, making sure the dough covers the bottom and sides completely.
- Add Fillings: Spoon a small amount of pizza sauce at the bottom of each dough-lined mold, then layer with shredded mozzarella cheese and mini pepperoni slices. Add any optional fillings like chopped vegetables or cooked sausage at this stage.
- Top and Season: Add more shredded mozzarella on top along with a sprinkle of grated Parmesan cheese and Italian seasoning for extra flavor.
- Seal Skulls: Fold the extra dough over the fillings, pressing firmly to seal each pizza skull closed so the filling doesn’t leak out during baking.
- Bake: Place the mold on a baking sheet and bake in the preheated oven for 18 to 22 minutes, or until the dough turns golden brown and is fully cooked through.
- Cool and Serve: Allow the pizza skulls to cool slightly before carefully removing them from the silicone mold. Serve warm as a delicious and festive Halloween snack.
Notes
- Customize your pizza skull fillings with favorite toppings like olives, mushrooms, bell peppers, or cooked sausage to suit your taste.
- For a spooky “bloody” effect, brush the tops of the pizza skulls with extra pizza sauce right after baking.
- Use a silicone mold shaped like skulls to simplify shaping and baking; alternatively, freehand shapes on a baking sheet for a rustic look.
- Make sure to seal the dough well around the edges to prevent fillings from leaking during baking.


