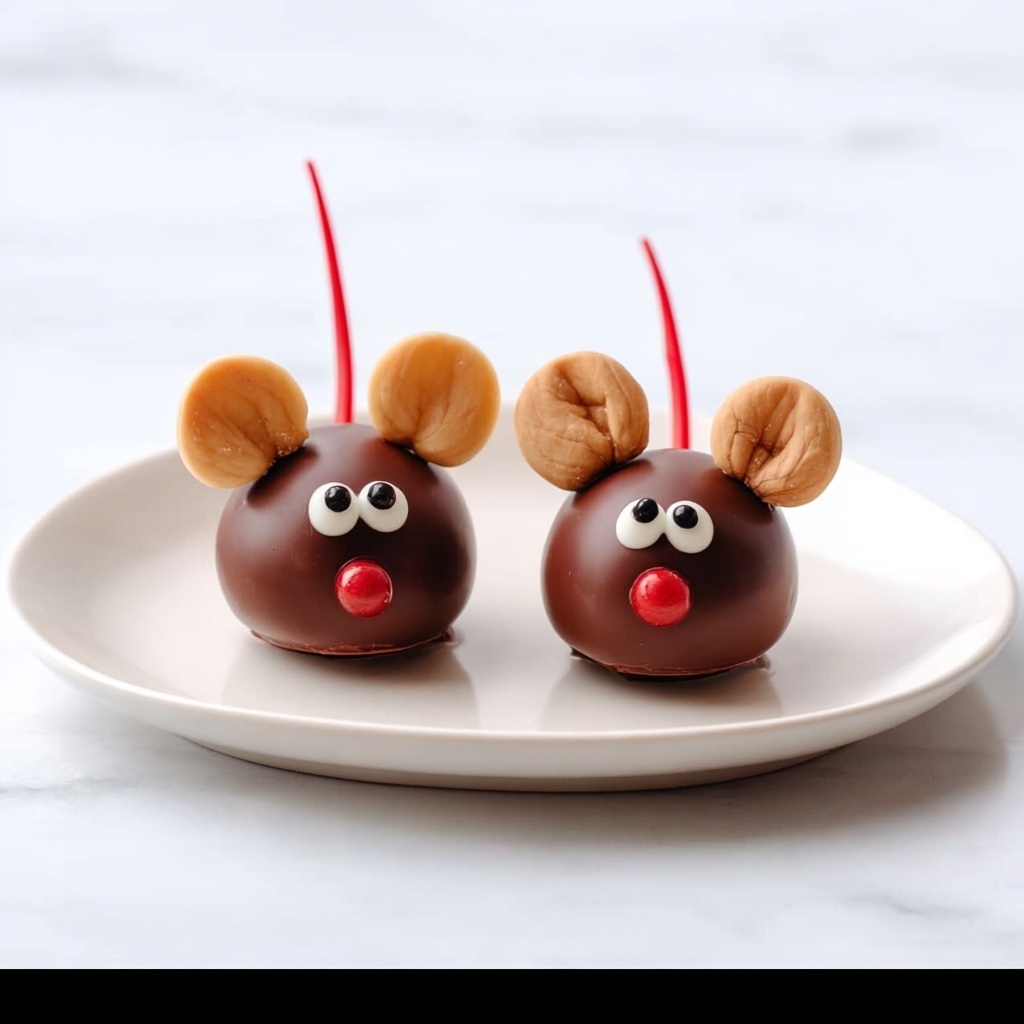
If you’re searching for a delightful, whimsical treat that’s bound to bring smiles and a touch of fun to any gathering, the Chocolate Cherry Mice Recipe is absolutely the one to try. These cute little edible critters combine rich chocolate, sweet cherries, and crunchy almonds into adorable morsels that are both charming to look at and irresistible to eat. Perfect for parties, holidays, or simply when you want a playful dessert, this recipe brings together simple ingredients to create magic on your plate with minimal effort.
Ingredients You’ll Need
Gathering the right ingredients for this recipe is as simple as it is essential. Each one brings something unique to the table, whether it’s the smooth chocolate, the juicy pop of cherries, or the delicate crunch of almonds. These components combine effortlessly to create a perfect balance of textures and flavors.
- 1 cup milk or semi-sweet chocolate chips: Provides the luscious, melt-in-your-mouth base to coat the cherries and hold everything together.
- 1 teaspoon shortening: Helps to smooth out the chocolate for easy dipping and a shiny finish.
- 20 Maraschino cherries (with stems): The star of the show, lending juicy sweetness and a fun shape for the mice bodies.
- 20 Hershey Chocolate Kisses: These form the distinct “head” of each mouse, adding a rich chocolate complement.
- 40 sliced almonds: Perfect for crafting delicate little ears that really bring these mice to life.
- 1 tube white icing: Used to create the bright, expressive eyes.
- 1 tube black icing: Adds the tiny pupils that make the eyes truly pop.
How to Make Chocolate Cherry Mice Recipe
Step 1: Melt the Chocolate
Start by melting the chocolate chips and shortening together in the microwave on low heat for about 1 minute. Take your time stirring until the mixture is silky smooth. This step is crucial because you want a perfectly glossy and fluid chocolate coating that will cling perfectly to the cherries.
Step 2: Dip and Assemble
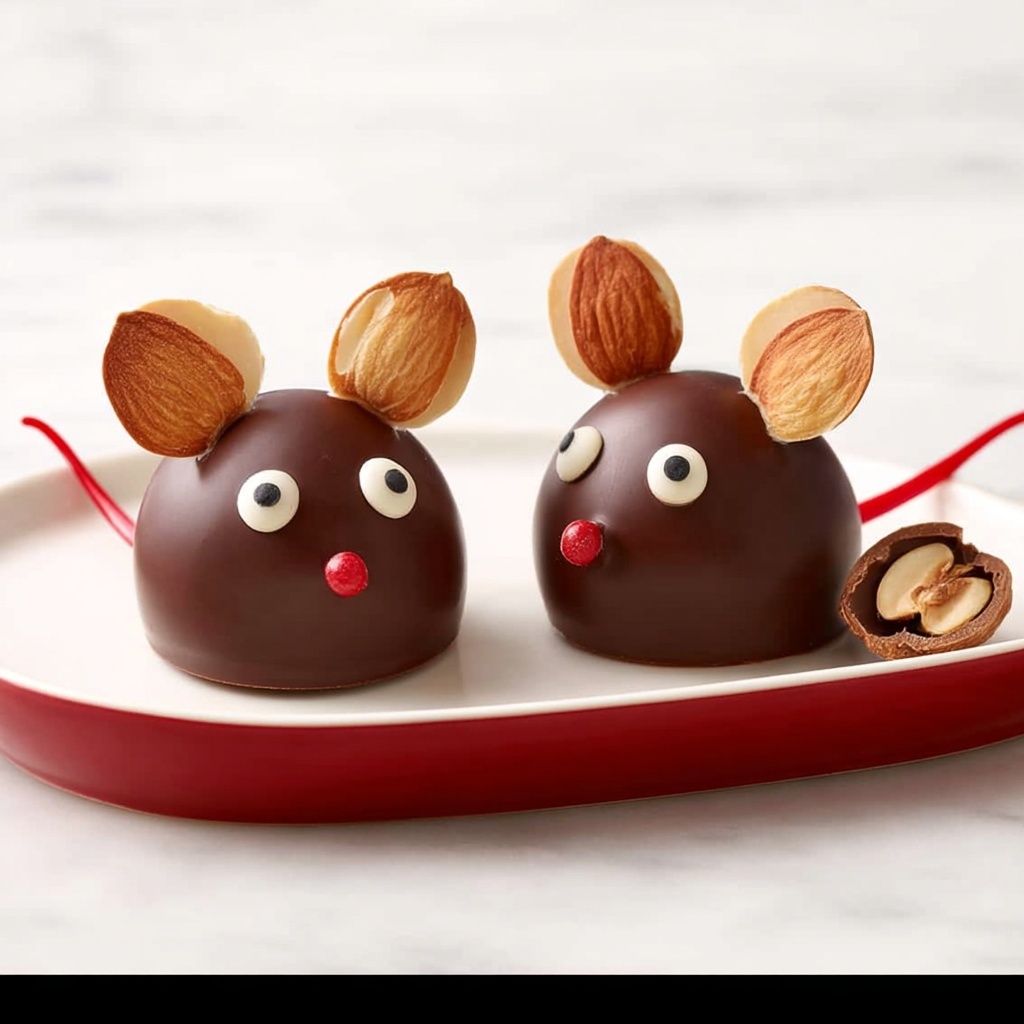
Hold each maraschino cherry by its stem and dip it carefully into the melted chocolate, coating it evenly. Then immediately press a Hershey’s chocolate kiss on top; this will function as the mouse’s head. Next, gently wedge two sliced almonds on either side between the cherry and the chocolate kiss to form cute ears. This part lets you get creative with placement so each little mouse has its own personality!
Step 3: Let Them Set and Add Details
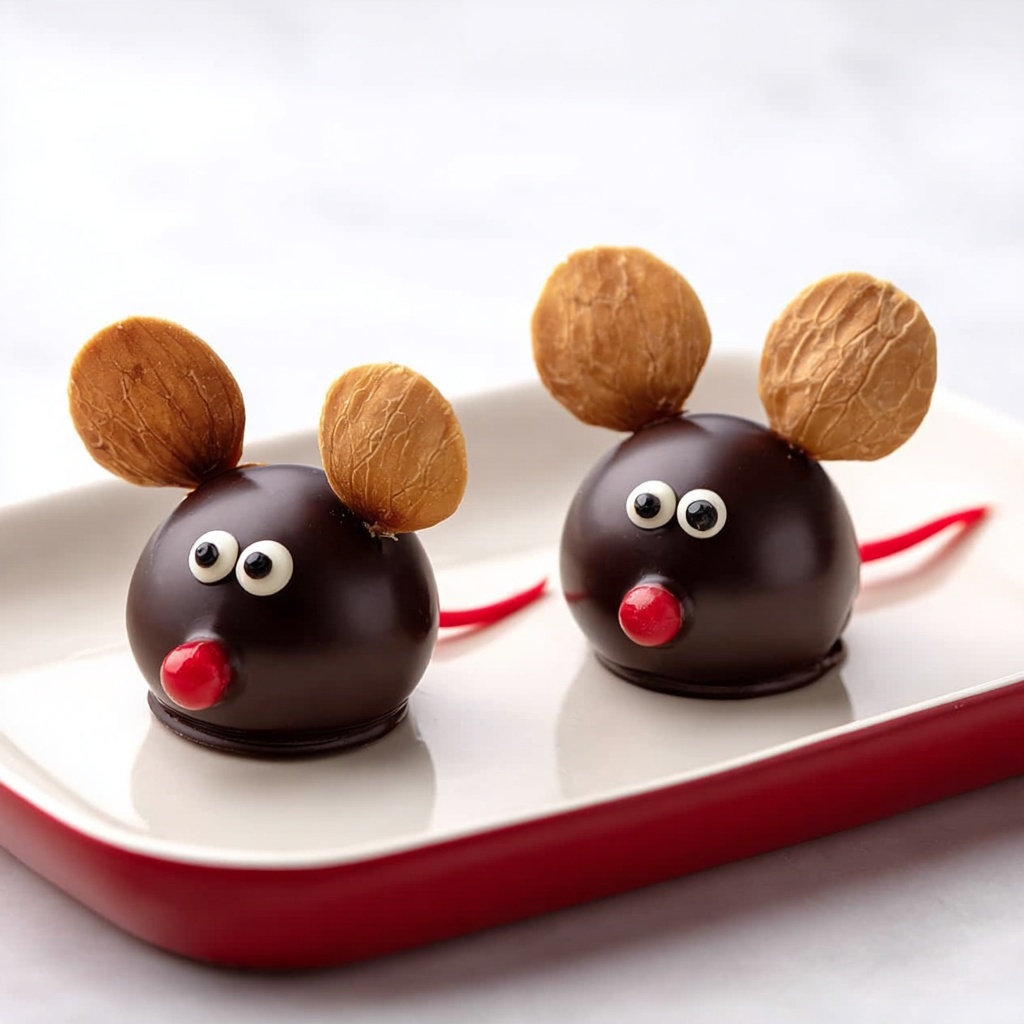
Place your chocolate cherry mice on wax paper and let the chocolate harden completely. Once set, it’s time to bring the faces to life by dotting white icing for the eyes, then carefully adding smaller dots of black icing on top as pupils. These tiny details give your mice a playful and adorable expression that never fails to charm everyone.
How to Serve Chocolate Cherry Mice Recipe
Garnishes
While the chocolate cherry mice are striking on their own, you can add a touch of festive flair by sprinkling a little powdered sugar dust or edible glitter around your presentation plate. Fresh mint leaves or a few chocolate shavings nearby make for lovely accents that elevate the visual impact.
Side Dishes
These mice pair beautifully with light, fruity accompaniments such as fresh berries or a simple whipped cream dip to balance their sweetness. If you’re serving them at a party, having some assorted nuts or a delicate cheese board nearby creates a fun mix of flavors and textures to enjoy alongside them.
Creative Ways to Present
Toss some of the Chocolate Cherry Mice Recipe creations into a decorative box lined with parchment for gifting. Alternatively, arrange them on toothpicks for easy snacking or place them atop cupcakes as charming edible toppers that will wow your guests and bring a smile to children and adults alike.
Make Ahead and Storage
Storing Leftovers
If you have leftovers, keep them in an airtight container at room temperature away from heat or direct sunlight. They’ll remain fresh for a couple of days, allowing the chocolate to maintain its snap and the cherries to stay juicy.
Freezing
You can freeze these mice for longer storage by placing them in a single layer on a tray to freeze initially, then transferring them to a freezer-safe container or bag. When frozen properly, they hold their shape well for up to one month.
Reheating
Since these treats are best enjoyed cold or at room temperature, avoid reheating. Instead, allow frozen mice to thaw naturally in the fridge or at room temperature to preserve their excellent texture and flavor.
FAQs
Can I use dark chocolate instead of milk chocolate?
Absolutely! Using dark chocolate will add a richer, more intense flavor that contrasts beautifully with the cherry’s sweetness. Just be sure to melt it gently to avoid scorching.
Do I have to use Maraschino cherries with stems?
While stems make dipping easier and help create the mouse shape, you can use stemless cherries if that’s what you have. Just be a little more careful during the dipping and assembling process.
What if I don’t have white and black icing tubes?
You can swap in melted white and dark chocolate for the eyes or try edible markers designed for decorating. The key is to create distinct eye details so the mice look lively and fun.
Is there a way to make this recipe vegan or dairy-free?
Yes! Use dairy-free chocolate chips and shortening, and opt for coconut-based or other plant-based icings. Check that the cherries are free of non-vegan dyes or additives to keep it fully plant-based.
How long does it take to prepare the Chocolate Cherry Mice Recipe?
Preparation is delightfully quick, generally around 10 minutes, plus 1 minute of melting time. The setting time for the chocolate can vary but usually won’t take more than 30 minutes to an hour.
Final Thoughts
The Chocolate Cherry Mice Recipe is one of those charming little desserts that brings joy not only through taste but by delighting the eyes and sparking creativity. Whether you’re making them for a party, a holiday treat, or just because, these mice are guaranteed to become a new favorite. So grab your ingredients, have fun assembling your tiny chocolate critters, and watch the smiles blossom around your table!
Print
Chocolate Cherry Mice Recipe
- Prep Time: 10 minutes
- Cook Time: 1 minute
- Total Time: 11 minutes
- Yield: 20 pieces
- Category: Dessert, Snack
- Method: Microwaving (Chocolate melting) and No-Cook (assembly and decorating)
- Cuisine: American
- Diet: Vegetarian
Description
These adorable Chocolate Cherry Mice are a delightful and easy-to-make treat perfect for parties or festive occasions. The combination of sweet maraschino cherries, creamy chocolate, and crunchy almond ears creates a fun bite-sized snack that looks as charming as it tastes.
Ingredients
Chocolate Coating
- 1 cup milk or semi-sweet chocolate chips
- 1 teaspoon shortening
Mouse Components
- 20 Maraschino cherries (with stems)
- 20 Hershey Chocolate Kisses
- 40 sliced almonds
Decorations
- 1 tube white icing
- 1 tube black icing
Instructions
- Melt the Chocolate: In the microwave, melt the chocolate chips and shortening together on low heat for 1 minute. Stir the mixture thoroughly until it becomes smooth and glossy, ensuring there are no lumps.
- Assemble the Mice: Hold a maraschino cherry by its stem and dip it into the melted chocolate, coating it thoroughly. Immediately press a Hershey’s Chocolate Kiss onto the cherry to form the mouse’s head. Carefully wedge two sliced almonds between the cherry and chocolate kiss on each side to resemble ears.
- Set and Decorate: Place the assembled chocolate cherries on wax paper to allow the chocolate to set and harden. Once set, use white icing to pipe small dots for eyes on the chocolate kiss. Then, add a tiny dot of black icing on top of the white dots to create pupils, giving your mice adorable faces.
Notes
- Use shortening in the chocolate to give it a smoother texture and help it harden nicely.
- Be gentle when inserting almond slices to avoid breaking the chocolate coating.
- Allow sufficient time for chocolate to set before decorating to prevent smudging.
- For a dairy-free version, use dairy-free chocolate chips and suitable icing substitutes.


