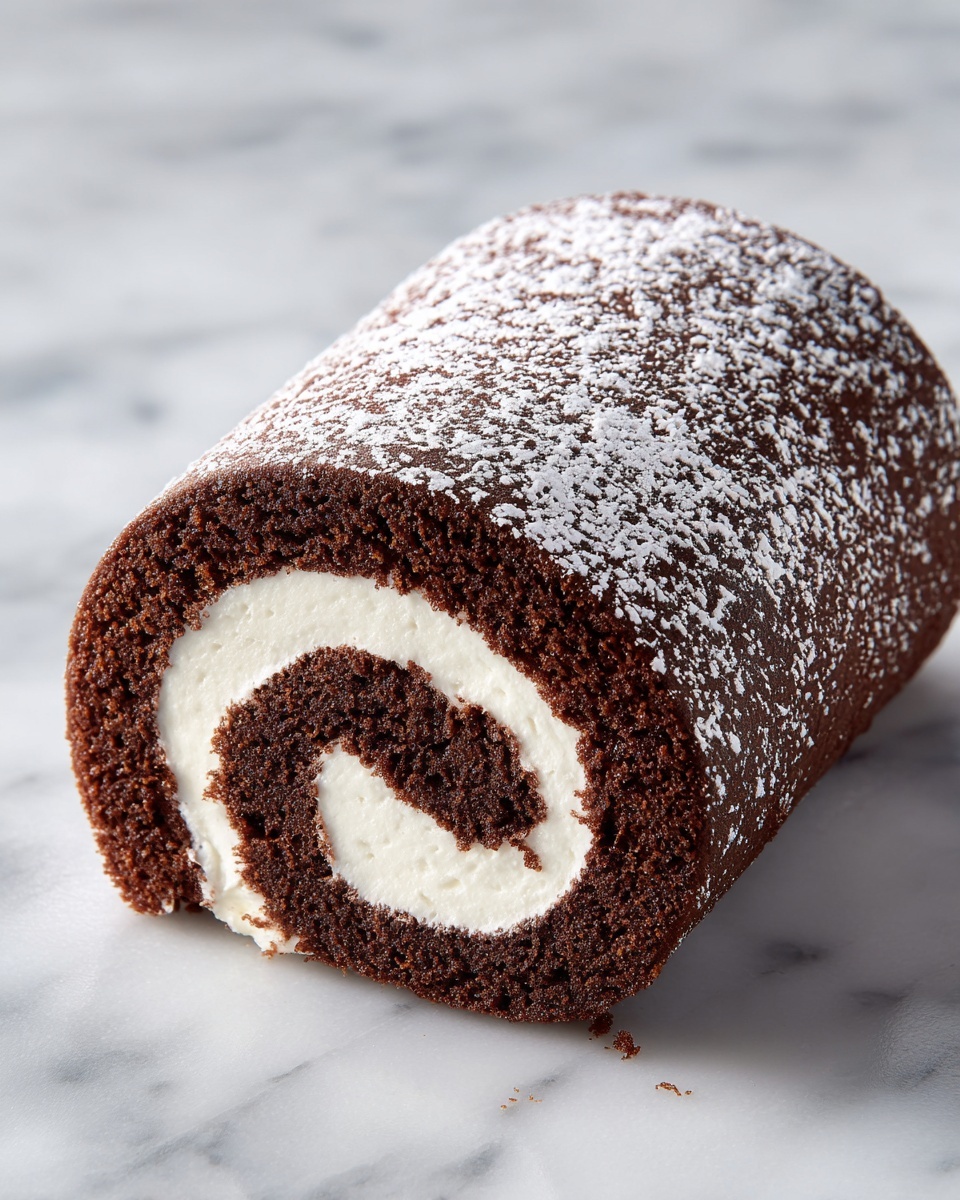
If you’re on the hunt for a show-stopping, irresistibly delicious dessert, this Chocolate Swiss Roll Recipe is exactly what you need. Imagine a soft, fluffy chocolate sponge cake rolled around a luxuriously creamy, chocolate-infused filling — each bite is a perfect harmony of rich, sweet, and tender textures. Whether you’re baking for a special occasion or simply craving something sweet and comforting, this recipe brings bakery-quality magic right to your kitchen in a surprisingly straightforward way.
Ingredients You’ll Need
This Chocolate Swiss Roll Recipe shines because of its simple, fundamental ingredients, each carefully chosen to create a beautifully balanced cake and filling. From the airy eggs that build the sponge’s structure to the cocoa powder that delivers deep chocolate flavor, every element plays a vital role in crafting this classic delight.
- Eggs: Four large eggs provide lift and fluffiness to the sponge base.
- Granulated Sugar: One cup of sugar sweetens while helping create a tender crumb.
- All-Purpose Flour: One cup offers structure and density without heaviness.
- Unsweetened Cocoa Powder: A quarter-cup for rich chocolate flavor and color.
- Baking Powder: One teaspoon to gently leaven and lighten the cake.
- Vanilla Extract: One teaspoon adds warmth and depth to the flavor profile.
- Salt: A quarter teaspoon to balance sweetness and enhance chocolate notes.
- Heavy Cream: One cup, whipped to create the luscious filling texture.
- Powdered Sugar: Half a cup to sweeten the whipped cream smoothly.
- Semi-Sweet Chocolate: Four ounces melted and folded into the cream for a decadent finish.
How to Make Chocolate Swiss Roll Recipe
Step 1: Prepare Your Oven and Baking Sheet
Start by preheating your oven to a precise 350°F (175°C). Get your baking sheet ready by lining it with parchment paper. This simple step prevents sticking and helps the cake bake evenly — the foundation of a perfect Swiss roll.
Step 2: Whip Eggs and Sugar Together
In a large bowl, beat the eggs with granulated sugar until the mixture looks light and fluffy. This aeration is essential; it’s what makes your cake spongy and soft. Then sift in your dry ingredients — flour, cocoa powder, baking powder, and salt — folding gently to combine everything without knocking out the air.
Step 3: Spread the Batter Evenly
Pour the resulting batter onto your prepared baking sheet and carefully spread it using a spatula to cover the entire surface uniformly. The even layer ensures your cake bakes consistently with the texture you want.
Step 4: Bake and Cool Slightly
Bake for 10 to 12 minutes, watching closely until the cake springs back when you touch it gently. Remove from the oven and let it cool for a few minutes—cool enough to handle but still pliable for rolling without cracks.
Step 5: Make the Creamy Chocolate Filling
While the cake cools, whip your heavy cream with powdered sugar until stiff peaks form—this creates a light yet stable base for the filling. Melt your semi-sweet chocolate and let it cool slightly before folding it gently into the whipped cream, yielding a luscious, smooth filling perfect for spreading.
Step 6: Roll Up Your Cake with Filling
When the cake is ready to roll, carefully unroll it on a clean surface. Spread the chocolate filling evenly over the surface, then roll the cake back up tightly but gently to maintain that perfect spiral without cracking.
Step 7: Slice and Serve
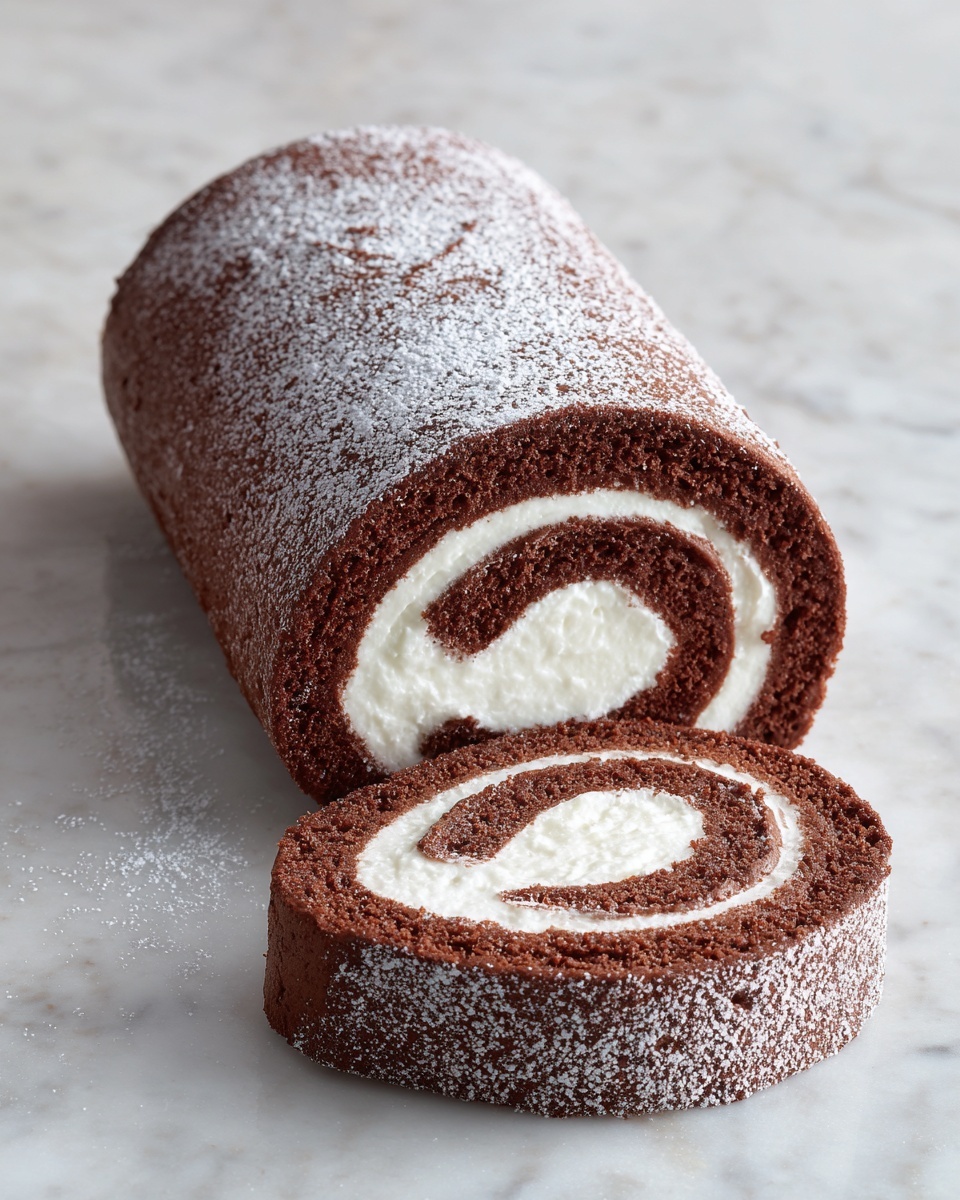
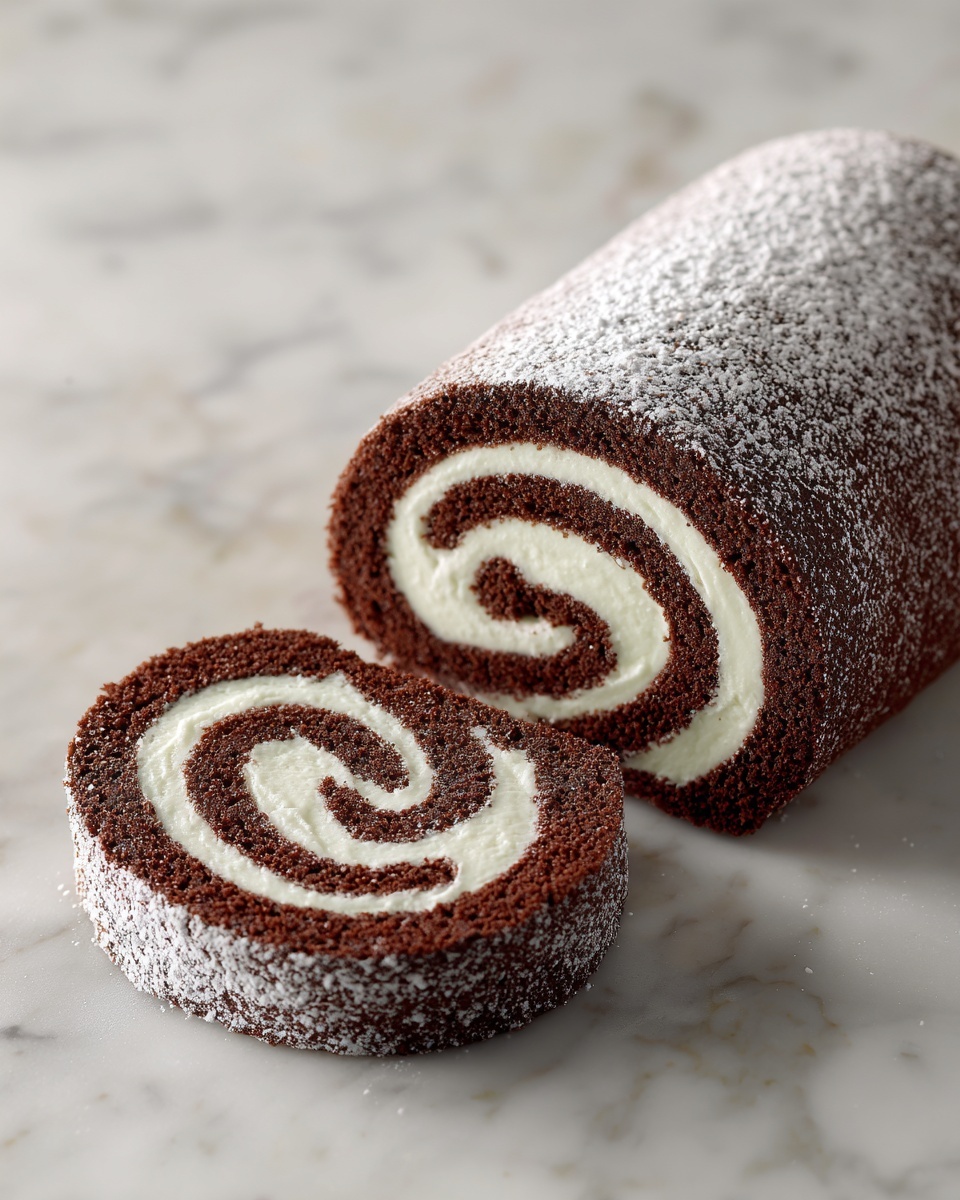
Slice your Chocolate Swiss Roll into even pieces to showcase the luscious spiral pattern. Serve immediately, and feel free to dust with powdered sugar or drizzle extra chocolate sauce to add a final touch of wow.
How to Serve Chocolate Swiss Roll Recipe
Garnishes
Simple garnishes like a light dusting of powdered sugar or a drizzle of warm chocolate sauce can elevate your Chocolate Swiss Roll Recipe to beautiful presentation levels. Fresh berries or a sprig of mint can add color and a burst of freshness to each plate.
Side Dishes
This dessert pairs wonderfully with a scoop of vanilla ice cream or a small bowl of fresh whipped cream on the side. For an adult twist, serve alongside a cup of espresso or a glass of dessert wine to complement the chocolate’s richness.
Creative Ways to Present
Try serving your Swiss roll on a rustic wooden board or a fancy cake stand for an elegant feel. You can also slice it into smaller bites and arrange on a platter for parties, garnishing each piece individually with edible flowers or tiny chocolate shavings for an extra-special look.
Make Ahead and Storage
Storing Leftovers
If you have leftovers, wrap your Chocolate Swiss Roll Recipe tightly in plastic wrap and store it in the refrigerator. It will stay flavorful and fresh for up to 3 days, allowing you to enjoy that delightful balance of chocolate sponge and creamy filling later on.
Freezing
To freeze, wrap the rolled cake tightly in plastic wrap and then foil to protect against freezer burn. Your Swiss roll can be frozen for up to 2 months. Thaw it overnight in the refrigerator before serving to preserve its perfect texture.
Reheating
Because this is a delicate cake with a creamy filling, reheating is best avoided. Instead, bring it to room temperature before serving for optimal flavor and texture. If you want a warm dessert, consider gently warming a slice of chocolate sauce to pour over the roll.
FAQs
Can I use a different type of chocolate for the filling?
Absolutely! You can substitute semi-sweet chocolate with dark, milk, or even white chocolate depending on your preference, but keep in mind this will change the sweetness and intensity of the filling.
What if my cake cracks when rolling?
If your cake cracks while rolling, it likely cooled too much and lost flexibility. Try rolling it while it’s still slightly warm, or cover it with a damp towel while cooling to maintain moisture and pliability.
Can I make this recipe gluten-free?
Yes, you can replace the all-purpose flour with a gluten-free flour blend designed for baking. Make sure the blend contains xanthan gum or a similar binder to maintain the cake’s structure and texture.
How do I ensure the filling doesn’t leak out?
Whip the cream to stiff peaks and fold in the melted chocolate gently so the filling holds its shape. Don’t overfill the cake, and roll it firmly but carefully to keep the filling inside.
Is this recipe suitable for beginners?
Definitely. The instructions are straightforward, and while some practice helps with the rolling technique, anyone can achieve a beautiful Chocolate Swiss Roll Recipe by following the steps with care and patience.
Final Thoughts
I can’t recommend enough giving this Chocolate Swiss Roll Recipe a try—it’s a true crowd-pleaser that combines simplicity with elegance and irresistible flavor. Once you master this recipe, you’ll have a stunning dessert ready to impress family and friends anytime. Happy baking!
Print
Chocolate Swiss Roll Recipe
- Prep Time: 15 minutes
- Cook Time: 12 minutes
- Total Time: 27 minutes
- Yield: 8 servings
- Category: Dessert
- Method: Baking
- Cuisine: Western
- Diet: Vegetarian
Description
This Chocolate Swiss Roll recipe offers a light, fluffy chocolate sponge cake rolled with a rich and creamy chocolate whipped filling. Perfect for dessert lovers, this treat combines the delicate texture of a classic Swiss roll with the indulgent flavor of chocolate, making it a delightful centerpiece for any occasion.
Ingredients
For the Cake:
- 4 large eggs
- 1 cup granulated sugar
- 1 cup all-purpose flour
- 1/4 cup unsweetened cocoa powder
- 1 tsp baking powder
- 1/4 tsp salt
- 1 tsp vanilla extract
For the Filling:
- 1 cup heavy cream
- 1/2 cup powdered sugar
- 4 oz semi-sweet chocolate
Instructions
- Preheat and Prepare: Preheat your oven to 350°F (175°C) and line a baking sheet with parchment paper to prevent sticking and ensure even baking.
- Mix Batter: In a large bowl, beat the eggs and granulated sugar together until the mixture is light and fluffy, creating a smooth base. Sift in the all-purpose flour, unsweetened cocoa powder, baking powder, and salt, then gently fold these dry ingredients into the wet mixture until fully incorporated, taking care not to deflate the batter.
- Spread Batter: Pour the prepared batter onto the lined baking sheet and spread it evenly to cover the entire surface, creating a thin, uniform layer for even baking.
- Bake the Cake: Bake the cake for 10-12 minutes, or until it springs back when lightly touched, indicating it’s cooked through. Remove it from the oven and allow it to cool for a few minutes before handling.
- Prepare Filling: While the cake cools, whip the heavy cream with powdered sugar until stiff peaks form. Melt the semi-sweet chocolate and let it cool slightly before folding it gently into the whipped cream to create a smooth chocolate filling.
- Roll the Cake: Once the cake has cooled enough to handle, carefully unroll it. Spread the chocolate filling evenly over the surface, then roll the cake back up tightly to form the Swiss roll shape.
- Serve: Slice the Swiss roll into even pieces and serve immediately. Optionally, garnish with additional powdered sugar or drizzle some chocolate sauce over the slices for an extra touch of elegance.
Notes
- Be careful while folding in the dry ingredients to keep the batter airy.
- Cool the cake slightly before unrolling to prevent cracking.
- Melted chocolate should be cooled so it does not deflate the whipped cream.
- Use a clean kitchen towel dusted with powdered sugar to help roll the cake without sticking, if desired.
- Store leftover Swiss roll in the refrigerator and consume within 2 days for best freshness.


