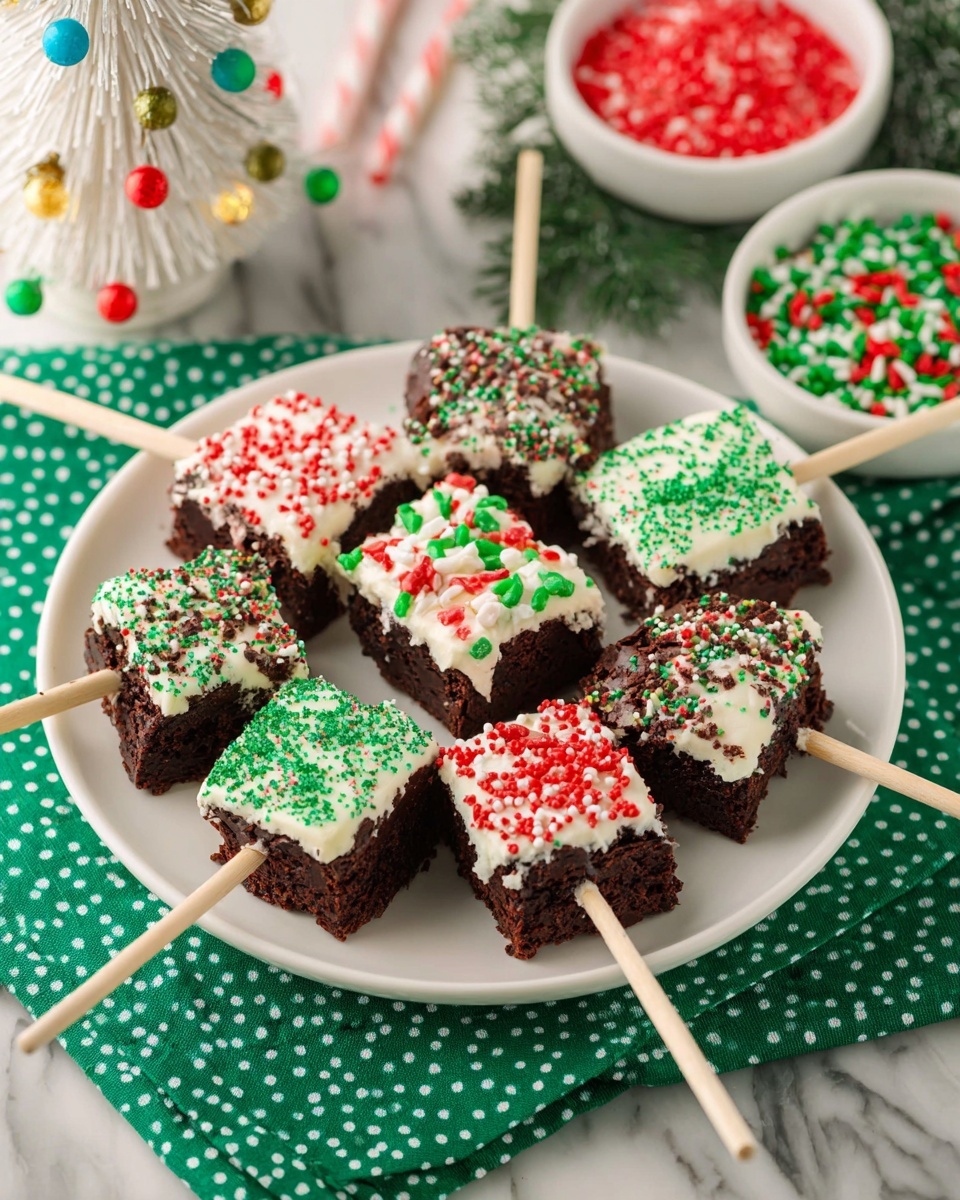
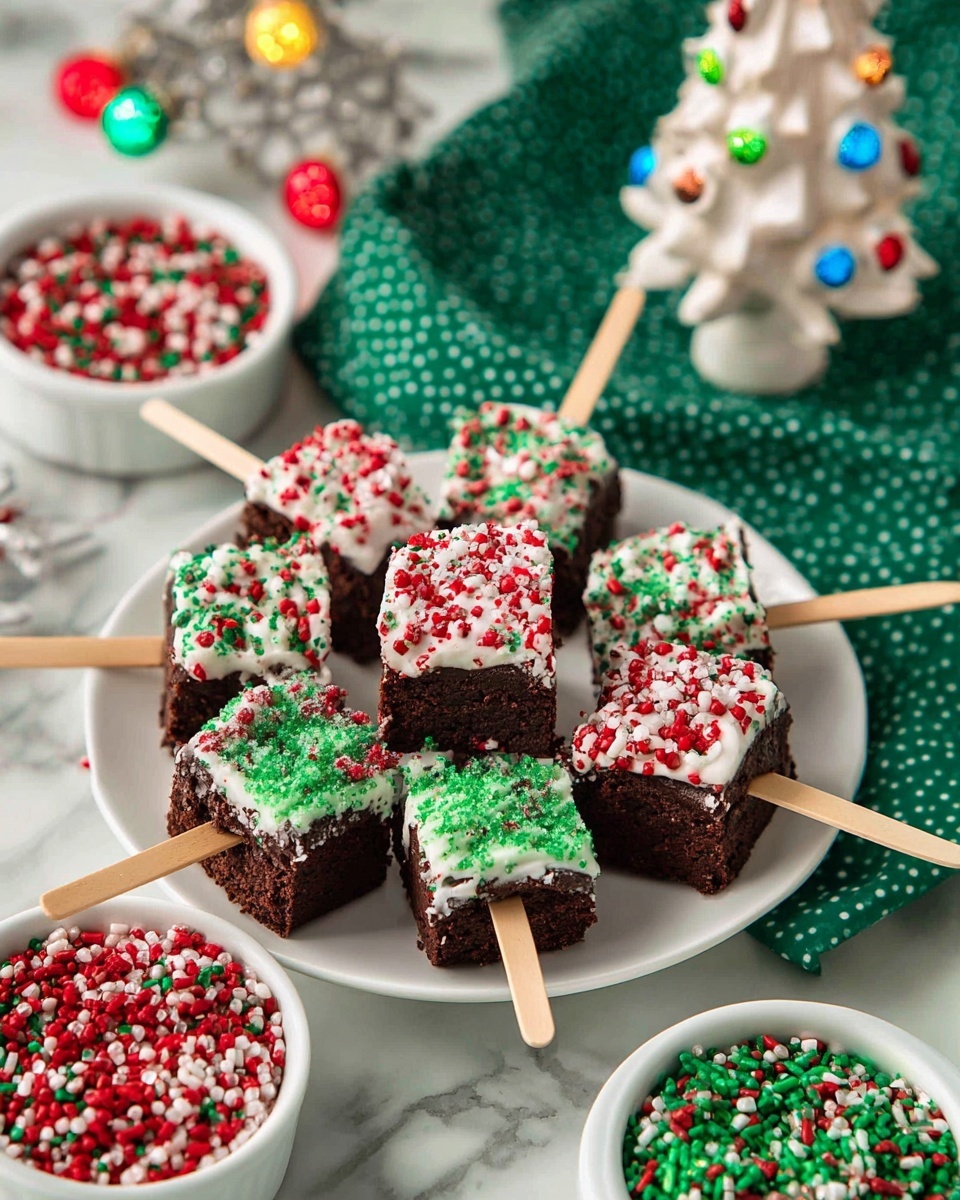
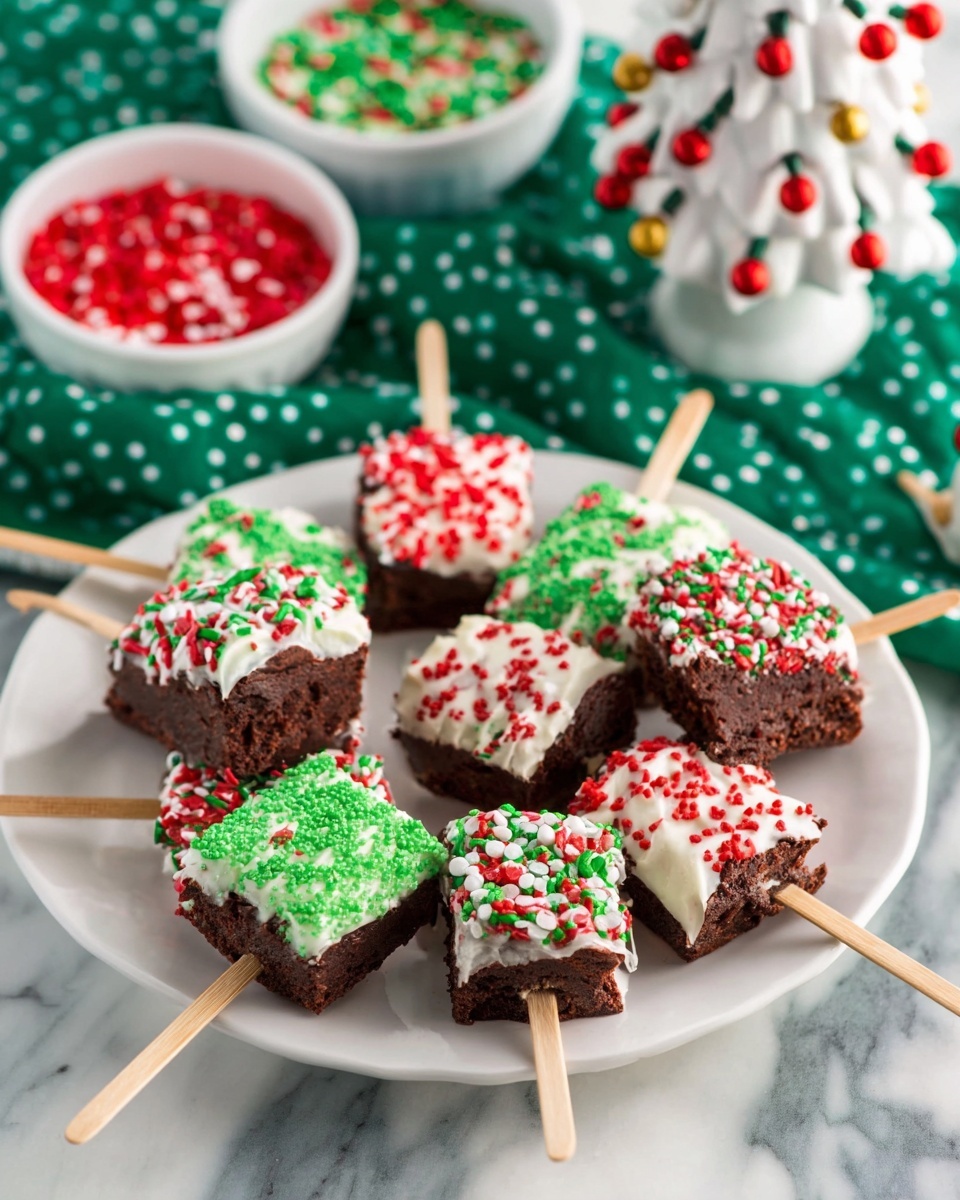
If you’re looking to add a fun and festive twist to your holiday treats, this Christmas Brownie Pops Recipe is an absolute must-try. Imagine fudgy, rich brownies transformed into delightful pops, beautifully coated with creamy white chocolate and sprinkled with colorful holiday cheer. These pops are not only easy to make but also perfect for sharing with family and friends, bringing joy to every bite and adding that extra sparkle to your Christmas celebrations.
Ingredients You’ll Need
Each ingredient in this Christmas Brownie Pops Recipe plays a crucial role in creating the perfect balance of flavor, texture, and festive appearance. From the fudgy base to the decorative toppings, these simple essentials come together to make something truly special.
- 18 oz box brownie mix: The foundation for fudgy, moist brownies that everyone loves and is easy to prepare.
- Water, oil, and eggs: These are the basic mixing ingredients required by the brownie mix, contributing to a smooth batter and chewy texture.
- 16 popsicle sticks: Perfect for turning ordinary brownies into fun, handheld pops that kids and adults alike will adore.
- 12 ounces white melting chocolate: A creamy coating that adds sweetness and allows the brownies to shine with festive flair.
- Holiday sprinkles: The final touch that brings color, texture, and a joyous Christmas spirit to every bite.
How to Make Christmas Brownie Pops Recipe
Step 1: Prepare Your Baking Dish
Start by lining an 8×8 baking dish with aluminum foil and spraying it lightly with cooking spray. This will ensure your brownies lift out effortlessly without sticking—a small step that saves a big hassle later.
Step 2: Mix and Bake Your Brownies
Follow the instructions on the brownie mix box carefully. Mix the water, oil, and eggs as directed and pour the batter into your prepared dish. Pop it into the oven and let the magic happen as the brownies transform into a luscious, fudgy base for your pops.
Step 3: Cool and Chill Brownies
Once baked, set the brownie pan on a cooling rack for about 10 minutes. This waiting period prevents the pops from crumbling when cut later. Then, place the pan in the freezer for 45 to 60 minutes—chilling the brownies makes them firm and easier to handle when forming into pops.
Step 4: Cut and Insert Popsicle Sticks
Carefully peel back the foil and lift the entire brownie slab onto a parchment-lined cutting board. Slice the brownies into 16 even squares. Push a popsicle stick halfway into each square; this transforms each piece into the perfect bite-sized Christmas Brownie Pop.
Step 5: Melt the White Chocolate
Using a double boiler, gently melt the white chocolate until smooth and glossy. The creamy coating will give the brownies a festive look and a delightful contrast from the rich, chocolatey base.
Step 6: Dip and Decorate
Work quickly for this next part—dip a corner of each brownie pop into the melted white chocolate, covering it partially. This process is best done one pop at a time to keep the chocolate smooth and prevent it from hardening before decorating.
Step 7: Add Holiday Sprinkles
While the chocolate coating is still wet, sprinkle your favorite holiday-themed sprinkles over the dipped section. The sprinkles not only add festive color but also a fun crunch that elevates the texture of each bite.
Step 8: Let Chocolate Set
Place the decorated brownie pops on parchment paper or a cooling rack. To speed up the hardening of the white chocolate and ensure a perfect finish, refrigerate the pops for about 10 minutes before serving or gifting.
How to Serve Christmas Brownie Pops Recipe
Garnishes
Besides holiday sprinkles, you can add garnishes like crushed candy canes, edible glitter, or tiny sugar snowflakes for an extra festive touch. These small details make your Christmas Brownie Pops look like they belong on the cover of a holiday cookbook!
Side Dishes
These brownie pops pair wonderfully with creamy hot chocolate or vanilla eggnog to keep the holiday vibe going. For a lighter option, serve alongside a fresh fruit plate with tart cranberries and sweet oranges—it’s a refreshing balance.
Creative Ways to Present
Wrap each pop in clear cellophane tied with red and green ribbons for a charming gift idea. Alternatively, arrange pops standing upright in a festive holiday-themed flower pot filled with decorative filler or popcorn to mimic a Christmas “tree” of treats.
Make Ahead and Storage
Storing Leftovers
You can keep leftover Christmas Brownie Pops in an airtight container at room temperature for up to 3 days. Make sure they are fully set and cool before storage to prevent them from sticking together.
Freezing
If you want to prepare these treats in advance, wrap each pop individually in plastic wrap and freeze in a sealed container for up to 2 months. Thaw them in the refrigerator overnight before enjoying.
Reheating
Since these pops are best enjoyed at room temperature, avoid microwaving. If you prefer a softer texture, allow frozen pops to sit out for about 30 minutes after thawing to regain that perfect fudgy consistency.
FAQs
Can I use homemade brownies for this recipe?
Absolutely! Homemade brownies work wonderfully if you prefer baking from scratch. Just ensure they are firm enough to handle and chill them well before cutting and inserting sticks.
What if I don’t have popsicle sticks?
You can substitute with sturdy wooden skewers or even coffee stirrers, but make sure whatever you use is food-safe and strong enough to hold the brownie securely.
Can I use dark or milk chocolate instead of white chocolate?
Yes, feel free to experiment with different coatings! Dark or milk chocolate pairs beautifully with fudgy brownies and offers a different flavor profile, though you might lose some of that bright festive look.
How do I prevent the chocolate from melting on the brownie?
Working quickly and dipping one pop at a time helps prevent the chocolate from hardening prematurely. Also, chilling the brownies beforehand keeps them firm, so the chocolate adheres nicely.
Are these brownie pops suitable for kids’ parties?
Definitely! They are a fun, mess-free treat that kids can hold and enjoy easily. Plus, decorating the pops can be a great activity for little hands during holiday gatherings.
Final Thoughts
I’m so excited for you to try this Christmas Brownie Pops Recipe because it’s such a joyful way to celebrate the season with delicious treats that look as good as they taste. Whether for a party, a gift, or just cozying up by the fire, these brownie pops are sure to bring smiles and festive fun. Happy baking and happy holidays!
Print
Christmas Brownie Pops Recipe
- Prep Time: 35 minutes
- Cook Time: 25-30 minutes
- Total Time: 1 hour 35 minutes
- Yield: 16 brownie pops
- Category: Dessert
- Method: Baking
- Cuisine: American
Description
Christmas Brownie Pops are a festive and fun holiday treat featuring rich, fudgy brownies on a stick, dipped in smooth white chocolate and decorated with colorful holiday sprinkles. Perfect for parties or gifting, these delightful pops combine the classic comfort of homemade brownies with a playful presentation and seasonal decoration.
Ingredients
Brownie Base
- 18 oz box brownie mix
- Water, oil, and eggs (quantities as listed on the brownie mix box)
Dipping and Decoration
- 16 popsicle sticks
- 12 ounces white melting chocolate
- Holiday sprinkles of your choice
Instructions
- Prepare the Baking Dish: Line an 8×8-inch baking dish with aluminum foil and spray it with cooking spray to prevent sticking. Set aside for later use.
- Make the Brownies: Follow the instructions on the back of your brownie mix box to combine the brownie mix with water, oil, and eggs. Pour the batter into the prepared baking dish and bake according to the box instructions.
- Cool and Chill the Brownies: Once baking is complete, place the baking dish on a cooling rack for 10 minutes to allow the brownies to set slightly. Then, place the dish in the freezer for 45-60 minutes to chill and firm up, making them easier to handle.
- Cut and Insert Sticks: Peel the aluminum foil from the baking dish sides and carefully transfer the entire block of brownies onto a cutting board lined with parchment paper. Cut the brownies into 16 equal squares and insert one popsicle stick into each square firmly.
- Melt the White Chocolate: Using a double boiler, melt the white melting chocolate until smooth and creamy. Remove from heat and position it nearby your brownie pops for easy dipping.
- Dip the Brownie Pops: Working one at a time, quickly dip a corner of each brownie pop into the melted white chocolate. This helps the chocolate coat just part of the brownie, creating a festive appearance. Refer to the tips for optimal dipping results.
- Add Sprinkles and Set: Immediately after dipping, sprinkle holiday sprinkles onto the melted chocolate coating. Place the dipped brownie pop on parchment paper or a cooling rack to let the chocolate harden.
- Chill to Harden: Once all brownie pops are dipped and decorated, refrigerate them for 10 minutes to ensure the white chocolate solidifies completely, making them ready to serve or gift.
Notes
- Working quickly when dipping the brownies in melted chocolate ensures a smooth and even coating without excessive melting of the brownie itself.
- Using an 8×8-inch pan helps achieve the ideal thickness for easy cutting and handling with popsicle sticks.
- Chilling the brownies before cutting allows cleaner, more precise squares and prevents crumbling.
- Use parchment paper when transferring brownies to prevent sticking and ease cleanup.
- Holiday sprinkles add festive color and texture; feel free to use your favorite themed varieties.
- If white chocolate seizes or thickens when melting, gently rewarm over the double boiler and stir continuously.
- Store finished brownie pops in an airtight container in the refrigerator to keep them fresh for up to 3 days.

