
There is something undeniably nostalgic and heartwarming about a batch of these delightful treats, which is why I’m so excited to share the Classic Butter Thumbprint Cookies Recipe with you. These cookies boast a tender, buttery base with that perfect tiny well filled with sweet, fruity jam that adds a burst of flavor and a pop of color. Whether you’re baking for holidays, gifting to friends, or simply craving a comforting cookie, these beauties never fail to bring smiles and a touch of homemade magic to any occasion.
Ingredients You’ll Need
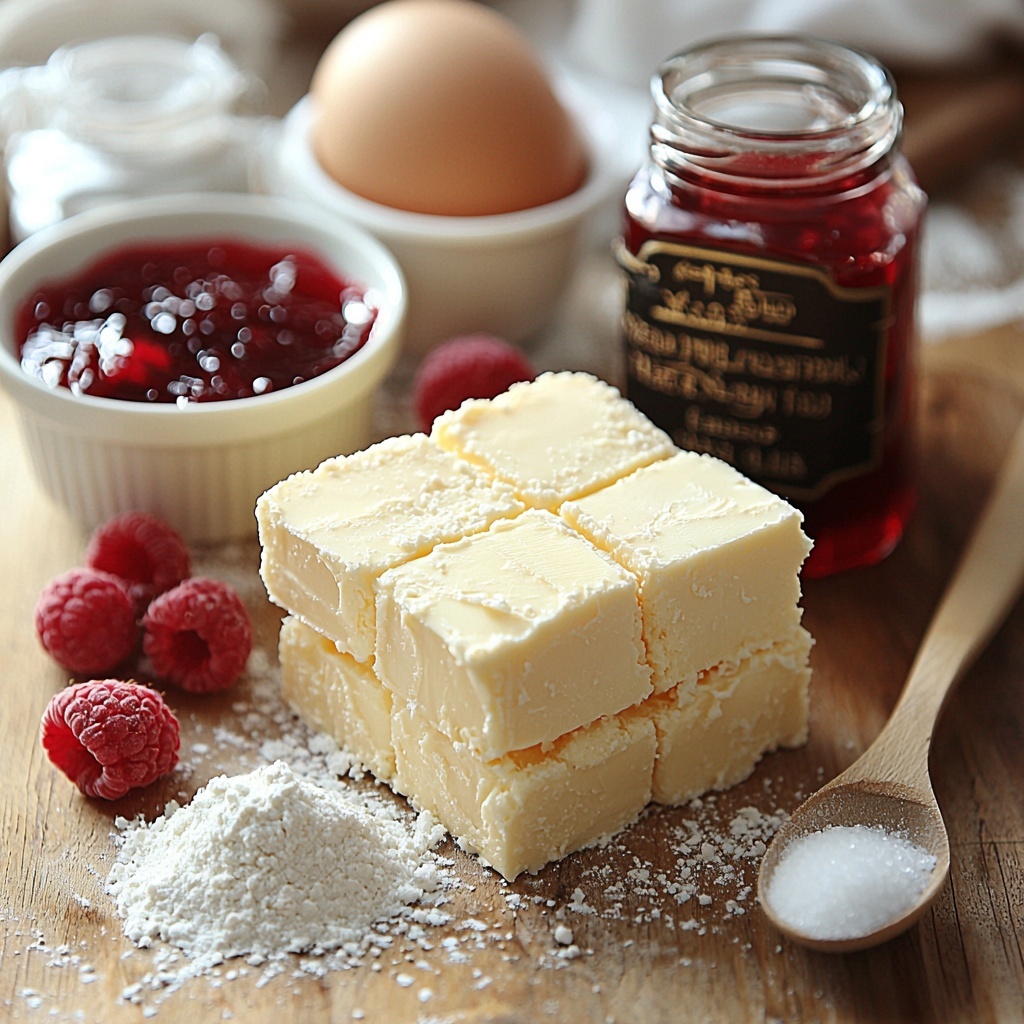
The beauty of this recipe lies in its simplicity—each ingredient plays a pivotal role in creating the perfect texture, subtle sweetness, and inviting aroma that make these thumbprint cookies irresistible. You’ll find that with just a handful of pantry staples, you can whip up something truly special.
- Unsalted butter: Using it at room temperature helps you cream the butter and sugar properly, giving the dough its signature tender crumb.
- Granulated sugar: Adds sweetness and, when rolled on the dough balls, offers a delicate crunch on the cookie’s exterior.
- Large egg yolk: Provides richness and helps bind the dough without making it tough.
- Vanilla extract: A small splash delivers a warm, aromatic depth that elevates every bite.
- All-purpose flour: The foundation of the dough, it ensures the cookies hold their shape but remain soft.
- Salt: Just a pinch to balance the sweetness and enhance the buttery flavor.
- Jam or fruit preserves: Your choice here makes each batch special—raspberry, strawberry, or apricot jams are classic favorites for that luscious, fruity center.
How to Make Classic Butter Thumbprint Cookies Recipe
Step 1: Preheat and Prepare
First things first, get your oven warmed to 350°F (175°C) and line a baking sheet with parchment paper. This simple prep ensures your cookies bake evenly and won’t stick, making cleanup a breeze.
Step 2: Cream Butter and Sugar
In a large bowl, cream the butter and granulated sugar together until they’re light and fluffy. This step is key to achieving that melt-in-your-mouth texture—don’t rush it. The air incorporated here makes all the difference.
Step 3: Add Egg Yolk and Vanilla
Mix in the egg yolk and vanilla extract until everything blends smoothly. The egg yolk lends a lovely richness, while the vanilla starts building the cookie’s inviting aroma.
Step 4: Combine Dry Ingredients
Gradually add the all-purpose flour and salt. Stir on low speed or fold gently with a spatula just until the dough forms. Be careful not to overmix to keep your cookies tender and soft.
Step 5: Shape the Cookies
Scoop out tablespoon-sized pieces of dough and roll them into smooth balls. For a fun extra touch, roll each dough ball in sugar. This adds a delightful sparkly texture and slight crunch to the outside once baked.
Step 6: Create the Thumbprints
Place the dough balls on the prepared baking sheet about 2 inches apart. Then gently press the center of each ball with your thumb or the back of a spoon, creating a small well ready to hold your jam.
Step 7: Fill with Jam and Bake
Fill each indentation with about half a teaspoon of your chosen jam or preserves. Be mindful not to overfill, as the jam will bubble and spread during baking. Bake for 12 to 14 minutes until the edges turn just golden, signaling they’re perfectly done.
Step 8: Cool and Enjoy
Allow the cookies to cool on the baking sheet for 5 minutes to set, then transfer them to a wire rack to cool completely. This cool-down step ensures the cookies firm up just right without losing that tender crumb.
How to Serve Classic Butter Thumbprint Cookies Recipe
Garnishes
A light dusting of powdered sugar over cooled cookies adds an elegant touch and a hint of extra sweetness. Alternatively, a thin drizzle of melted chocolate can bring a decadent twist that’s visually stunning and delicious.
Side Dishes
These cookies go beautifully alongside a hot cup of tea or coffee, making your break feel indulgent. For a festive touch, serve them with a bowl of fresh berries or a scoop of vanilla ice cream for an unexpected but delightful pairing.
Creative Ways to Present
Arrange your thumbprint cookies in a circle on a decorative platter, alternating jam flavors for a colorful display. You can even package them in charming boxes tied with ribbon—perfect for sharing your love of baking with friends and family.
Make Ahead and Storage
Storing Leftovers
Once fully cooled, store these cookies in an airtight container at room temperature for up to one week. The sealed environment helps maintain their tenderness and keeps that jam center fresh and luscious.
Freezing
If you want to keep these cookies for longer, you can freeze them after baking. Layer them with parchment paper between cookies in a freezer-safe container or bag. They’ll keep beautifully for up to 3 months so you’ll always have a sweet treat on hand.
Reheating
To enjoy your frozen or stored cookies fresh from the oven, warm them in a preheated 300°F oven for about 5 minutes. This refreshes their softness and melts the jam slightly, making each bite as irresistible as when they first came out of the oven.
FAQs
Can I use margarine instead of butter?
While you can substitute margarine, butter is preferred for its rich flavor and better texture. Margarine may result in a less tender cookie and muted flavor, so try to stick to unsalted butter if possible.
What kind of jam works best?
Fruit preserves like raspberry, strawberry, and apricot are traditional favorites because their bright flavors complement the buttery cookie perfectly. Feel free to experiment with other jams like blueberry or cherry to discover your personal favorite!
How do I prevent the jam from leaking during baking?
Use just a small amount of jam (about half a teaspoon) and press the indentation firmly but gently to create a well that holds the filling. Overfilling or pushing too hard can cause leakage.
Can I make these cookies gluten-free?
Yes! Substitute the all-purpose flour with a gluten-free baking blend that measures cup-for-cup. Just be sure to check that your jam is gluten-free, too, and expect a slightly different texture.
Why are my cookies not soft?
If your cookies turned out dry or hard, you might have overbaked them or overmixed the dough, which develops the gluten too much. Keep a close eye on baking times and mix the dough just until combined for tender cookies.
Final Thoughts
Baking the Classic Butter Thumbprint Cookies Recipe is like wrapping yourself in a warm, cozy hug straight from the oven. They’re simple to make, wonderfully versatile, and utterly delightful to share. I can’t wait for you to try this recipe and create your own little moments of joy—one buttery, jam-filled bite at a time.
Print
Classic Butter Thumbprint Cookies Recipe
- Prep Time: 15 minutes
- Cook Time: 14 minutes
- Total Time: 29 minutes
- Yield: 24 cookies
- Category: Dessert
- Method: Baking
- Cuisine: American
Description
Classic Butter Thumbprint Cookies are buttery, tender cookies with a delightful jam-filled center. Perfectly balanced between sweet and rich, these cookies are a nostalgic treat that’s easy to make and perfect for any occasion.
Ingredients
Cookie Dough
- 1 cup unsalted butter, room temperature
- 1/2 cup granulated sugar (plus more for rolling)
- 1 large egg yolk
- 1 teaspoon vanilla extract
- 2 cups all-purpose flour
- 1/4 teaspoon salt
Filling
- 1/3 cup jam or fruit preserves (raspberry, strawberry, apricot, etc.)
Instructions
- Preheat Oven: Preheat the oven to 350°F (175°C) and line a baking sheet with parchment paper to ensure the cookies don’t stick and bake evenly.
- Cream Butter and Sugar: In a large bowl, cream the butter and 1/2 cup granulated sugar together until the mixture is light and fluffy. This helps incorporate air for a tender texture.
- Add Egg Yolk and Vanilla: Mix in the egg yolk and vanilla extract until the ingredients are well combined, enriching the dough with flavor and moisture.
- Incorporate Dry Ingredients: Gradually add the all-purpose flour and salt. Mix on low speed or fold in with a spatula until the dough just comes together, avoiding overmixing to keep the cookies tender.
- Form Dough Balls: Scoop out tablespoon-sized portions of dough and roll each into smooth balls, creating uniform cookies for even baking.
- Optional Sugar Coating: Roll each dough ball in additional granulated sugar for added texture and a slight crunch.
- Arrange on Baking Sheet: Place the dough balls about 2 inches apart on the prepared baking sheet to allow room for spreading.
- Create Thumbprints: Gently press a thumbprint or the back of a spoon into the center of each dough ball to form an indentation for the jam.
- Fill with Jam: Spoon approximately 1/2 teaspoon of your chosen jam into each indentation. Be careful not to overfill to prevent spilling during baking.
- Bake: Bake in the preheated oven for 12 to 14 minutes, or until the cookie edges are just golden and the jam is set.
- Cool: Let the cookies cool on the baking sheet for 5 minutes to firm up, then transfer them to a wire rack to cool completely before serving or storing.
Notes
- Allow butter to come to room temperature to ensure easy creaming.
- Use a variety of jams to customize flavors – raspberry and apricot are classic choices.
- For a gluten-free version, substitute all-purpose flour with a gluten-free baking blend.
- Store cookies in an airtight container at room temperature for up to one week.
- These cookies freeze well; freeze unbaked dough balls and bake directly from frozen, adding a couple of extra minutes to baking time.


