“`html
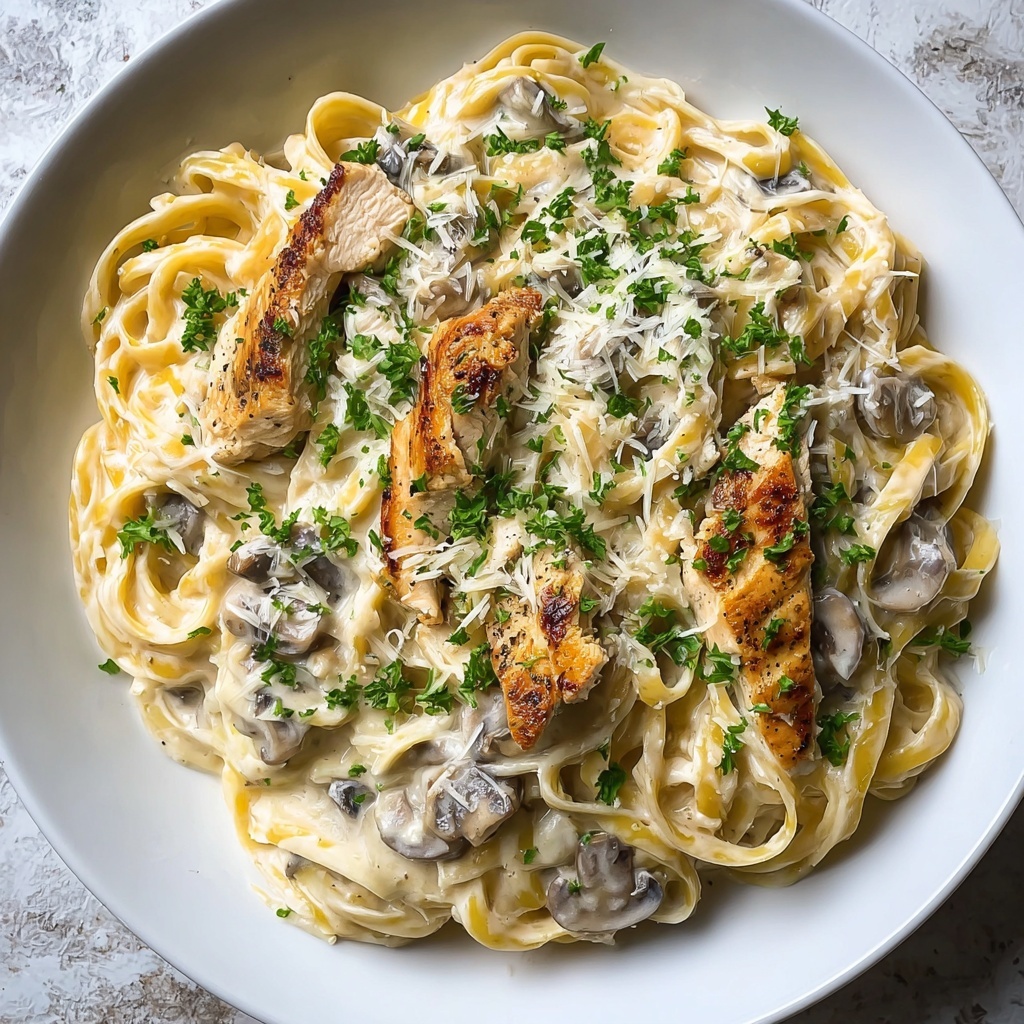
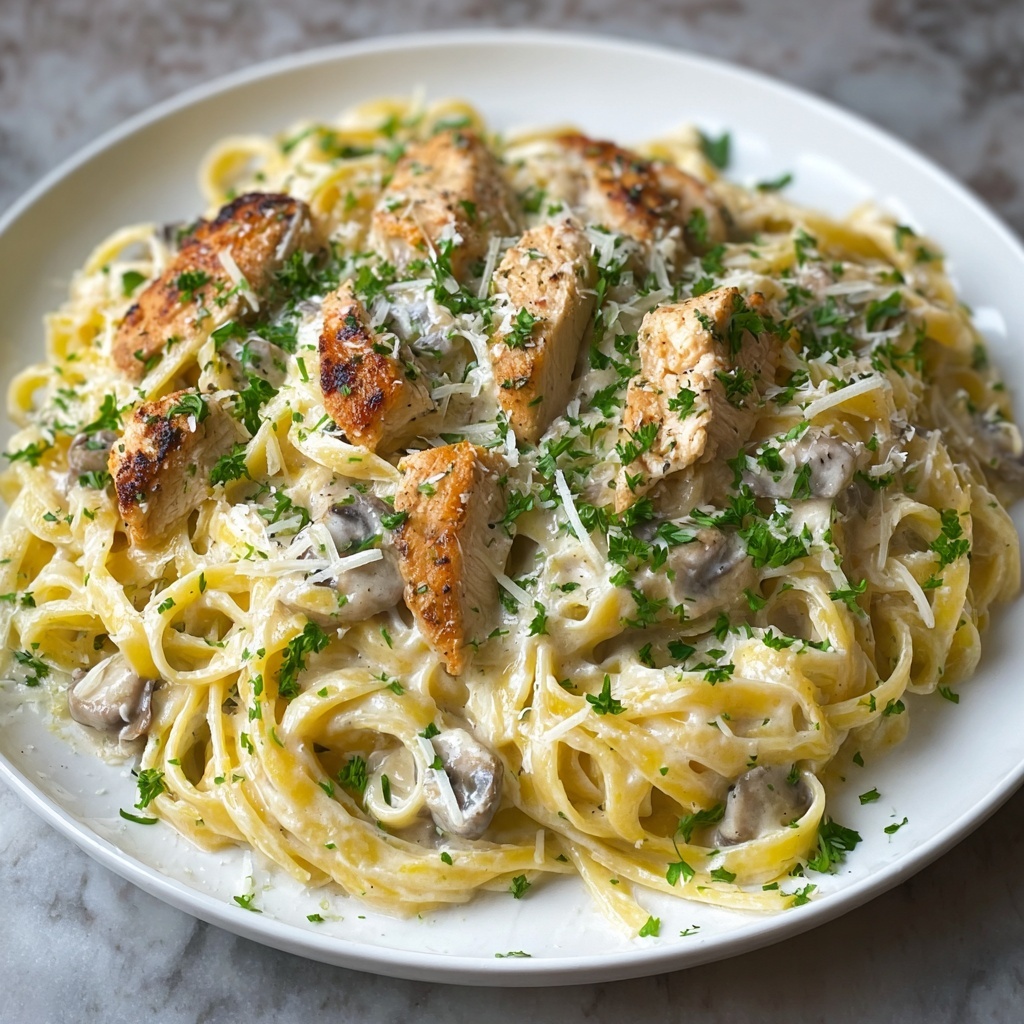
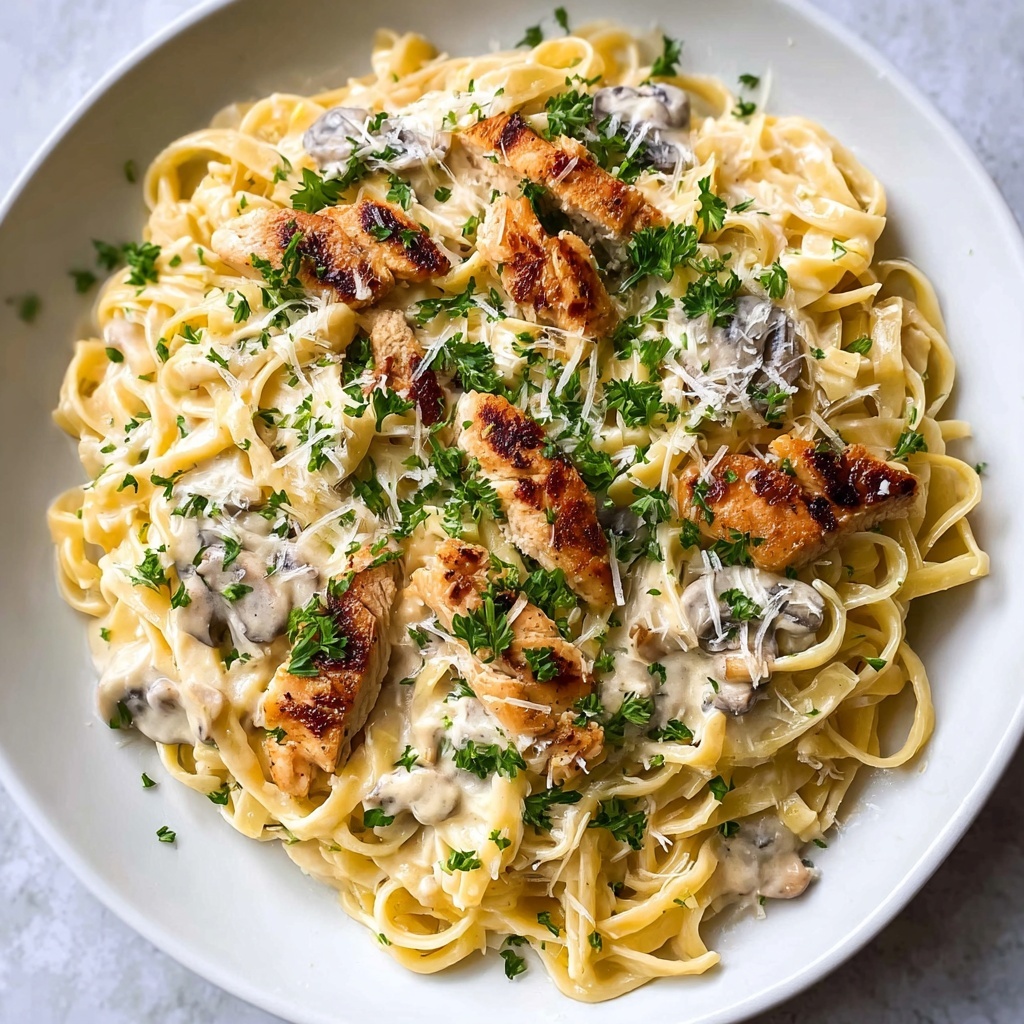
If you’ve been craving a rich, comforting pasta dish but need to skip the dairy, this Creamy Dairy-Free Chicken Alfredo Recipe is about to become your new best friend. Imagine tender strips of juicy chicken coated in a luscious, velvety sauce that’s surprisingly made without any cream or cheese, yet still hits every note of classic Alfredo goodness. The magic comes from wholesome, simple ingredients like almond and coconut milk, nutritional yeast, and a bit of tapioca starch, coming together to create a silky sauce that makes you forget it’s dairy-free. Whether you’re cooking for yourself or feeding a crowd, this recipe will quickly prove that delicious and dairy-free can go hand in hand with ease and style.
Ingredients You’ll Need
The beauty of this recipe lies in its simplicity. Each ingredient is carefully chosen not only to bring flavors that pop but also to create the perfect creamy texture and brilliant color that Alfredo sauce is known for — all without dairy. Here’s what you’ll want on hand to whip this up effortlessly.
- 1 lb boneless, skinless chicken breast: sliced into strips, this is the hearty protein star of the dish.
- 2 tbsp olive oil: essential for browning the chicken and adding richness without butter.
- 1 small onion, finely chopped: adds a delicate sweetness and depth when sautéed.
- 2 cloves garlic, minced: brightens and lifts the sauce with savory aroma.
- 1 cup unsweetened almond milk: provides creaminess with a subtle nuttiness, keeping it light.
- 1 cup unsweetened coconut milk: adds body and a slight natural sweetness that melds perfectly.
- 1/4 cup vegetable or chicken broth: adds savory background flavor and thins the sauce just right.
- 3 tbsp nutritional yeast: the secret umami powerhouse that replaces cheese’s tang.
- 2 tbsp tapioca starch (or cornstarch): thickens the sauce beautifully without clumps.
- 1 tsp Italian seasoning: brings bright herbal notes typical of Alfredo’s Italian roots.
- Salt and pepper to taste: vital for balanced seasoning throughout.
- 1/4 cup dairy-free cheese shreds (optional): for an extra cheesy feel if you like, melty and indulgent.
- 12 oz fettuccine pasta, uncooked: the luxurious vessel for all that sauce, perfectly wide and comforting.
- Fresh parsley, chopped: for a fresh, peppery finish as a garnish.
How to Make Creamy Dairy-Free Chicken Alfredo Recipe
Step 1: Cook the Pasta
Start by cooking your fettuccine pasta according to the package directions until it’s perfectly al dente. Drain it well and set aside, ready to soak up all that heavenly sauce later. This attention to pasta texture is key because it works like a sponge for every creamy bite.
Step 2: Brown the Chicken
Heat the olive oil in a large skillet over medium heat. Add the chicken strips, seasoning them with salt and pepper. Cook for about 5 to 7 minutes until they develop a gorgeous golden crust and are cooked through. Then, remove the chicken from the skillet and set it aside — you’ll bring it back soon, richly coated in sauce.
Step 3: Sauté Onions and Garlic
In the same skillet, toss in the finely chopped onion and cook until it becomes translucent and tender, about 2 to 3 minutes. Next, stir in the minced garlic and cook for another minute. This step layers flavors and builds that sweet, aromatic base for your sauce.
Step 4: Add the Dairy-Free Milks and Broth
Pour in the almond milk, coconut milk, and broth. Stir everything together, setting the stage for your dairy-free Alfredo sauce. These liquids create the creamy foundation that makes this recipe stand out.
Step 5: Thicken and Flavor the Sauce
Sprinkle in the nutritional yeast, tapioca starch, and Italian seasoning, along with a pinch of salt and freshly ground black pepper. Whisk consistently and patiently as the sauce thickens to a luscious, velvety consistency — this usually takes about 4 to 5 minutes. This tactile moment is the reward of home cooking, when your sauce comes to life.
Step 6: Melt in Dairy-Free Cheese (Optional)
If you’re using dairy-free cheese shreds, add them now. Stir until they melt and meld smoothly into the sauce, boosting the cheesy vibe without any dairy guilt.
Step 7: Combine Chicken and Pasta
Return the golden chicken strips to the skillet, stirring to coat them completely in the sauce. Then add your cooked pasta, tossing gently until every strand is luxuriously covered. This harmony of flavors and textures is what makes the dish truly irresistible.
Step 8: Garnish and Serve
Finish by sprinkling chopped fresh parsley over the top. Its bright freshness not only adds a pop of color but also a lovely herbal note to cut through the richness. Now, dig in and enjoy your fabulous Creamy Dairy-Free Chicken Alfredo Recipe!
How to Serve Creamy Dairy-Free Chicken Alfredo Recipe
Garnishes
Fresh parsley is a classic way to garnish, but you can also sprinkle some crushed red pepper flakes for a bit of a spicy kick or a handful of toasted pine nuts to add crunch and a toasty depth. These small touches visually elevate the dish and enhance its flavor personality.
Side Dishes
This dish pairs beautifully with a crisp green salad dressed in lemon vinaigrette to balance the creaminess, or roasted vegetables like broccoli or asparagus, which contribute vibrant color and fresh, earthy notes. Garlic bread made with dairy-free butter is also a fantastic companion to mop up leftover sauce.
Creative Ways to Present
For a fun twist, serve the Alfredo over spiralized zucchini noodles or spaghetti squash for a lighter, grain-free option that still holds the creamy sauce well. You could even plate it in individual warm bowls topped with microgreens or edible flowers to impress guests with its elegance and flair.
Make Ahead and Storage
Storing Leftovers
After enjoying your Creamy Dairy-Free Chicken Alfredo Recipe, store any leftovers in an airtight container in the fridge. It will keep well for 3 to 4 days, allowing you to savor that comfort again in quick, satisfying meals during the week.
Freezing
If you want to freeze the dish, keep the pasta and sauce separate for best results. Store the sauce and cooked chicken in a freezer-safe container for up to 2 months. When ready, thaw overnight in the fridge to maintain that creamy texture when reheating.
Reheating
Reheat gently on the stovetop over low heat, stirring frequently to prevent the sauce from splitting. You might need to add a splash of almond milk or broth to loosen the sauce if it thickens too much. This will bring back that fresh, silky texture like it was just made.
FAQs
Can I use another type of non-dairy milk for this recipe?
Absolutely! While almond and coconut milk work beautifully here, you can substitute with oat or cashew milk as well. Just make sure it’s unsweetened to keep the sauce savory and creamy without any off-flavors.
Is nutritional yeast necessary, and what does it do?
Yes, nutritional yeast is a key ingredient in this Creamy Dairy-Free Chicken Alfredo Recipe. It provides a cheesy, nutty umami flavor that replaces traditional Parmesan, making the sauce taste rich and satisfying without any dairy.
Can I make this recipe gluten-free?
Definitely. Just swap the fettuccine for gluten-free pasta, and you’ll still get all the creamy, comforting flavors. Many gluten-free options hold sauce well, so the dish remains just as delicious.
What can I do if I don’t have tapioca starch?
If tapioca starch isn’t available, cornstarch is a great alternative and will thicken your sauce just as nicely. Use the same amount as stated in the recipe, and whisk well to avoid lumps.
Is this recipe suitable for meal prep?
Yes, this Creamy Dairy-Free Chicken Alfredo Recipe is fantastic for meal prep! It reheats beautifully and keeps well in the fridge, making busy weeknights a breeze while still enjoying a wholesome, comforting meal.
Final Thoughts
There’s something so satisfying about creating a dish that feels indulgent yet aligns with your dietary preferences — and this Creamy Dairy-Free Chicken Alfredo Recipe delivers exactly that. It’s a testament to how plant-based ingredients can be transformed into something truly special, bursting with flavor and texture. So go ahead, give this recipe a whirl; I promise it’ll become one of your go-to favorites for any night craving creamy comfort food without the dairy.
“`
Print
Creamy Dairy-Free Chicken Alfredo Recipe
- Prep Time: 0h 15m
- Cook Time: 0h 25m
- Total Time: 0h 40m
- Yield: 4 servings
- Category: Main Course
- Method: Stovetop
- Cuisine: Italian-American
- Diet: Low Lactose
Description
This Creamy Dairy Free Chicken Alfredo is a delicious, comforting pasta dish that uses a rich dairy-free sauce made from almond and coconut milk, combined with nutritional yeast and tapioca starch for creaminess. Tender chicken breast strips are cooked to perfection and tossed with fettuccine in a flavorful, creamy sauce that’s completely free from dairy products, making it perfect for those with lactose intolerance or dairy allergies.
Ingredients
Chicken and Cooking
- 1 lb (450g) boneless, skinless chicken breast, sliced into strips
- 2 tbsp olive oil
- Salt and pepper to taste
Sauce
- 1 small onion, finely chopped
- 2 cloves garlic, minced
- 1 cup (250ml) unsweetened almond milk
- 1 cup (240ml) unsweetened coconut milk
- 1/4 cup (60ml) vegetable or chicken broth
- 3 tbsp nutritional yeast
- 2 tbsp tapioca starch (or cornstarch)
- 1 tsp Italian seasoning
- Salt and pepper to taste
- 1/4 cup (60g) dairy-free cheese shreds (optional)
Pasta and Garnish
- 12 oz (340g) fettuccine pasta, uncooked
- Fresh parsley, chopped for garnish
Instructions
- Cook the Pasta: Cook the fettuccine pasta according to the package instructions until al dente. Drain and set aside to keep warm.
- Heat Olive Oil: In a large skillet, heat the olive oil over medium heat to prepare for cooking the chicken.
- Cook Chicken: Add the sliced chicken breast to the skillet and season with salt and pepper. Cook for 5-7 minutes, turning occasionally, until the chicken is fully cooked and golden brown. Remove the chicken from the skillet and set aside.
- Sauté Onion: In the same skillet, add the finely chopped onion and sauté for 2-3 minutes until it becomes translucent and soft.
- Add Garlic: Stir in the minced garlic and cook for about 1 minute more until fragrant, being careful not to burn it.
- Add Liquids: Pour in the unsweetened almond milk, unsweetened coconut milk, and vegetable or chicken broth into the skillet. Stir gently to combine the liquids.
- Make the Sauce: Sprinkle in the nutritional yeast, tapioca starch, Italian seasoning, salt, and pepper. Whisk continuously while cooking for 4-5 minutes until the sauce thickens and becomes creamy.
- Add Dairy-Free Cheese (Optional): If using dairy-free cheese shreds, stir them into the sauce and cook until fully melted and incorporated into the sauce.
- Combine Chicken and Sauce: Return the cooked chicken strips to the skillet, stirring to coat them evenly with the creamy sauce.
- Toss Pasta: Add the cooked fettuccine pasta to the skillet and toss everything together carefully until the pasta is well coated and the ingredients are evenly combined.
- Garnish and Serve: Sprinkle chopped fresh parsley over the top as a garnish before serving to add a burst of color and fresh flavor.
Notes
- You can substitute tapioca starch with cornstarch if preferred.
- For a spicier twist, add crushed red pepper flakes during the sauce preparation.
- Use vegetable broth to keep the recipe fully plant-based or chicken broth for added depth of flavor.
- Ensure to stir constantly when thickening the sauce to prevent lumps from forming.
- Leftovers can be stored in the refrigerator for up to 3 days and reheated gently on the stovetop.


