There is something wonderfully comforting about a warm, cinnamon-spiced apple dessert, and this Easy Apple Crisp Recipe hits all the right notes. Perfectly tender apples baked beneath a golden, buttery oat topping create a harmonious blend of textures and flavors that feel like a warm hug on a plate. Whether you’re after a cozy treat for fall evenings or a simple dessert that everyone will love, this recipe is your go-to for ease and deliciousness.
Ingredients You’ll Need
These ingredients are straightforward but essential, each playing a key role in crafting the perfect balance between sweet, tart, and crunchy. From the fresh apples that provide bright, juicy flavor to the buttery oat topping that adds irresistible texture, everything here works in harmony.
- 3 pounds apples (Granny Smith and Pink Lady recommended): A mix of tart and sweet apples adds depth and balance to the filling.
- ½ cup granulated sugar: Sweetens the apples just enough without overpowering their natural flavor.
- 1 tablespoon fresh lemon juice: Brightens the fruit and prevents browning while adding subtle tanginess.
- 1 tablespoon cornstarch: Thickens the apple juices as they bake, creating a luscious filling.
- 2 teaspoons ground cinnamon: Adds warm, inviting spice to the filling.
- ½ cup unsalted butter (or melted coconut oil for vegan option): Creates a richly textured topping with a golden finish.
- 1 cup rolled oats: Provides hearty chewiness and an irresistible rustic crunch.
- 1 cup all-purpose flour (or gluten-free 1:1 flour/almond flour): Binds the topping together and gives it a tender crumb.
- ⅓ cup packed brown sugar: Adds a deep caramel sweetness to the crisp topping.
- 1 teaspoon cinnamon: Infuses the crumble with aromatic spice.
- ¼ teaspoon salt: Enhances and balances all the flavors.
How to Make Easy Apple Crisp Recipe
Step 1: Preheat & Prep
Start by preheating your oven to 350°F (175°C), which sets the perfect temperature for tender apples and golden topping. Lightly grease a 13×9-inch baking dish with cooking spray to ensure easy release after baking.
Step 2: Prepare the Apple Filling
Peel, core, and chop your apples into roughly 1-inch chunks—this size helps them hold some shape but cook through to tender perfection. Mixing different apple varieties like Granny Smith and Pink Lady brings a balance of tartness and sweetness.
Step 3: Combine the Filling Ingredients
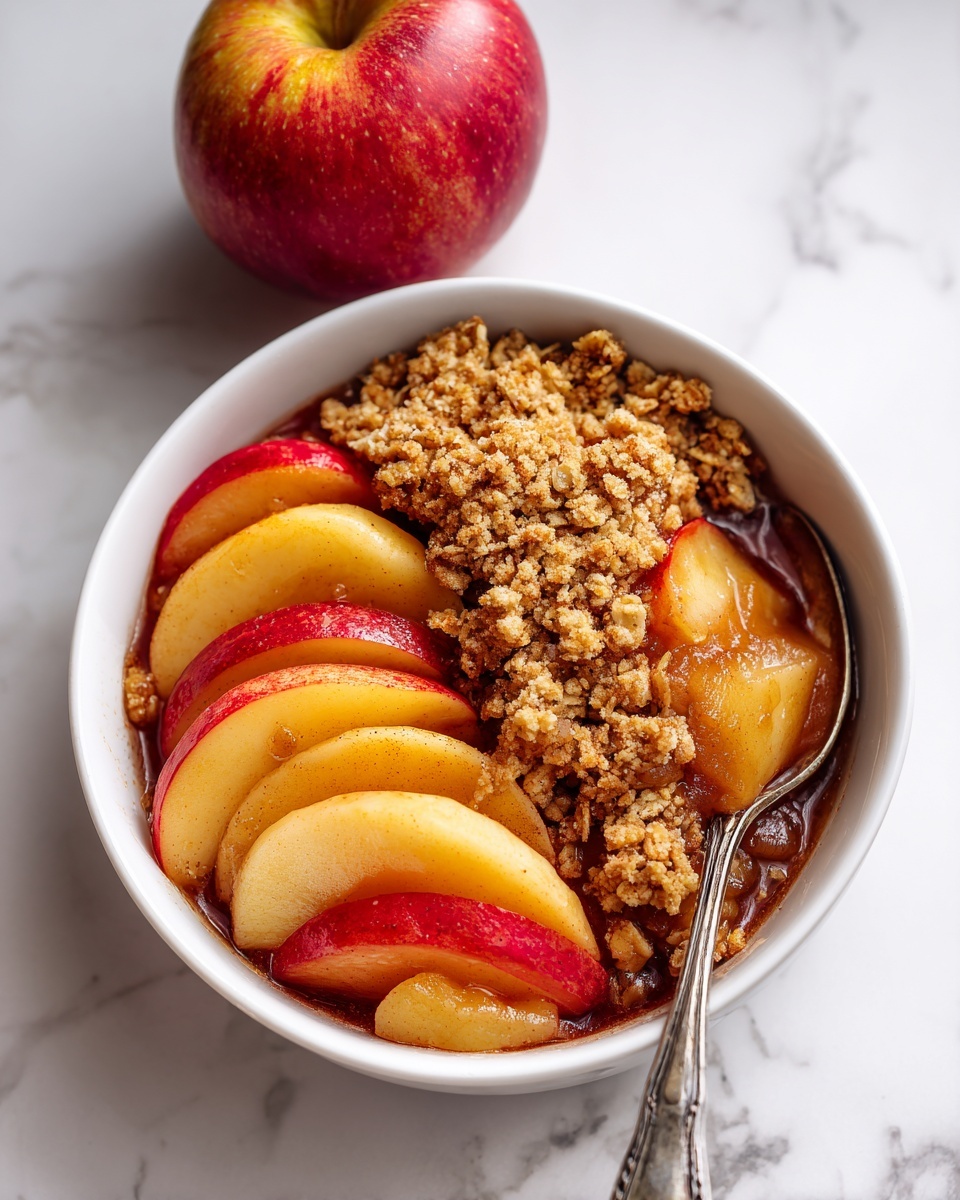
In a large bowl, toss the apple chunks with granulated sugar, fresh lemon juice, cornstarch, and ground cinnamon. This mixture will coat the apples thoroughly, ensuring each bite bursts with classic apple crisp flavor and a thickened, luscious texture after baking.
Step 4: Spread the Filling into the Dish
Evenly spread the apple mixture into the prepared baking dish. Ensuring it’s spread out will help the apples cook evenly and produce a bubbling, golden filling that’s as delicious as it looks.
Step 5: Make the Crisp Topping
Melt the unsalted butter—or coconut oil if you prefer a vegan option—until it’s just liquid. This helps bind the oat and flour mixture together when you mix it later.
Step 6: Mix the Dry Topping Ingredients
In a separate bowl, combine rolled oats, all-purpose flour, brown sugar, cinnamon, and salt. These dry ingredients build the foundation of your crisp topping with a perfect balance of sweetness, spice, and texture.
Step 7: Stir in the Melted Butter
Pour the melted butter into the dry ingredient mix and stir until it forms a crumbly texture. This crumbly topping is what will bake into a satisfyingly crisp and golden blanket over your apples.
Step 8: Assemble and Bake
Evenly sprinkle the crisp topping over the prepared apples in the baking dish. Place it in the oven and bake for 50 to 60 minutes until the topping turns a gorgeous golden brown and the filling is bubbling energetically. If the topping starts to brown too quickly, loosely cover it with foil to prevent burning.
Step 9: Cool & Serve
Once out of the oven, let the apple crisp rest for at least 15 minutes. This pause allows the filling to set slightly for cleaner slices and enhances the flavors. Serve warm to enjoy the full comforting experience.
Step 10: Enjoy!
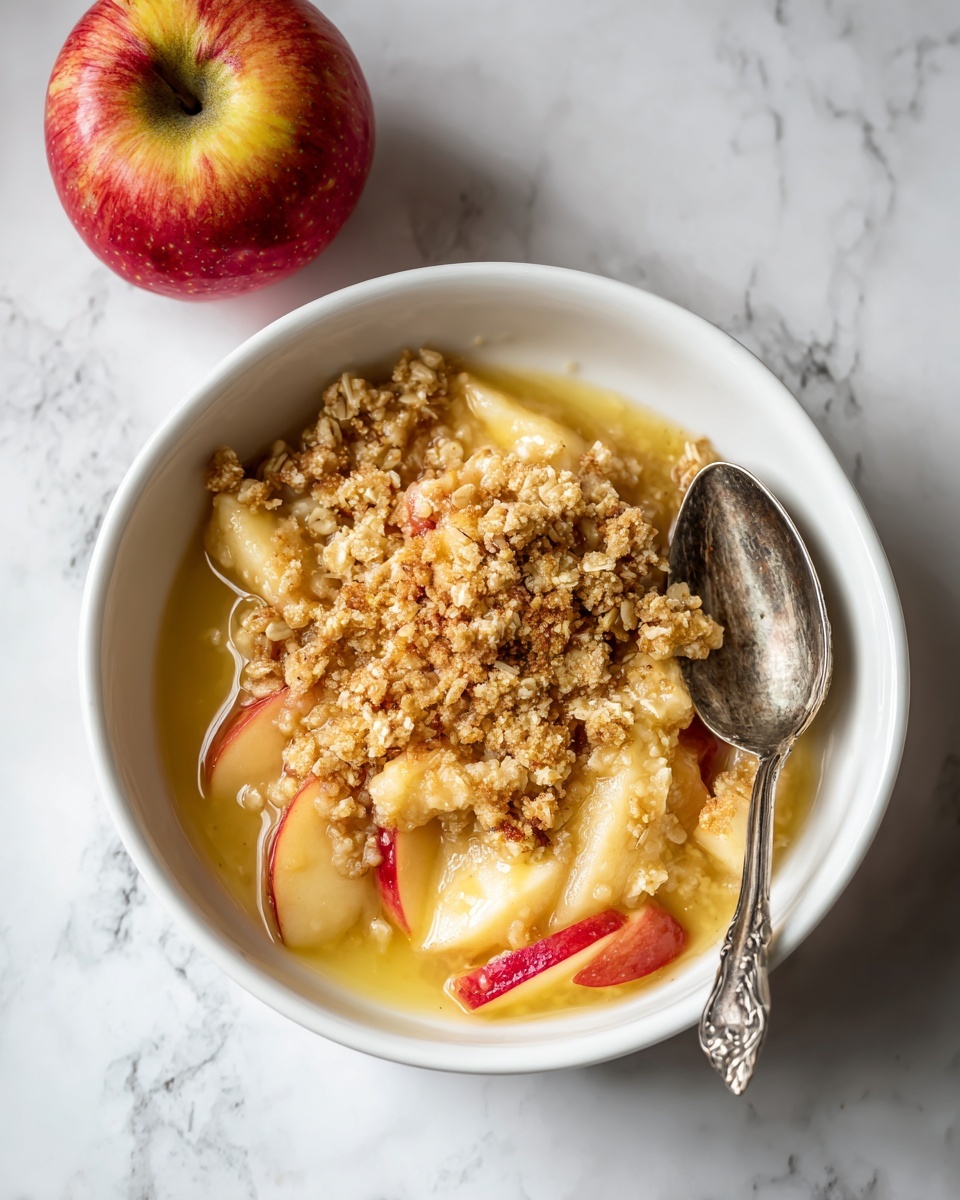
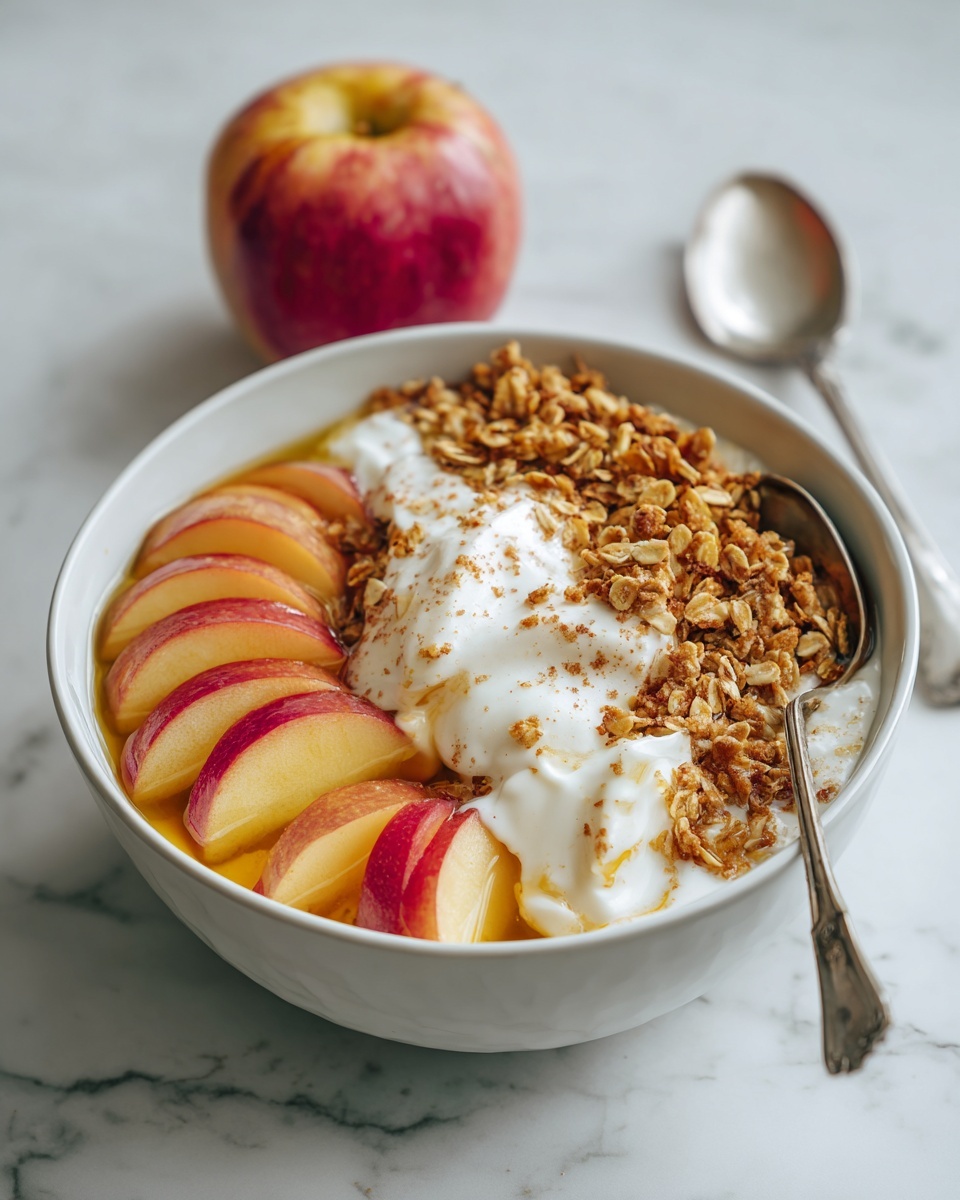
For the ultimate indulgence, serve your apple crisp topped with a scoop of vanilla ice cream, a dollop of whipped cream, or a drizzle of caramel sauce. Each option adds its own luscious surprise to this simple, fulfilling dessert.
How to Serve Easy Apple Crisp Recipe
Garnishes
Sprinkle a little extra cinnamon or toasted chopped nuts over the top right before serving to add a touch of crunch and a beautiful finishing look. A few fresh apple slices or a sprig of mint can bring a refreshing contrast too.
Side Dishes
Easy Apple Crisp pairs wonderfully with a hot cup of coffee or tea for dessert after dinner, or alongside a savory autumnal meal like roasted pork or grilled chicken. It’s a crowd-pleasing dessert that complements many main courses.
Creative Ways to Present
For a fun twist, serve the apple crisp in individual ramekins or mini cast iron skillets to impress guests with a rustic, cozy presentation. Another idea is to stuff it into puff pastry shells for an elegant handheld dessert.
Make Ahead and Storage
Storing Leftovers
Store any leftover apple crisp in an airtight container in the refrigerator for up to 4 days. The flavors actually deepen overnight, making it a delicious next-day treat.
Freezing
You can freeze apple crisp either before or after baking. Cover the unbaked dish tightly with foil and plastic wrap for up to 3 months, or cool baked crisp completely before wrapping and freezing. Just thaw overnight in the fridge before reheating.
Reheating
Reheat apple crisp gently in the oven at 325°F (165°C) for about 20 minutes to bring back the crisp topping and warm, bubbly filling. Avoid microwaving if you want to maintain that wonderful crunchy texture.
FAQs
Can I use other fruits besides apples for this crisp?
Absolutely! Pears, peaches, or berries work beautifully with this crisp topping. Adjust baking times slightly depending on the fruit’s juiciness and softness for best results.
How do I make this recipe vegan?
Simply swap the butter for melted coconut oil or any vegan butter substitute. This keeps the topping rich and crumbly without dairy.
What if I don’t have cornstarch?
You can substitute cornstarch with an equal amount of arrowroot powder or flour. Both will help thicken the apple juices nicely during baking.
Can this recipe be made gluten-free?
Yes! Use a gluten-free 1:1 flour blend or almond flour in place of all-purpose flour, and ensure your oats are certified gluten-free to keep it safe.
Why should I let the apple crisp rest after baking?
Allowing it to rest helps the juices thicken up and prevent the crisp from being too runny when served. It also cools it to a comfortable temperature for enjoying.
Final Thoughts
If you’re craving a dessert that’s simple to prepare yet delivers maximum warmth and comfort, this Easy Apple Crisp Recipe is your new best friend in the kitchen. With its tender apples, crunchy topping, and sweet-spiced aroma, it’s a true classic that never gets old or complicated. Give it a try—you might just find it becomes your go-to recipe for cozy nights and happy gatherings.
Print
Easy Apple Crisp Recipe
- Prep Time: 15 minutes
- Cook Time: 50 minutes
- Total Time: 1 hour 5 minutes
- Yield: 8 servings
- Category: Dessert
- Method: Baking
- Cuisine: American
- Diet: Vegetarian
Description
This Easy Apple Crisp is a comforting and delicious dessert featuring tender cinnamon-spiced apples topped with a buttery, oat-filled crumb topping. It’s perfect for cozy gatherings and simple enough for weeknight treats. The recipe offers flexibility with options for vegan and gluten-free adaptations while maintaining a perfectly golden, crunchy topping.
Ingredients
Apple Filling
- 3 pounds apples (Granny Smith and Pink Lady recommended)
- ½ cup granulated sugar
- 1 tablespoon fresh lemon juice
- 1 tablespoon cornstarch
- 2 teaspoons ground cinnamon
Crisp Topping
- ½ cup unsalted butter (or melted coconut oil for vegan option)
- 1 cup rolled oats
- 1 cup all-purpose flour (or gluten-free 1:1 flour/almond flour)
- ⅓ cup packed brown sugar
- 1 teaspoon cinnamon
- ¼ teaspoon salt
Instructions
- Preheat & Prep: Preheat your oven to 350°F (175°C) and lightly grease a 13×9-inch baking dish with cooking spray to prevent sticking.
- Prepare the Apple Filling: Peel, core, and chop the apples into 1-inch chunks for even cooking and texture.
- Mix Apple Filling: In a large bowl, combine the chopped apples with granulated sugar, fresh lemon juice, cornstarch, and ground cinnamon until the apples are well coated and the mixture is evenly seasoned.
- Spread Apples: Transfer and spread the apple mixture evenly into the prepared baking dish to ensure consistent baking.
- Make the Crisp Topping: Melt the unsalted butter or coconut oil in a small saucepan or microwave, preparing it for mixing with dry ingredients.
- Combine Topping Ingredients: In a separate bowl, mix rolled oats, all-purpose or gluten-free flour, brown sugar, cinnamon, and salt thoroughly.
- Bind Topping: Stir the melted butter or coconut oil into the oat and flour mixture until it forms a crumbly, coarse texture perfect for topping.
- Assemble & Bake: Evenly sprinkle the crisp topping over the apple filling and place the baking dish in the oven.
- Bake: Bake for 50-60 minutes until the topping is golden brown and the apple filling is bubbly. If the topping starts browning too quickly, cover loosely with foil to prevent burning.
- Cool & Serve: Remove from oven and let the apple crisp rest for at least 15 minutes to thicken and cool slightly.
- Enjoy: Serve warm by itself or topped with vanilla ice cream, whipped cream, or caramel sauce for an extra indulgent treat.
Notes
- For a vegan version, substitute unsalted butter with melted coconut oil.
- To make it gluten-free, use a 1:1 gluten-free flour blend or almond flour instead of all-purpose flour.
- Crisp can be stored covered in the refrigerator for up to 3 days and reheated before serving.
- Using a mix of tart and sweet apples like Granny Smith and Pink Lady gives balanced flavor and texture.
- Letting the crisp cool slightly helps the filling set and prevents burns from hot fruit.


