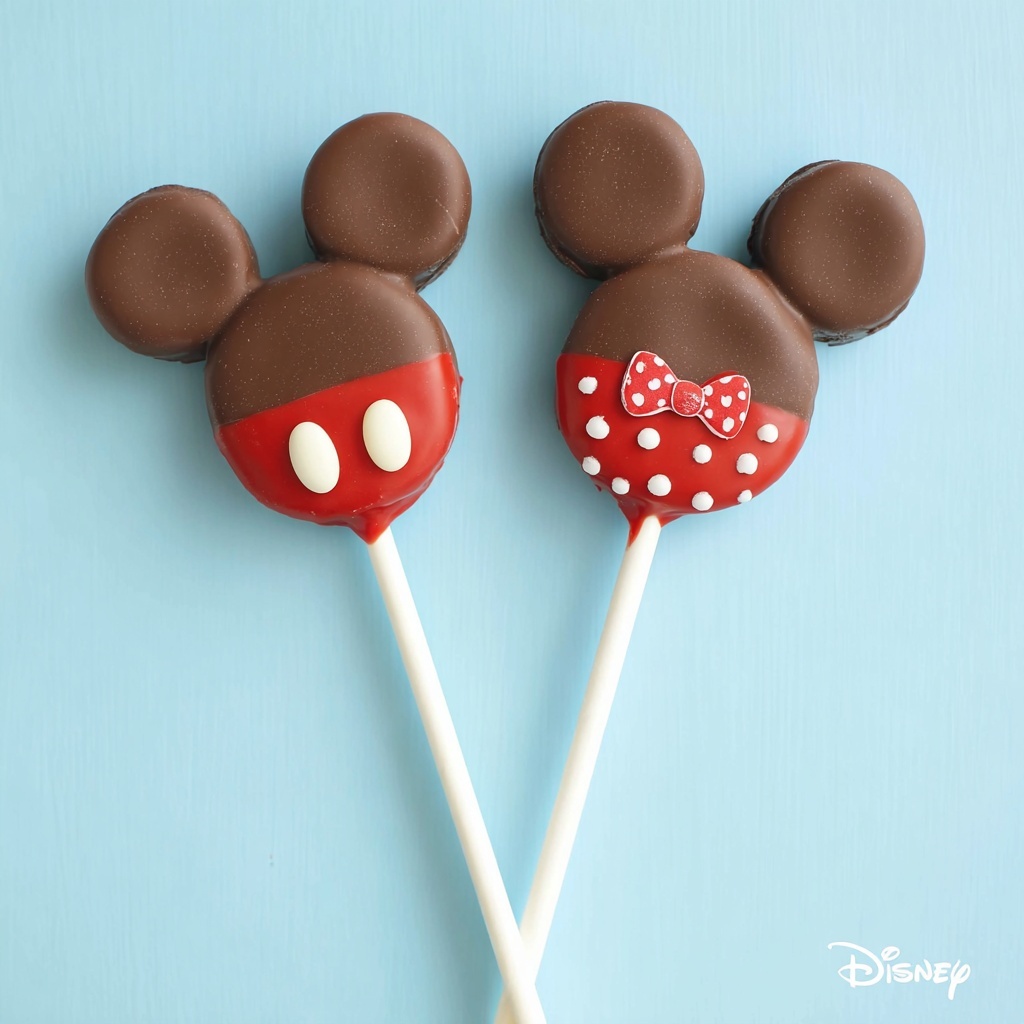
If you are looking for a fun and delightful way to bring a bit of Disney magic into your kitchen, this Easy Mickey and Minnie Mouse Treats Recipe is just the ticket! Combining simple, everyday ingredients with playful design, these treats are perfect for parties, special occasions, or just a cheerful snack that will make everyone smile. The charm of chocolate, the crispness of wafers, and the whimsy of colorful sprinkles come together to create irresistible bites that capture the joyful spirit of Mickey and Minnie Mouse in every nibble.
Ingredients You’ll Need
Gathering your ingredients is the first exciting step to crafting these charming Easy Mickey and Minnie Mouse Treats Recipe. Each item on the list is straightforward but essential, contributing to the perfect balance of texture, flavor, and that signature Disney look.
- 6 Mini Chocolate Moon Pies: Soft, chocolaty treats that form the base of your Mickey and Minnie faces with a luscious marshmallow center.
- 12 Vanilla Wafers: Crisp and sweet, these wafers provide the perfect ears for your characters and add delightful crunch.
- 1 Chocolate Candy Coating: Smooth and melty, this coating is your glue and your canvas, ensuring everything sticks and tastes heavenly.
- 1 Red Chocolate Candy Melts: Bold and vibrant, these melts turn your treats into Minnie-themed creations with their iconic red bows.
- 1 Mini Marshmallows: Soft and pillowy, perfect for creating Minnie’s distinctive bow details or extra accents.
- Assorted Sprinkles: Adds a fun pop of color, texture, and festive flair to your treats—think little dots and heart shapes for that authentic Minnie look.
- Lollipop Sticks: Essential for turning your treats into easy-to-hold, adorable pops that everyone loves to pose with before devouring.
How to Make Easy Mickey and Minnie Mouse Treats Recipe
Step 1: Prepare the Vanilla Wafers
Start by melting your chocolate candy coating according to its package instructions—it should be silky and smooth. Using a fork, dip each vanilla wafer into the melted chocolate, ensuring they are fully coated for maximum flavor and adhesion. Place the coated wafers on wax paper to set; this creates the crisp ears that will hold perfectly on your treats.
Step 2: Coat the Mini Chocolate Moon Pies
Unwrap each Mini Chocolate Moon Pie and melt your red chocolate candy melts. Dip half of each Moon Pie into the red chocolate carefully, which will give you that classic Minnie red dress or Mickey’s iconic color pop. Place these dipped Moon Pies onto wax paper to begin firming up while you prepare the decorations.
Step 3: Create Minnie’s Ears and Bow
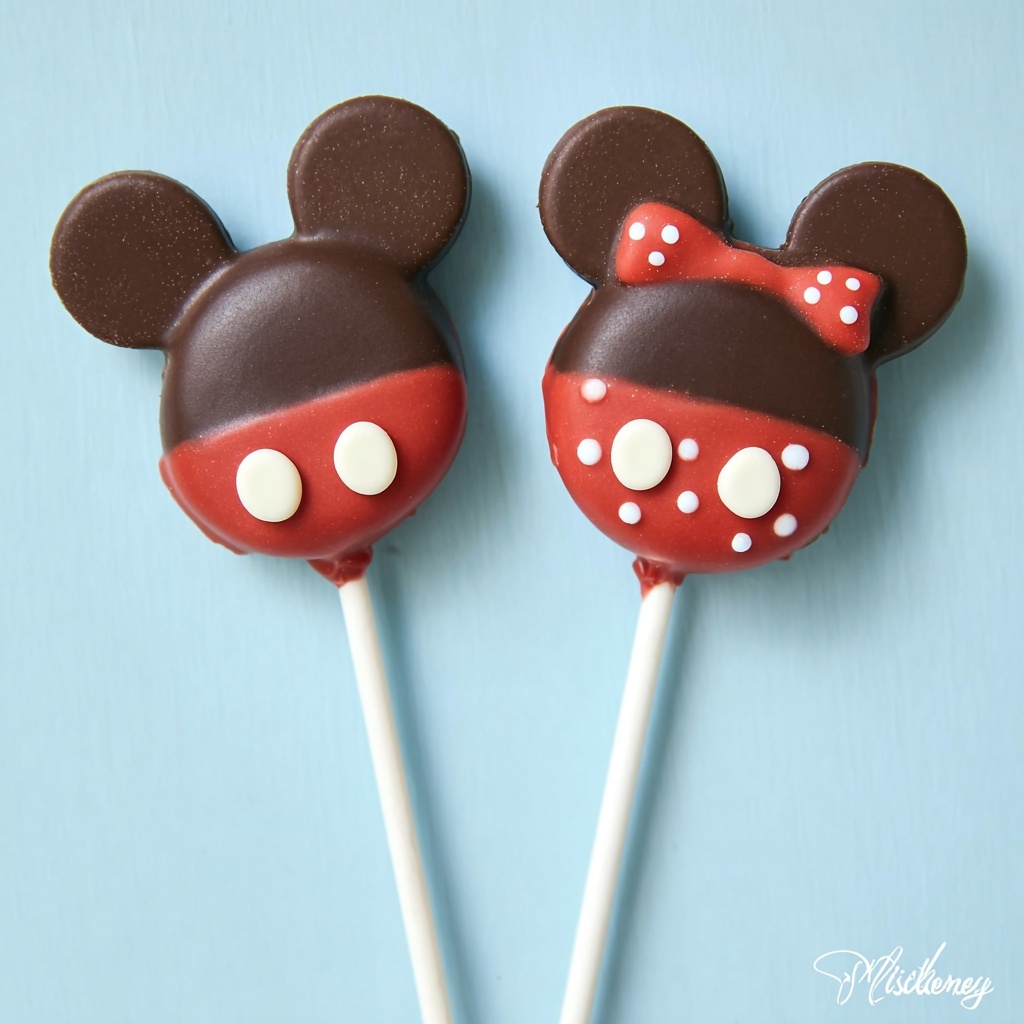
Now for the fun part: cut mini marshmallows in half and gently place two halves onto the red chocolate half of the Moon Pie to form ears or bow accents. Add mini white sprinkles on these marshmallow halves to mimic Minnie’s polka-dot style. For an extra special touch, use two heart-shaped sprinkles to create a bow on the front, securing them carefully with a dab of melted chocolate. This step really brings Minnie to life!
Step 4: Assemble Your Treats on Sticks
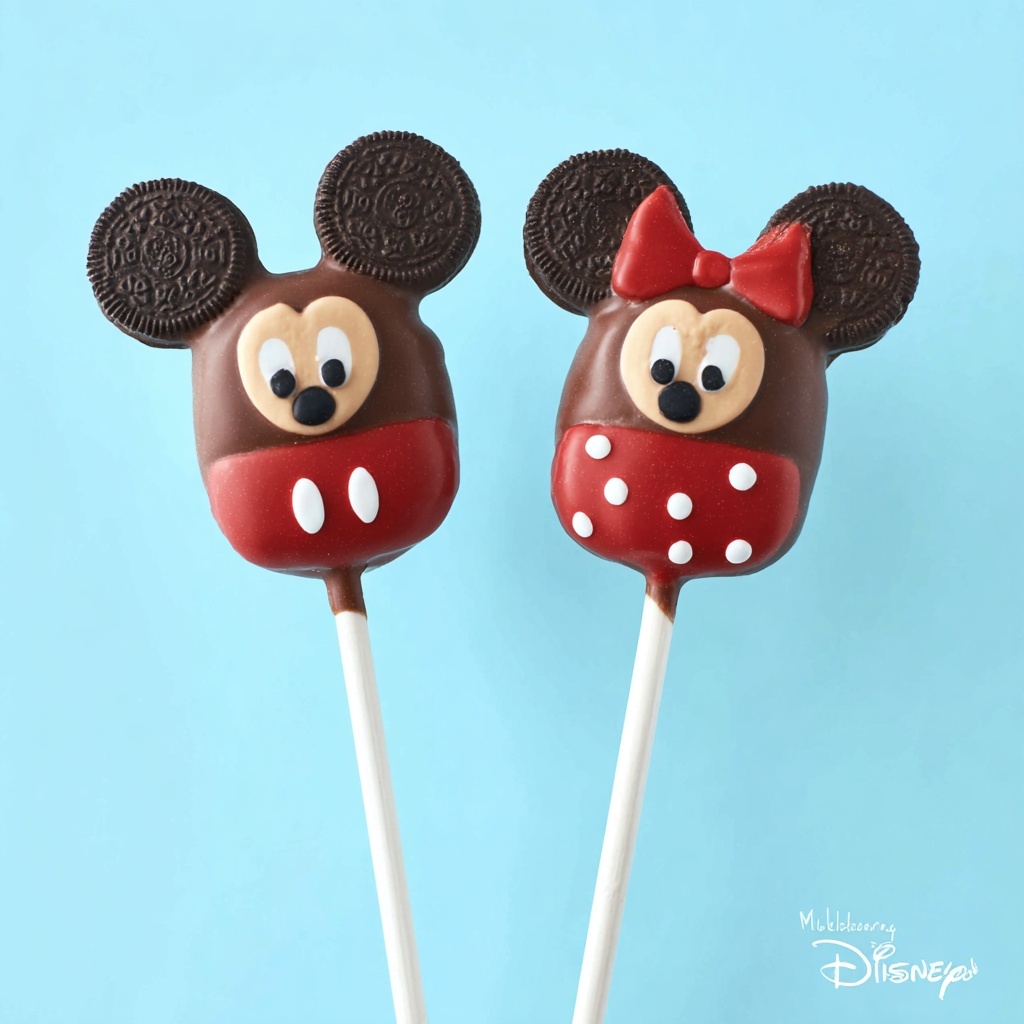
Press a lollipop stick firmly into the bottom of each Moon Pie, making sure it’s inserted well so the treat stays stable. Then, attach the vanilla wafer ears on top, sticking them into the moon pie’s chocolate coating so they adhere nicely. Let your assembled treats sit for about 20 minutes to fully set and firm up before enjoying.
How to Serve Easy Mickey and Minnie Mouse Treats Recipe
Garnishes
Adding the right garnishes elevates these treats from cute to downright enchanting. Consider using additional sprinkles, edible glitter, or even a light dusting of powdered sugar for a magical finish. Small edible pearls can add a touch of elegance to Minnie’s bow, making your presentation pop.
Side Dishes
These treats pair wonderfully with a variety of snacks, including fresh fruit for a burst of refreshing contrast or a simple scoop of vanilla ice cream for a creamy balance. For a party, offer colorful fruit juices or milkshakes to complement the rich chocolate flavors.
Creative Ways to Present
Serving these treats on a themed platter lined with red and white checkered paper instantly amps up the Disney feel. You could also create a display using a small stand or arrange them in a Mickey-shaped formation to wow your guests visually before they even take a bite.
Make Ahead and Storage
Storing Leftovers
If you have any leftover Easy Mickey and Minnie Mouse Treats Recipe goodies, store them in an airtight container at room temperature. They will stay fresh for up to two days, retaining their crispness and melt-in-your-mouth charm.
Freezing
For longer storage, wrap each treat individually in plastic wrap and freeze them in a sealed box. When ready to eat, thaw in the refrigerator for a couple of hours to preserve texture and flavor without moisture build-up.
Reheating
Reheating is not necessary, but if you prefer your treats a little softer, allow them to come to room temperature naturally, or warm very gently in a microwave for just 5 seconds at a time to avoid melting the decorations.
FAQs
Can I use different types of cookies instead of vanilla wafers?
Absolutely! While vanilla wafers offer the perfect size and texture for ears, you can experiment with thin graham crackers or even sugar cookies cut into circles for a unique twist.
Is it necessary to use lollipop sticks?
The sticks make these treats easy to hold and help with presentation, but if you prefer, you can serve them without sticks on a plate or in cupcake liners for a more traditional snack style.
Can I substitute the red candy melts with another color?
Definitely! While red is perfect for Minnie, you can have fun with other colors like blue or pink to personalize your treats for different occasions or characters.
How long do these treats take to set?
Typically, the chocolate coatings will need about 15 to 20 minutes to fully set at room temperature, but you can speed this up by placing them in the refrigerator for about 10 minutes.
Are these treats allergen friendly?
This recipe contains common allergens like milk, wheat, and soy in the cookies and candy coatings. Always check ingredient labels if you have specific allergies and consider suitable substitutions.
Final Thoughts
Whipping up this Easy Mickey and Minnie Mouse Treats Recipe is like a little celebration in your kitchen, bringing joy not just through taste but by sparking smiles and nostalgia. Whether you’re making these for a kids’ party, a themed gathering, or just because you adore those iconic ears, these treats will not disappoint. So grab your ingredients, get creative, and enjoy every magical bite!
Print
Easy Mickey and Minnie Mouse Treats Recipe
- Prep Time: 10 minutes
- Cook Time: 0 minutes
- Total Time: 30 minutes
- Yield: 6 treats
- Category: Dessert
- Method: No-Cook
- Cuisine: American
Description
These Easy Minnie and Mickey Mouse Treats are adorable, no-bake snacks perfect for parties or themed celebrations. Using mini chocolate moon pies, vanilla wafers, and candy melts, these fun treats are decorated with marshmallows and sprinkles to resemble the iconic Disney characters. They’re simple to assemble, requiring no oven time, making them perfect for a quick and delightful dessert that kids and adults will love.
Ingredients
Main Ingredients
- 6 Mini Chocolate Moon Pies
- 12 Vanilla Wafers
- 1 cup Chocolate Candy Coating (for dipping wafers and assembling)
- 1 cup Red Chocolate Candy Melts
- 6 Mini Marshmallows (cut in half)
- Assorted Sprinkles (mini white sprinkles for Minnie, 2 heart-shaped sprinkles for bows)
- 6 Lollipop Sticks
Instructions
- Melt Chocolate Coating: Melt the chocolate candy coating as per package instructions. Using a fork, dip each vanilla wafer into the melted chocolate to coat them evenly. Place the coated wafers on wax paper and allow them to set for approximately 15 minutes so the chocolate hardens.
- Prepare Moon Pies: Unwrap the mini chocolate moon pies. Melt the red chocolate candy melts according to the package directions. Dip half of each mini moon pie into the melted red chocolate, then place them onto wax paper to begin setting.
- Decorate with Marshmallows and Sprinkles: Using kitchen scissors, cut each mini marshmallow in half. Press two halves into the front side of the red chocolate-coated moon pies to represent ears. For Minnie Mouse treats, add mini white sprinkles onto the red chocolate for added detail, and attach two heart-shaped sprinkles to form a bow secured with a dab of melted chocolate.
- Assemble Treat Pops: Insert a lollipop stick into the bottom of each moon pie. Attach two of the previously coated vanilla wafers on top to mimic the character’s ears, securing them with melted chocolate. Place the assembled treats back on wax paper and let them set fully for about 20 minutes before serving.
Notes
- Use wax paper for easy removal of treats after chocolate sets.
- You can substitute the mini marshmallows with any small white candies if preferred.
- Ensure chocolate coatings are fully melted but not overheated to prevent seizing.
- Allow treats to set in a cool, dry place to ensure the chocolate hardens properly.
- Store in an airtight container at room temperature for up to 2 days.


