
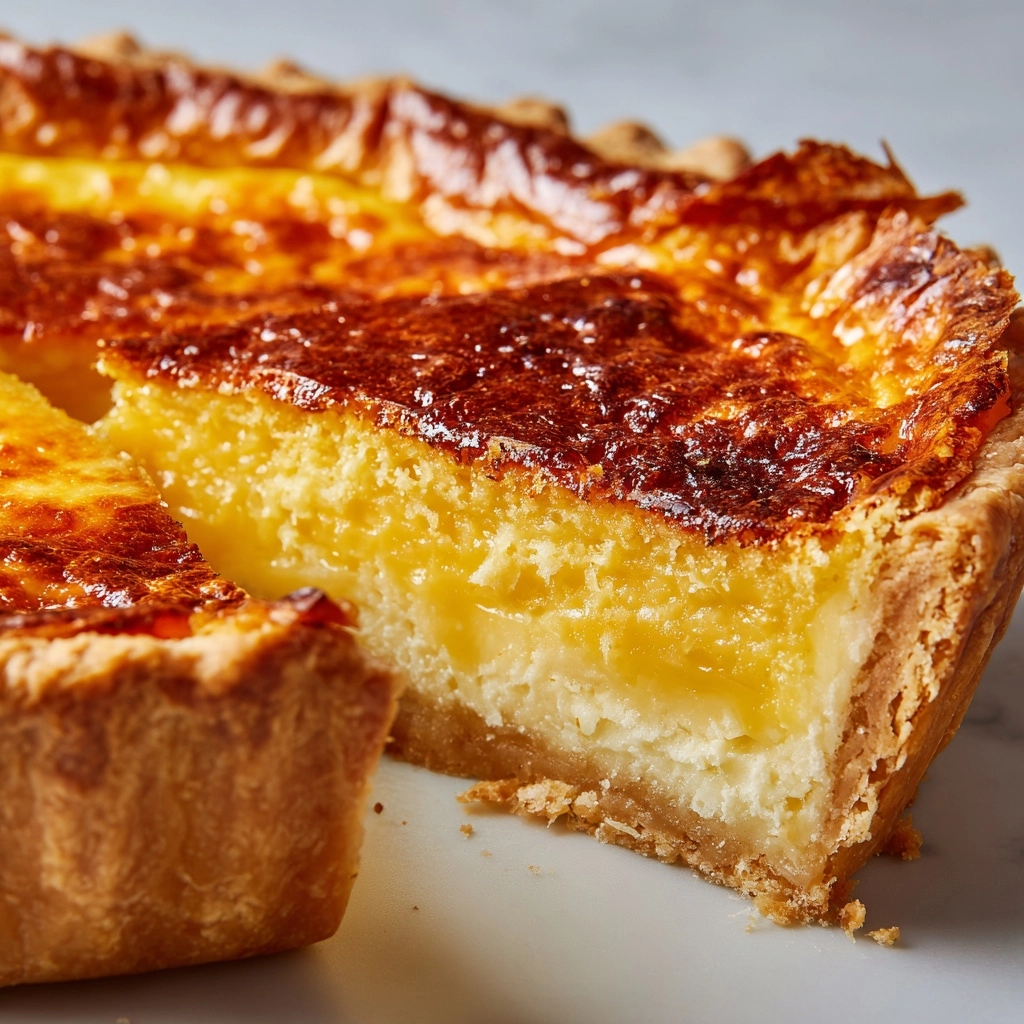
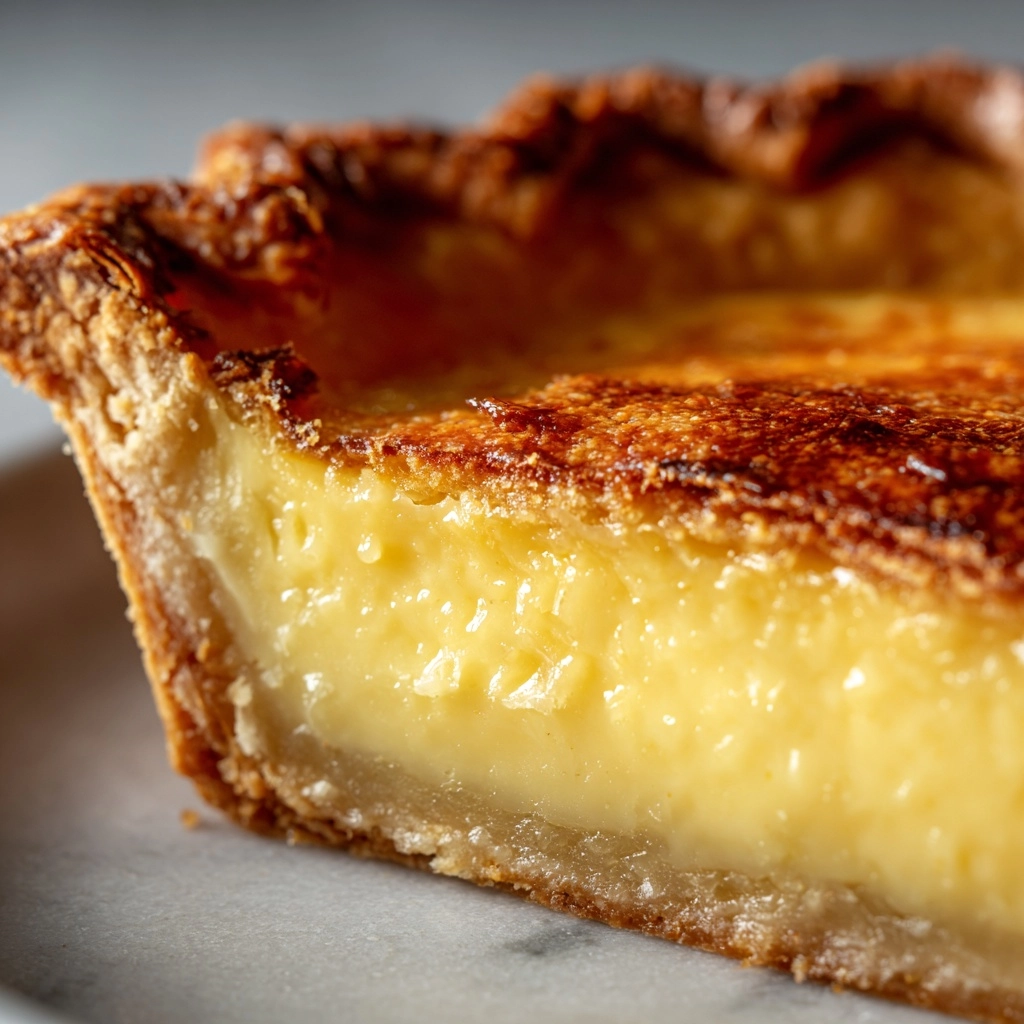
If you’re on a quest for the flakiest, most buttery pie crust that will quickly become a cherished family tradition, your search ends here: Grandmother’s Pie Crust. This recipe captures all the charm and nostalgia of those picture-perfect pies cooling on a windowsill, yet it couldn’t be simpler to master at home. With just a handful of everyday ingredients transformed through classic technique, you’ll create a crust that’s melt-in-your-mouth tender and destined to make every pie the star of the table—all with the comfort of knowing you’re carrying on a time-honored tradition.
Ingredients You’ll Need
Just four humble staples stand between you and Grandmother’s Pie Crust perfection. Each ingredient plays a crucial role in creating the exquisite texture, golden color, and buttery richness that define this cherished recipe.
- All-purpose flour: The sturdy foundation, providing just the right structure while staying beautifully tender in every bite.
- Salt: Don’t underestimate this! A teaspoon brings all the flavors to life, balancing sweetness or savoriness in your finished pie.
- Cold unsalted butter: The secret to rich, flaky layers—cut this into tiny cubes and keep everything as cold as possible.
- Ice water: With just a few spoonfuls, ice-cold water helps the dough come together without sacrificing that light, melt-away quality.
How to Make Grandmother’s Pie Crust
Step 1: Bring Your Ingredients Together
Start by whisking your flour and salt together in a big, roomy bowl—this simple mix ensures the salt is evenly distributed throughout. Don’t rush this step! It sets the stage for an even, flavorful Grandmother’s Pie Crust.
Step 2: Cut in the Butter
Add the cold, cubed butter to the bowl. This is where the magic begins: Use a pastry cutter or your fingertips to quickly work the butter into the flour, aiming for a crumbly texture with a few pea-sized bits of butter left. These visible butter pieces ensure the crust bakes up with lovely flaky layers, just like Grandmother’s kitchen always promised.
Step 3: Add Ice Water Gradually
Sprinkle the ice water in one tablespoon at a time. Gently mix with a fork after each addition, stopping as soon as the dough starts to come together and holds together when pinched. It’s perfectly normal if some floury spots remain; resisting the urge to over-mix keeps your crust wonderfully tender.
Step 4: Shape and Chill the Dough
Turn the dough out and gently divide it in half. Shape each portion into a disc—this makes it easier to roll out later—then wrap tightly in plastic wrap. The dough needs a good chill in the fridge for at least an hour so the butter can firm up and the flour fully hydrates, guaranteeing Grandmother’s Pie Crust bakes up golden and crisp.
Step 5: Roll Out and Get Baking
When it’s pie time, unwrap your chosen disc and let it sit at room temperature just until it’s pliable (usually about five minutes). Roll it out on a lightly floured surface to fit your pie dish. Patch any little tears with a gentle press and revel in the anticipation—the perfect vessel for your favorite pie fillings is ready and waiting!
How to Serve Grandmother’s Pie Crust
Garnishes
Bring your pie to life with thoughtful finishing touches—brushing a bit of cream or egg wash over the crust before baking creates that glossy, golden finish. For extra sparkle and a delightful crunch, sprinkle a little coarse sugar on top if you’re making a fruit or sweet pie. Decorative cutouts from leftover dough are not only adorable but also showcase just how special homemade pie can be.
Side Dishes
Grandmother’s Pie Crust is a showstopper on its own, but pairing it with homemade whipped cream, rich vanilla ice cream, or even a dollop of crème fraîche lets the crust’s buttery layers really shine. If you’re serving a savory pie, consider a crisp green salad with a bright vinaigrette or creamy mashed potatoes for the perfect cozy meal.
Creative Ways to Present
Don’t limit yourself to traditional round pies. Try baking mini hand pies, rustic galettes, or charming tartlets—each one a loving showcase for the tender layers of Grandmother’s Pie Crust. Even small twists, like weaving a lattice top or playing with different crimped edges, make every dessert feel like a special occasion.
Make Ahead and Storage
Storing Leftovers
If you find yourself with leftover dough or baked crust, simply wrap it tightly in plastic wrap and refrigerate for up to three days. Tucking it in an airtight container keeps it from drying out or picking up flavors from the fridge—handy for those spontaneous pie cravings!
Freezing
One of my favorite tricks is to double up and freeze extra discs of Grandmother’s Pie Crust. Wrap the discs well, store them in a freezer bag, and they’ll be waiting for you for up to two months. For best results, thaw the dough in the refrigerator overnight before rolling out and baking.
Reheating
If you’re reheating a baked pie, pop it into a moderate oven (about 350°F) for 10 to 15 minutes until the crust is refreshed and as flaky as when it first came out. Cover the edges loosely with foil if needed to prevent over-browning while the filling heats through.
FAQs
Can I use salted butter instead of unsalted?
Absolutely! If you only have salted butter on hand, just reduce the added salt in the recipe a little to balance things out. Your Grandmother’s Pie Crust will still be rich and delicious.
What if I don’t have a pastry cutter?
No problem at all—your fingertips work beautifully, or you can use two butter knives in a criss-cross motion. The goal is to keep those butter pieces cold and well distributed for ultimate flakiness.
How do I know when the dough has enough water?
When the dough just begins to come together and holds when you pinch some between your fingers, you’ve got it right. Too much water can make the crust tough, so use a light hand and add water gradually.
Why does the dough need to be chilled before rolling?
Chilling relaxes the gluten and re-solidifies the butter, resulting in a Grandmother’s Pie Crust that rolls out smoothly and bakes up extra flaky. It also makes the dough easier to handle, so don’t skip this crucial step.
Can I make Grandmother’s Pie Crust ahead of time?
Yes! The dough discs can be kept chilled for a few days or frozen for up to two months. This makes Grandmother’s Pie Crust the ultimate make-ahead treat and a lifesaver during the holidays or whenever pie inspiration strikes.
Final Thoughts
Every bite of Grandmother’s Pie Crust is a taste of cozy tradition, ready to transform any pie into a masterpiece. Whether you’re baking for a special occasion or just because, I can’t wait for you to experience firsthand how easy and rewarding it is to make this legendary pie crust at home.
Print
Grandmother’s Pie Crust Recipe
- Prep Time: 15 minutes
- Cook Time: 0 minutes
- Total Time: 15 minutes (plus chilling)
- Yield: 2 pie crusts
- Category: Baking
- Method: No-Bake (before filling)
- Cuisine: American
- Diet: Vegetarian
Description
Learn how to make a classic and flaky Grandmother’s Pie Crust from scratch. This buttery crust is perfect for both sweet and savory pies, and it comes together easily with just a few simple ingredients.
Ingredients
Dry Ingredients:
- 2 1/2 cups all-purpose flour
- 1 teaspoon salt
Wet Ingredients:
- 1 cup cold unsalted butter, cubed
- 6–8 tablespoons ice water
Instructions
- Mix Dry Ingredients: In a large mixing bowl, whisk together the flour and salt.
- Add Ice Water: Add the ice water, one tablespoon at a time, mixing gently with a fork until the dough begins to come together and hold when pinched.
- Roll Out and Use: When ready to use, let the dough sit at room temperature for a few minutes to soften slightly, then roll out on a lightly floured surface to fit your pie dish.
Add the cold, cubed butter and use a pastry cutter or your fingers to cut the butter into the flour until the mixture resembles coarse crumbs with some pea-sized pieces remaining.
Do not overwork the dough. Divide the dough in half, shape each half into a disc, and wrap tightly in plastic wrap. Chill in the refrigerator for at least 1 hour before rolling out.
Notes
- For extra flakiness, keep all ingredients cold and handle the dough as little as possible.
- This recipe makes enough for two 9-inch pie crusts.
- The dough can be frozen for up to 2 months—thaw in the fridge overnight before using.
Nutrition
- Serving Size: 1/8 of crust
- Calories: 210
- Sugar: 0g
- Sodium: 160mg
- Fat: 15g
- Saturated Fat: 9g
- Unsaturated Fat: 5g
- Trans Fat: 0g
- Carbohydrates: 16g
- Fiber: 1g
- Protein: 2g
- Cholesterol: 40mg

