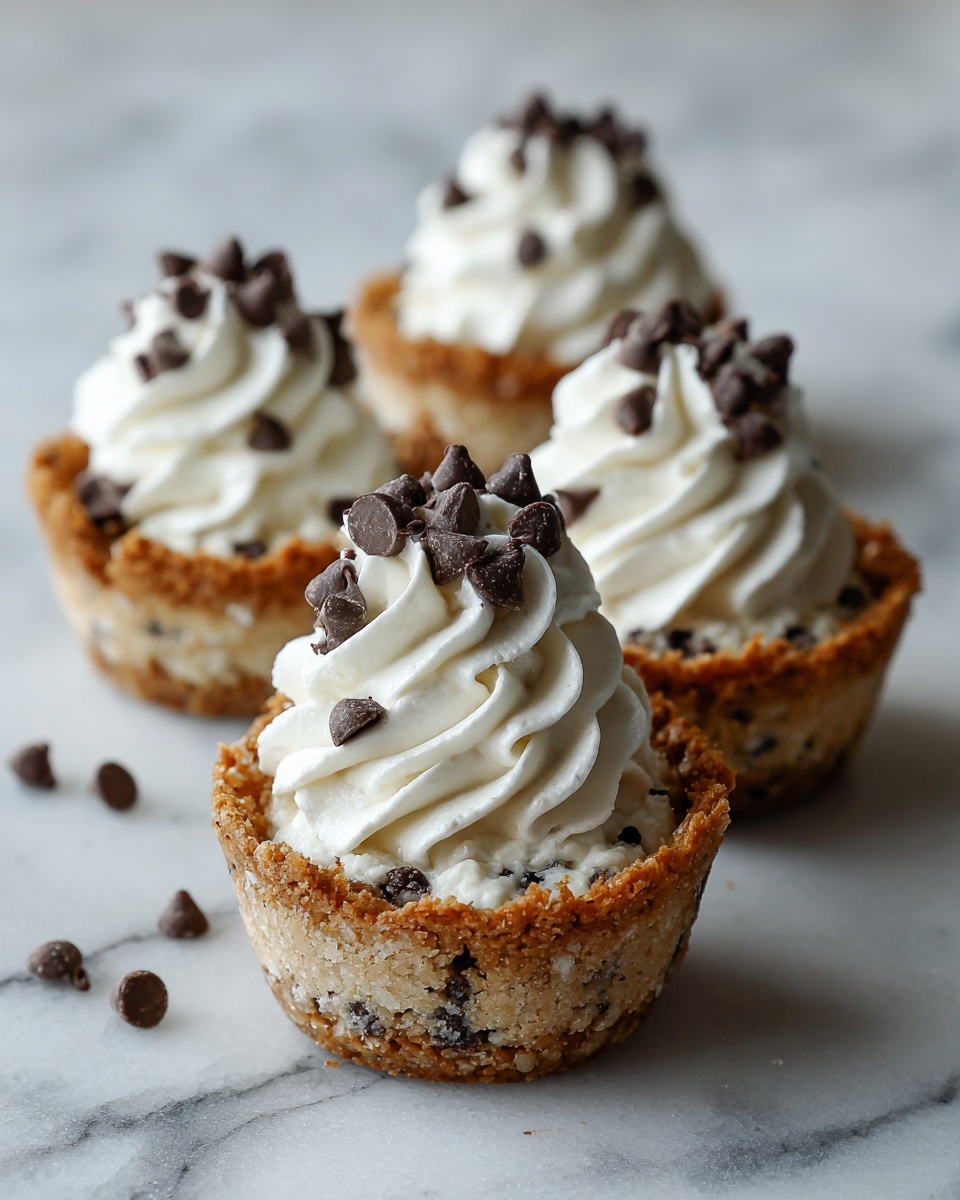
If you’re in the mood for a delightful treat that’s both charming and bursting with flavor, this Mini Cannoli Cups Recipe is your new best friend in the kitchen. These bite-sized wonders combine the crisp, golden crust of mini pie shells with a luscious, creamy ricotta filling that is lightly sweetened and spiced with citrus zest and vanilla. Perfect for parties, dessert tables, or simply a fun twist on a classic cannoli, these little cups deliver a satisfying crunch followed by a smooth, decadent finish that will have everyone coming back for more.
Ingredients You’ll Need
The magic of the Mini Cannoli Cups Recipe lies in its straightforward but thoughtfully chosen ingredients. Each component plays a crucial role, from the flaky pie crust that forms the perfect vessel for the filling to the ricotta cheese that adds rich creaminess. Together, these simple ingredients create an irresistible treat that looks sophisticated but comes together with ease.
- Whole-milk ricotta cheese: The heart of the filling, offering a creamy, slightly tangy base that’s perfectly rich.
- Powdered sugar (1/2 cup): Gently sweetens the ricotta without any graininess, keeping the filling smooth.
- Granulated sugar (2 tablespoons): Adds a touch of texture and sweetness to the crust’s seasoning.
- Finely grated orange or lemon zest (1 teaspoon): Brings a refreshing brightness that enhances the overall flavor.
- Vanilla extract (1/2 teaspoon): Infuses warmth and depth to the creamy filling.
- Refrigerated pie crusts (1 box, 2 count): Provides the crisp, golden miniature shells that hold all the deliciousness.
- Turbinado sugar (3 tablespoons): Used to sprinkle on the dough, it caramelizes and adds a lovely crunch.
- Ground cinnamon (1 teaspoon): Adds a subtle spice that perfectly complements the sweetness.
- Miniature semisweet chocolate chips or finely chopped pistachios (1/4 cup): For garnish, bringing a delightful contrast in texture and flavor.
- Additional powdered sugar: A finishing touch for dusting that elevates the presentation and taste.
How to Make Mini Cannoli Cups Recipe
Step 1: Preheat and Prepare
Start by preheating your oven to 425°F. This high heat will ensure that the pie crust cups bake quickly to a beautiful golden-brown crispness, the very foundation that makes these mini cannoli so irresistible.
Step 2: Roll and Season the Dough
Lightly flour your work surface and unroll the refrigerated pie crusts carefully. Sprinkle the dough generously with turbinado sugar and ground cinnamon, then gently roll over it with a rolling pin. This step presses the flavorful sugars right into the dough, setting up a sweet, spiced crunch in every bite.
Step 3: Cut and Shape the Mini Cups
Using a 2½-inch cookie cutter, punch out rounds from the dough. Press each round firmly into the cups of an ungreased mini muffin pan. If you run short, simply gather your scraps, roll again, and cut more rounds to ensure you make a full 48 cups. This shaping is what creates those perfect tiny cannoli shells ready to be filled.
Step 4: Bake and Cool
Bake the shaped dough for about 10 minutes or until they turn a gorgeous golden color. Once baked, allow them to cool completely in the pan before transferring to a wire rack; this is key to keeping their crisp texture intact.
Step 5: Whip the Filling
While the shells cool, beat together the whole-milk ricotta, powdered sugar, granulated sugar, citrus zest, and vanilla extract until the mixture is smooth and creamy. For easy filling later, spoon the mixture into a zip-top bag and refrigerate until needed.
Step 6: Fill and Garnish
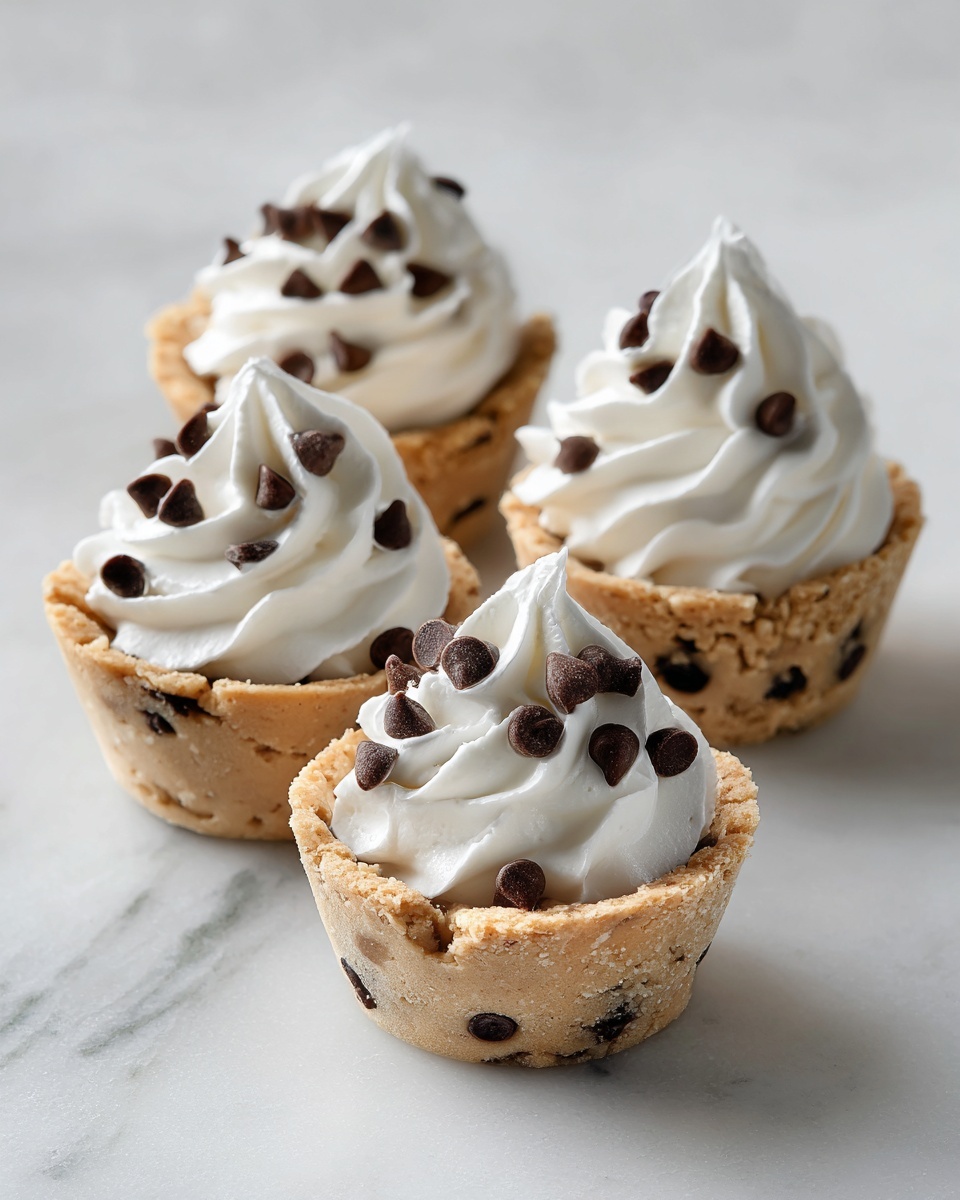
When ready to serve, snip a corner off the refrigerated bag and pipe the luscious ricotta mixture into each cooled cannoli cup. Finish by sprinkling mini chocolate chips or chopped pistachios on top and dusting with a little powdered sugar for that classic look and extra pop of sweetness.
How to Serve Mini Cannoli Cups Recipe
Garnishes
While the classic garnishes of mini chocolate chips or chopped pistachios are delicious, you can also play around with toasted coconut flakes, fresh berries, or even a drizzle of melted chocolate. These finishing touches add contrast and elevate the mini cannoli cups from simple to spectacular.
Side Dishes
Serve your mini cannoli cups alongside fresh fruit platters, espresso, or a light Moscato wine to balance their sweetness. They also pair wonderfully with a scoop of gelato or a dollop of whipped cream for a decadent dessert spread.
Creative Ways to Present
These mini cannoli cups look fantastic arranged on a tiered serving tray or scattered across a marble slab dusted with powdered sugar. For festive occasions, place edible flowers around them or present in individual mini dessert glasses for a modern twist.
Make Ahead and Storage
Storing Leftovers
You can keep any leftover mini cannoli cups in an airtight container in the refrigerator for up to 2 days. To avoid the crust becoming soggy, it’s best to store the shells and filling separately and fill just before serving.
Freezing
It’s not recommended to freeze the filled mini cannoli cups since the moisture in the filling can affect the crispness and texture. However, you can freeze the baked shells alone for up to one month. Thaw completely before filling and serving.
Reheating
If your shells have lost a bit of their crunch, pop them in a 350°F oven for 3-5 minutes to freshen them up before filling. Avoid reheating filled cups as the filling is best served chilled and fresh.
FAQs
Can I use low-fat ricotta cheese for this recipe?
While you can substitute low-fat ricotta, the texture may be less creamy and the flavor not as rich. Whole-milk ricotta provides the best results for that luscious filling.
Is it okay to make the filling a day ahead?
Absolutely! Making the filling a day ahead actually allows the flavors to meld beautifully. Just keep it refrigerated and give it a quick whisk before piping into the cups.
Can I make the crust from scratch instead of using refrigerated pie crusts?
Yes, homemade pie crust works wonderfully if you prefer. Just make sure it’s rolled thin and baked as directed to achieve the right crispness.
What if I don’t have a 2½-inch cookie cutter?
No worries! You can use a similarly sized glass or a small bowl rim to cut out your rounds, just make sure they fit well in your mini muffin pan cups.
Can I substitute pistachios with another nut?
Definitely! Chopped almonds, walnuts, or even hazelnuts make great alternatives if you want a different crunch and flavor profile.
Final Thoughts
There’s something truly special about sharing little bites of joy, and this Mini Cannoli Cups Recipe brings that joy in every creamy, crunchy mouthful. Whether for a festive gathering or a sweet indulgence at home, these tiny treats are sure to delight every sweet tooth. Give them a try—you’ll find they become your go-to recipe whenever you want something quick, impressive, and utterly delicious.
Print
Mini Cannoli Cups Recipe
- Prep Time: 20 minutes
- Cook Time: 10 minutes
- Total Time: 30 minutes
- Yield: 48 servings
- Category: Dessert
- Method: Baking
- Cuisine: Italian-American
- Diet: Vegetarian
Description
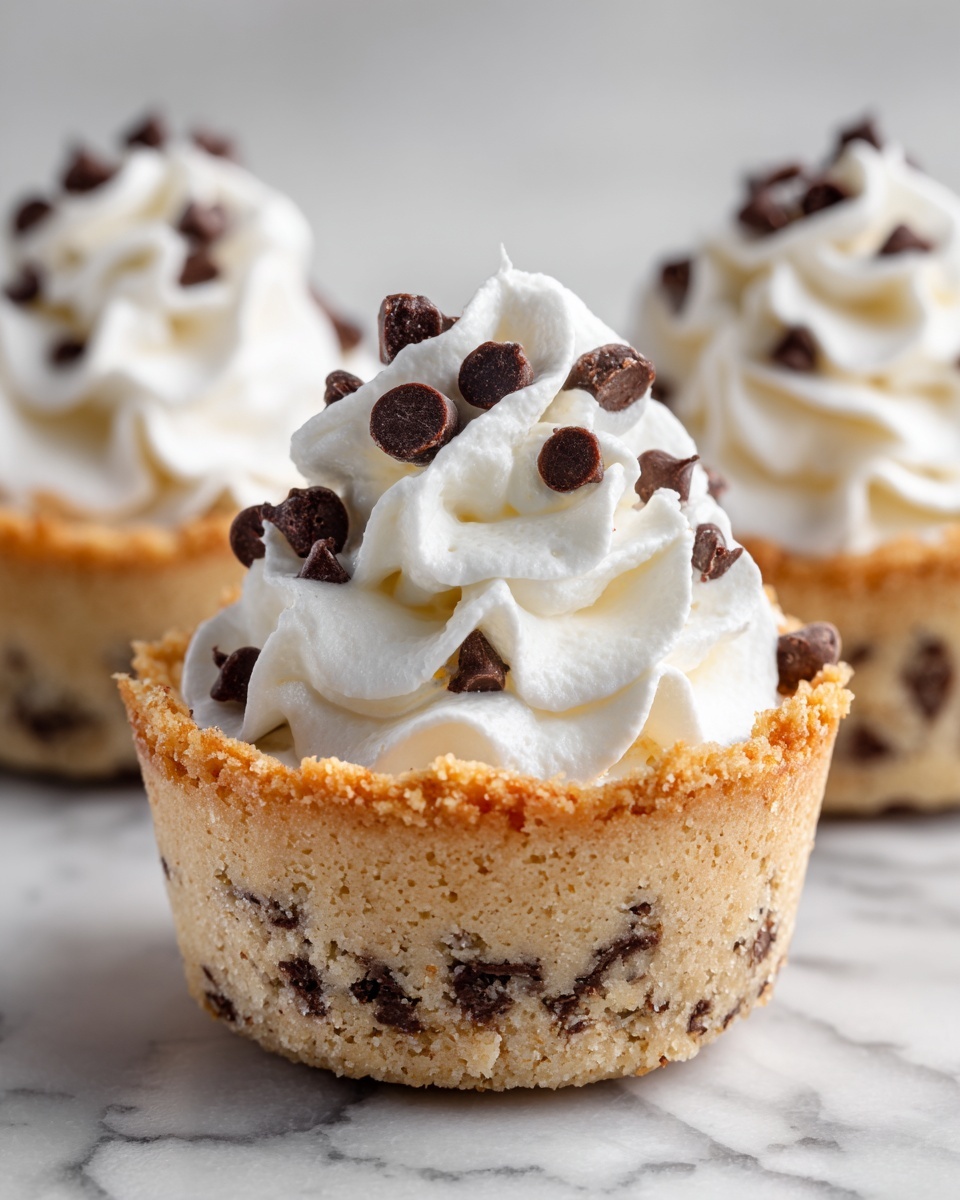
Mini Cannoli Cups are delightful bite-sized desserts featuring a crispy, cinnamon-sugar coated pie crust shell filled with a creamy, ricotta-based filling infused with citrus zest and vanilla. Topped with miniature chocolate chips or chopped pistachios and a dusting of powdered sugar, these treats are perfect for parties or elegant gatherings.
Ingredients
For the Filling
- 1 container (15 oz) whole-milk ricotta cheese
- 1/2 cup powdered sugar
- 2 tablespoons granulated sugar
- 1 teaspoon finely grated orange or lemon zest
- 1/2 teaspoon vanilla extract
For the Cups
- 1 box (2 count) refrigerated pie crusts, softened as directed on box
- 3 tablespoons turbinado sugar (raw sugar)
- 1 teaspoon ground cinnamon
For Garnish
- 1/4 cup miniature semisweet chocolate chips or finely chopped pistachios
- Additional powdered sugar for dusting
Instructions
- Preheat the oven: Set your oven to 425°F (220°C) to prepare for baking the mini crust cups.
- Prepare the dough: Lightly flour a work surface. Unroll the refrigerated pie crusts and sprinkle them evenly with the turbinado sugar and ground cinnamon. Use a rolling pin to gently press the sugar and cinnamon mixture into the dough for extra flavor and slight crunchy texture.
- Cut and form cups: Using a 2½-inch round cookie cutter, cut out circles from the dough. Press each round firmly into the cups of an ungreased mini muffin tin to shape the cups. If needed, re-roll scraps to make enough rounds to fill 48 cups.
- Bake the cups: Bake the dough-lined muffin cups in the preheated oven for 10 minutes, or until they turn golden brown. Remove from the oven and let them cool completely in the pans before carefully transferring to a wire rack to cool further.
- Make the filling: While the cups cool, combine the ricotta cheese, powdered sugar, granulated sugar, finely grated citrus zest, and vanilla extract in a large bowl. Beat these ingredients together until creamy and smooth. Transfer the filling to a zip-top bag and refrigerate until ready to use.
- Fill and garnish: Once the pastry cups are completely cooled, cut the tip off the corner of the zip-top bag and pipe the ricotta filling into each cup. Garnish the filled cups with miniature chocolate chips or finely chopped pistachios. Finally, dust the tops lightly with additional powdered sugar for a festive touch.
Notes
- Ensure the pie crust is well chilled and soft enough to roll easily without cracking.
- Use either orange or lemon zest based on your flavor preference.
- Alternative garnishes like chopped nuts or dried fruit can be used as toppings.
- For best texture, fill the cups just before serving to keep shells crisp.
- These cups can be prepared a few hours in advance and refrigerated until serving.
