
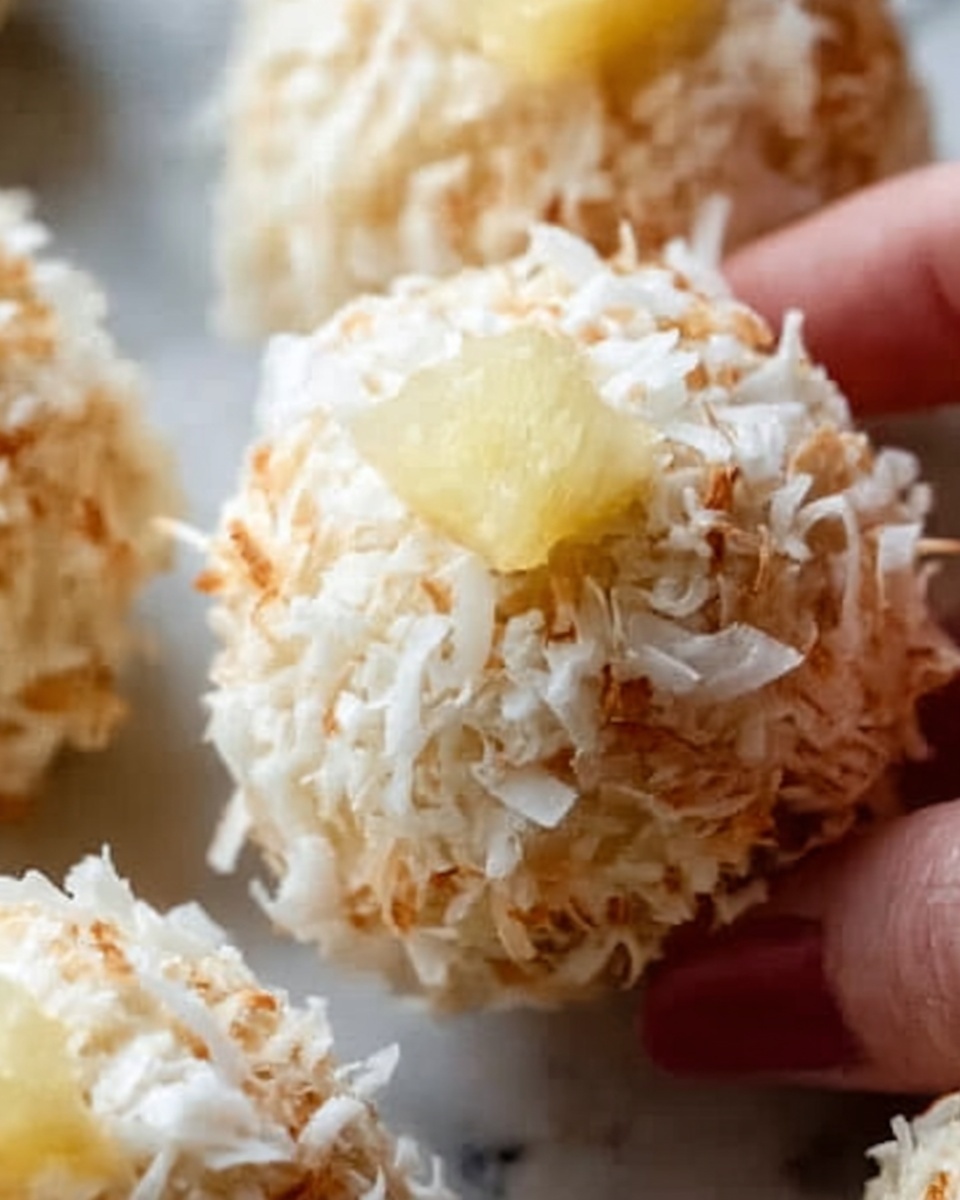
If you’re craving a tropical treat that’s effortlessly delightful, I can’t wait to share this Pineapple Coconut No-Bake Balls Recipe with you! These little bites perfectly balance the sweet tang of dried pineapple with the creamy, dreamy texture of shredded coconut, all without heating up your kitchen. Whether you want a quick snack, a beautiful party offering, or a guilt-free dessert, these no-bake balls are a total game changer. Let’s dive into making these sunshine-packed delights together!
Ingredients You’ll Need
Gathering the right ingredients is the secret to nailing this Pineapple Coconut No-Bake Balls Recipe. Each component plays a unique role in delivering a luscious texture and vibrant tropical flavor that will make your taste buds sing.
- Dried pineapple, 1 cup, chopped: Provides natural sweetness and chewy bursts of tropical flavor.
- Sweetened shredded coconut, 1 1/2 cups (plus extra for rolling): Adds richness, texture, and the classic coconut aroma.
- Sweetened condensed milk, 1/2 cup: Acts as a creamy binder that adds moisture and sweetness.
- Vanilla extract, 1 teaspoon: Enhances the overall flavor with warm, sweet notes.
- Salt, 1/4 teaspoon: Balances the sweetness and heightens the tropical taste.
How to Make Pineapple Coconut No-Bake Balls Recipe
Step 1: Prepare the Ingredients
Start by placing the chopped dried pineapple, shredded coconut, sweetened condensed milk, vanilla extract, and salt into a large mixing bowl. Stir everything until the mixture looks well combined and sticky—this is where the magic begins to take shape.
Step 2: Form the Balls
Now comes the fun part: rolling! Use your hands to scoop and shape the mixture into small balls about an inch in diameter. If the mixture sticks too much, just wet your hands with a little water to help. You’ll get a great tactile sense of when each ball feels just right—soft but holding together perfectly.
Step 3: Roll in Coconut
Spread some extra shredded coconut on a plate. Gently roll each formed ball in this coconut coating, ensuring every surface is covered. This not only amps up the coconut flavor but also adds a lovely texture contrast that makes every bite special.
Step 4: Chill
Place your coconut-coated balls on a parchment-lined baking sheet and pop them into the fridge for at least 30 minutes. This chilling phase lets them firm up beautifully so that you can handle and serve them easily without any mess.
Step 5: Serve
Once chilled, your Pineapple Coconut No-Bake Balls are ready to share! Their tropical sweetness shines through with every bite, making them perfect for snacking or as a charming addition to any dessert spread.
How to Serve Pineapple Coconut No-Bake Balls Recipe

Garnishes
Although these balls are delicious on their own, garnishing them with a sprinkle of finely chopped pistachios or a light dusting of cinnamon can add an unexpected pop of color and flavor. A drizzle of melted dark chocolate also takes them to a new level of indulgence.
Side Dishes
Serve these no-bake delights alongside fresh fruit platters, tropical smoothies, or a dollop of coconut yogurt for a refreshing and well-rounded tropical snack experience. They pair wonderfully with light teas and fruity cocktails as well.
Creative Ways to Present
Get creative and arrange these balls on a vibrant serving tray lined with banana leaves to enhance the tropical vibe. You can also skewer a few on cocktail picks with a cube of pineapple or a mint leaf for playful bite-sized treats that impress at any gathering.
Make Ahead and Storage
Storing Leftovers
Place any leftover Pineapple Coconut No-Bake Balls in an airtight container and store them in the refrigerator. They’ll stay fresh and flavorful for up to 5 days, making it easy to enjoy them throughout the week.
Freezing
If you want to keep these tropical treats longer, freeze them! Lay the balls on a tray to freeze individually first, then transfer them to a freezer-safe container or bag. They can be frozen for up to 3 months—perfect for a future snack emergency.
Reheating
Because these are no-bake treats, there’s no reheating needed. Just thaw frozen balls in the refrigerator or at room temperature for about 15-20 minutes until they’re soft and ready to enjoy again.
FAQs
Can I use fresh pineapple instead of dried?
Fresh pineapple has more moisture, which might make the mixture too wet to hold together properly. Dried pineapple is best because it keeps the texture just right and prevents the balls from becoming soggy.
Is it possible to make these vegan or dairy-free?
Absolutely! Substitute the sweetened condensed milk with a thick coconut cream or a plant-based condensed milk alternative to keep the recipe vegan and dairy-free while still maintaining that luscious texture.
How long do Pineapple Coconut No-Bake Balls last in the fridge?
They remain fresh and delicious for about 5 days when stored properly in an airtight container in the refrigerator.
Can I add nuts or seeds to this recipe?
Yes! Tossing in chopped macadamia nuts, almonds, or sunflower seeds can add a wonderful crunch and extra layers of flavor to these no-bake balls.
What is the best way to prevent the balls from sticking to my hands?
Lightly wetting your hands with water before shaping the balls works like a charm. It stops sticking without altering the flavor or texture.
Final Thoughts
This Pineapple Coconut No-Bake Balls Recipe is truly a little tropical treasure you can whip up anytime without fuss. Sweet, chewy, and creamy, they’re an irresistible treat that brings sunshine to any day. I hope you enjoy making and sharing these as much as I do—they’re pure joy in every bite!
Print
Pineapple Coconut No-Bake Balls Recipe
- Prep Time: 10 minutes
- Cook Time: 0 minutes
- Total Time: 40 minutes
- Yield: 12 servings
- Category: Dessert
- Method: No-Cook
- Cuisine: Fusion
Description
These Pineapple Coconut No-Bake Balls are a deliciously sweet and tropical treat that combines the chewy texture of dried pineapple with the rich flavor of shredded coconut. Easy to make and requiring no baking, they are perfect for a quick snack or dessert that can be enjoyed chilled.
Ingredients
Ingredients
- 1 cup dried pineapple, chopped into small pieces
- 1 1/2 cups sweetened shredded coconut (plus extra for rolling)
- 1/2 cup sweetened condensed milk
- 1 teaspoon vanilla extract
- 1/4 teaspoon salt
Instructions
- Prepare the Ingredients: In a large mixing bowl, combine the chopped dried pineapple, shredded coconut, sweetened condensed milk, vanilla extract, and salt. Mix everything together until it’s well combined and forms a sticky mixture.
- Form the Balls: Use your hands to shape small balls about 1 inch in diameter from the mixture. If the mixture sticks to your hands too much, dampen your hands slightly with water to make forming the balls easier.
- Roll in Coconut: Spread extra shredded coconut on a plate. Roll each ball in the coconut so that they are evenly coated on all sides, adding texture and extra flavor.
- Chill: Place the coated balls on a baking sheet lined with parchment paper. Refrigerate them for at least 30 minutes until they are firm and set.
- Serve: Once chilled, the Pineapple Coconut No-Bake Balls are ready to be enjoyed as a refreshing and sweet snack.
Notes
- If the mixture is too dry to hold together, add a little more sweetened condensed milk.
- Store the balls in an airtight container in the refrigerator for up to one week.
- For a healthier twist, use unsweetened shredded coconut and a natural sweetener instead of sweetened condensed milk.
- These can be made in advance and are a great option for parties or as grab-and-go snacks.
