
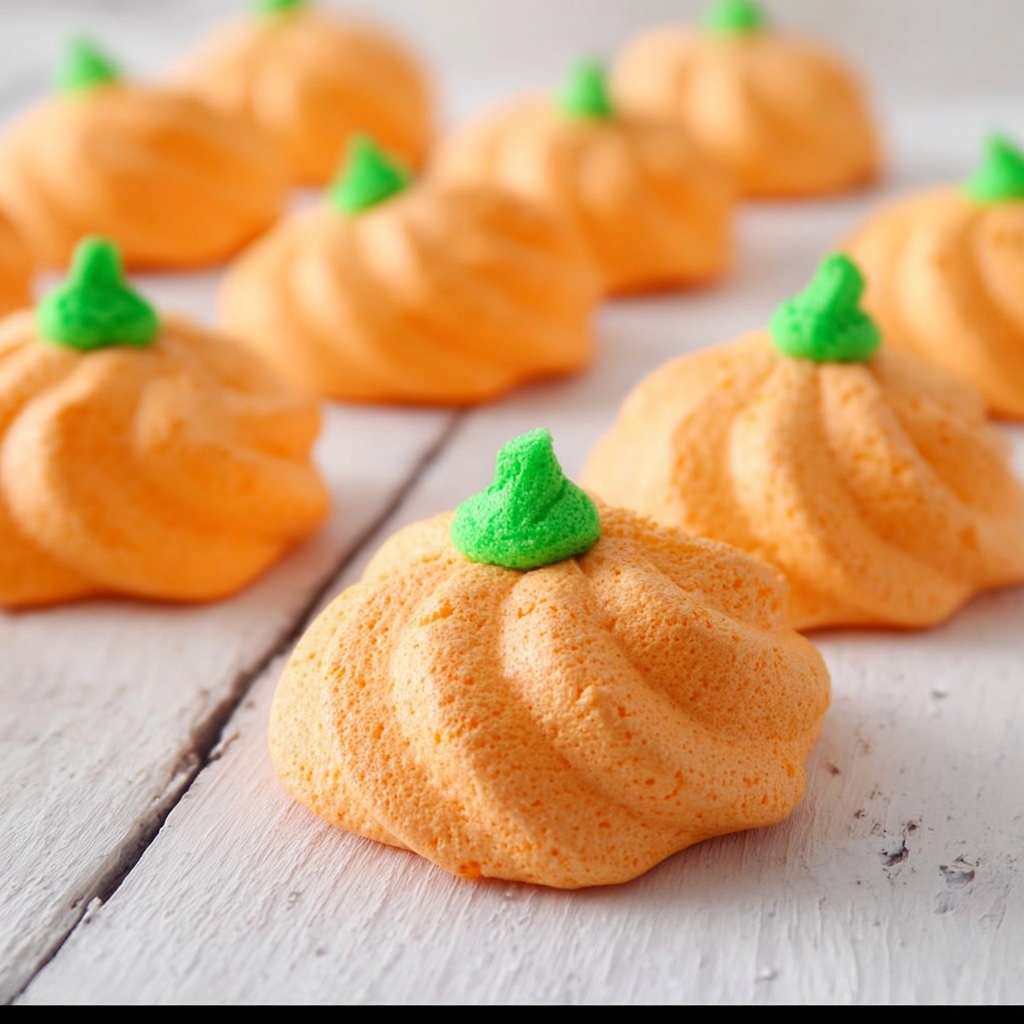
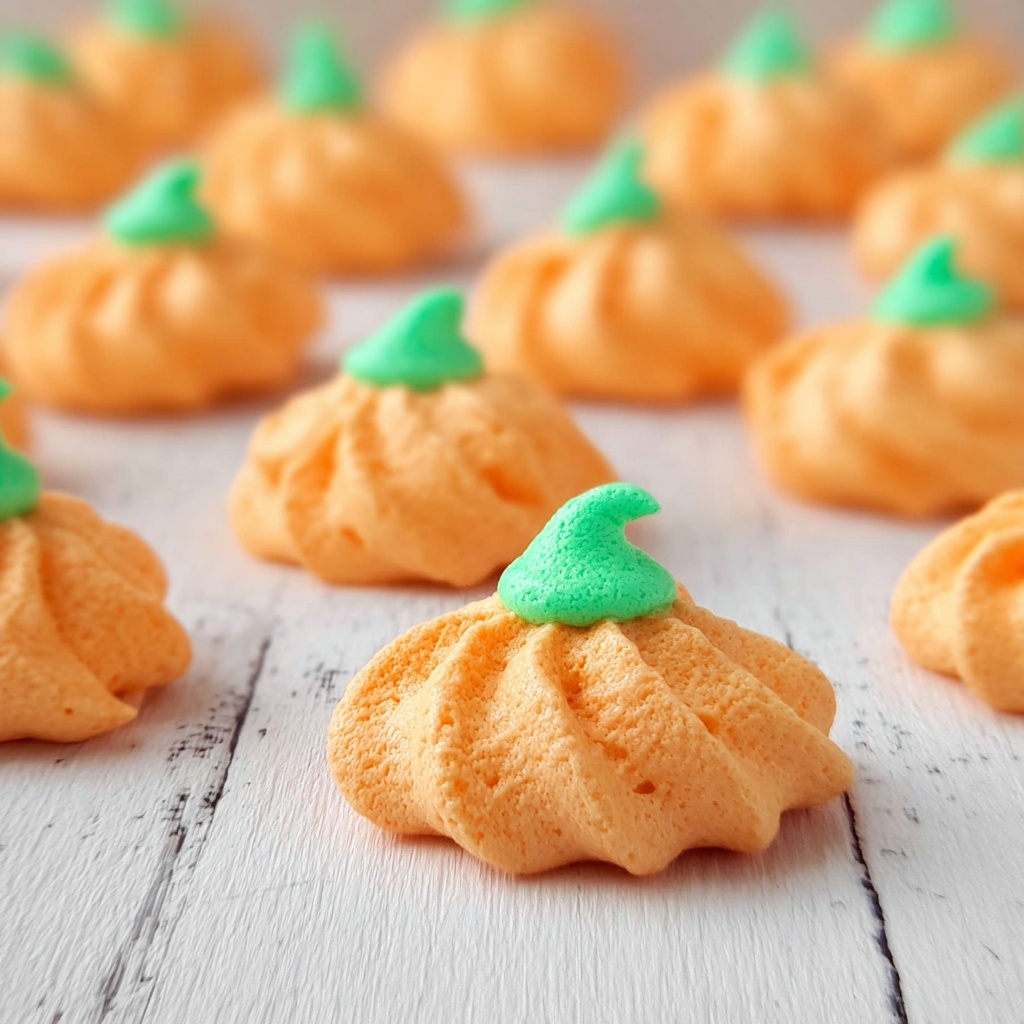
If you’re craving a delicate, melt-in-your-mouth treat that combines the lightness of classic meringues with the warm, subtle essence of autumn, then this Pumpkin Meringues Recipe is exactly what your kitchen needs. These little cloud-like delights capture the essence of pumpkin in a beautifully airy texture, offering a unique twist on traditional meringues that will blow your mind and sweet tooth alike. Whether you’re serving them at a festive gathering or sneaking a few bites after dinner, they’re sure to become an instant favorite that feels both special and comforting.
Ingredients You’ll Need
Simple but crucial, the ingredients for this Pumpkin Meringues Recipe come together to create a perfect balance of flavor, structure, and sweetness. Each item plays a vital role in achieving that irresistible texture and subtle pumpkin charm.
- 1/2 cup egg whites: The foundation for your airy meringues, beaten to stiff peaks for volume.
- 1 tsp Cream of Tartar: Helps stabilize the egg whites and maintains their fluffy consistency.
- 1/4 tsp salt: Enhances flavor and balances the sweetness perfectly.
- 1 tsp Vanilla: Adds a warm, sweet aroma that complements the pumpkin vibe beautifully.
- 1 1/3 cup sugar: Sweetens and helps create that glossy, glossy sheen meringues are known for.
How to Make Pumpkin Meringues Recipe
Step 1: Prepare Your Mixing Bowl
Start by ensuring your mixing bowl is completely clean and free of any grease or moisture — this is super important because even a tiny bit of fat or water can stop your egg whites from whipping up properly into those stiff peaks you’re aiming for. Wiping the bowl with a clean kitchen towel or paper towel is a quick but essential step to success.
Step 2: Begin Whipping the Egg Whites
Dump your egg whites into the bowl of your stand mixer and sprinkle in the cream of tartar and salt. Mix on medium speed until you spot lots of tiny bubbles fluttering across the egg whites, then raise the speed slightly to encourage more bubbles and volume.
Step 3: Sweeten and Whip to Perfection
Time to add the magic flavors! Add the vanilla and sugar one tablespoon at a time, beating well after each addition. This gradual process helps dissolve the sugar fully, creating that signature glossy look and thick texture. Turn the mixer up to high and whip until you get stiff, shiny peaks that hold their shape like tiny snowy mountains. This can take about 5 to 7 minutes, but it’s worth the attention!
Step 4: (Optional) Add Color to Your Meringues
If you want your pumpkin meringues to pop with a bit of color, this is the moment to gently fold in gel food coloring. Divide the egg whites into separate bowls if you’re using different colors, then carefully blend in the gel until just combined — remember, gel colors are the best choice here to keep your meringues stiff and glossy.
Step 5: Shape the Meringues
Grab a piping bag fitted with a large star tip and pipe the meringue mixture onto a parchment paper-lined cookie sheet in swirling motions, building little peaks that look like delicate pumpkins or soft clouds. If you’re not confident with piping, spoons work just fine – just drop spoonfuls onto the paper and shape them gently with the back of the spoon.
Step 6: Bake and Cool
Pop the tray into an oven preheated to 250 degrees Fahrenheit and let your meringues bake for one hour. Then turn off the oven but leave the meringues inside with the door closed for another hour to dry out gently and develop that perfect melt-in-your-mouth texture. Once cooled completely, your pumpkin meringues are ready to enjoy!
How to Serve Pumpkin Meringues Recipe
Garnishes
Sprinkle a light dusting of pumpkin pie spice or cinnamon atop the meringues before serving for a little extra warmth and visual charm. You can also drizzle melted chocolate or caramel for an added layer of indulgence, making each bite a delightful treat for both the eyes and the palate.
Side Dishes
Pumpkin meringues pair wonderfully with cups of rich hot cocoa, spiced coffee, or creamy chai tea. For something heartier, serve alongside a scoop of vanilla or cinnamon ice cream to create a simple yet elegant dessert experience that balances mellow sweetness with refreshing coolness.
Creative Ways to Present
Arrange your pumpkin meringues in a layered dessert glass alternating with whipped cream and crushed ginger snaps for a visually stunning trifle. Or scatter them across a festive charcuterie board filled with nuts, dried fruits, and cheeses for a unique and charming seasonal spread that guests will adore.
Make Ahead and Storage
Storing Leftovers
Keep your pumpkin meringues in an airtight container at room temperature for up to a week. Make sure they’re completely cooled before storing to avoid any moisture buildup that could soften their crisp exterior.
Freezing
These meringues freeze beautifully! Place them in a freezer-safe container with parchment paper layers to prevent sticking. When you’re ready, just thaw them at room temperature, and they’ll retain their delicate texture and flavor almost perfectly.
Reheating
Since meringues are best served crisp and cool, reheating isn’t usually necessary or recommended. If you prefer a slightly warmed meringue, pop them in a low oven (around 200 degrees Fahrenheit) for just a few minutes, but be careful not to melt or soften them too much.
FAQs
Can I use regular food coloring instead of gel?
Gel food coloring is highly recommended for meringues because it won’t affect the texture or stability, unlike regular liquid food coloring, which can add moisture and prevent stiff peaks.
Why did my meringues weep or become sticky?
Sticky meringues often result from baking at too high a temperature or insufficient drying time in the oven. Patience during the cooling phase is key to achieving that perfect, crisp finish.
Can I substitute powdered sugar for granulated sugar?
It’s best to stick with granulated sugar because it dissolves properly during the whipping process, ensuring a glossy meringue. Powdered sugar contains cornstarch, which can affect texture.
What if my egg whites don’t whip up properly?
Make sure your mixing bowl and beaters are absolutely clean and dry, and avoid any yolk in the whites. Also, use room temperature egg whites for the best volume.
Is the pumpkin flavor coming from pumpkin puree?
This Pumpkin Meringues Recipe uses pumpkin-inspired spices and flavoring rather than actual pumpkin puree, which would add moisture and disrupt the meringue structure.
Final Thoughts
There’s something truly magical about whipping up these pumpkin meringues — from the satisfying fluffy peaks to the gentle pumpkin notes in every bite. If you’re looking for a dessert that feels festive, elegant, and utterly delicious, this Pumpkin Meringues Recipe is a must-try. Give it a go, and I promise you’ll be reaching for seconds (and thirds!). Happy baking!
Print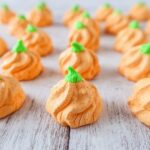
Pumpkin Meringues Recipe
- Prep Time: 20 minutes
- Cook Time: 60 minutes
- Total Time: 1 hour 20 minutes plus 1 hour resting time
- Yield: 48 meringues
- Category: Dessert
- Method: Baking
- Cuisine: American
- Diet: Low Fat
Description
Delightfully light and airy Pumpkin Meringues, perfect for a sweet, fall-inspired treat. These meringues are whipped to stiff peaks and gently flavored with vanilla, then baked low and slow to achieve a crisp exterior with a melt-in-your-mouth texture. Ideal for holiday desserts or a delightful snack.
Ingredients
Meringue Base
- 1/2 cup egg whites (about 4 large egg whites)
- 1 tsp cream of tartar
- 1/4 tsp salt
- 1 tsp vanilla extract
- 1 1/3 cups granulated sugar
Instructions
- Prepare Your Equipment: Ensure the mixing bowl is completely clean and free of grease, fat, or moisture by wiping it thoroughly with a clean kitchen or paper towel. This ensures the egg whites can whip up properly.
- Start Whipping Egg Whites: Place the egg whites in the mixing bowl of a stand mixer. Add the cream of tartar and salt. Mix on medium speed until numerous small bubbles form, then increase the mixer speed one notch to encourage more air incorporation.
- Add Vanilla and Sugar Gradually: Slowly add the vanilla and sugar, one tablespoon at a time, beating after each addition until the sugar is fully dissolved. Increase the mixer speed to high and continue beating the egg whites with the whisk attachment until they form thick, stiff, and glossy peaks, about 5 to 7 minutes.
- Add Coloring (Optional): Turn off the mixer. If you want to color the meringues, divide the egg whites into separate bowls corresponding to the number of colors. Add gel food coloring and gently fold it in until just blended.
- Pipe or Spoon Meringues: Transfer the egg whites to a piping bag fitted with a large star tip. Pipe swirling mounds onto parchment paper-lined baking sheets, coming to a peak. Alternatively, you may spoon tablespoons of meringue onto the sheets if piping is not preferred.
- Bake and Dry Meringues: Bake the meringues in a preheated oven at 250°F (121°C) for 1 hour. After baking, turn off the oven but leave the meringues inside for an additional hour with the door closed to fully dry out and set. Once done, remove from the oven and cool completely on the baking sheets before serving.
Notes
- Use gel food coloring only to avoid adding moisture that can deflate the egg whites.
- Make sure there is no grease in the mixing bowl as it can prevent the egg whites from whipping properly.
- If you don’t have a piping bag, you can spoon meringues onto the baking sheet but piping creates a more decorative look.
- Allowing the meringues to dry in the turned-off oven ensures a crisp exterior and a chewy center.
- Store meringues in an airtight container to keep them crisp and fresh.
