
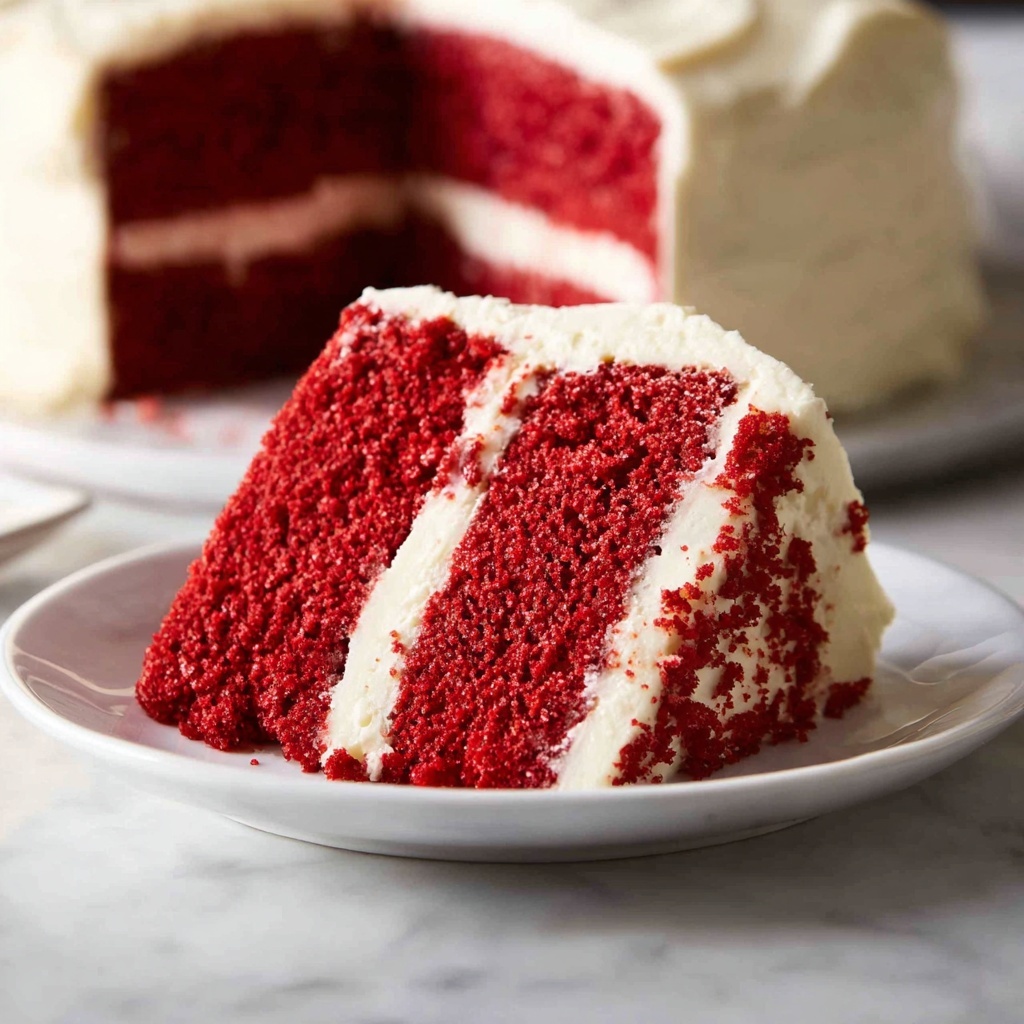
If you’re on the hunt for a show-stopping dessert that’s as stunning as it is scrumptious, you have to try this Red Velvet Cake with Cream Cheese Frosting Recipe. This classic cake dazzles with its vibrant red color, irresistibly moist crumb, and that luscious, tangy cream cheese frosting that practically melts in your mouth. Whether you’re celebrating a special occasion or simply craving something sweet to brighten your day, this recipe is your ticket to pure happiness in every bite.
Ingredients You’ll Need
The magic behind this Red Velvet Cake with Cream Cheese Frosting Recipe lies in its simple, yet carefully chosen ingredients. Each one plays a crucial role—from creating the cake’s tender texture and subtle cocoa flavor to giving it that iconic red hue and glossy finish.
- Plain cake flour (2 2/3 cups / 400 g): Provides a soft and fine crumb perfect for cakes.
- Cocoa powder (2 tbsp / 10 g, unsweetened): Adds just a hint of chocolate flavor without overpowering.
- Baking soda (1 tsp / 5 g): Helps the cake rise beautifully without any bitter aftertaste.
- Salt (pinch): Enhances all the flavors and balances sweetness.
- Unsalted butter (1/2 cup / 115 g, softened): Provides richness and tenderness to the cake.
- Caster sugar (1 1/2 cups / 330 g): Sweetens without graininess for a smooth crumb.
- Eggs (2, room temperature): Bind the cake’s structure and add moisture.
- Vegetable oil (1 cup / 250 ml): Keeps the cake incredibly moist and soft.
- White vinegar (1 tsp): Reacts with baking soda to lighten the crumb and boost red color.
- Vanilla extract (2 tsp): Adds warm, sweet aroma that complements the cocoa.
- Buttermilk (1 cup / 250 ml, room temperature): Brings tang and tenderizes the crumb.
- Red food colouring liquid (2 1/2 tbsp): Gives that signature vibrant red shade everyone loves.
- Philadelphia Cream Cheese (14 oz / 400 g, softened): The star of the frosting; creamy and slightly tangy.
- Unsalted butter (1/2 cup / 115 g, softened): Adds silkiness and structure to the frosting.
- Vanilla extract (1 1/2 tsp): Enhances the sweetness and depth of the frosting.
- Soft icing sugar (4 cups / 450 g, sifted): Sweetens and creates the perfect frosting consistency.
How to Make Red Velvet Cake with Cream Cheese Frosting Recipe
Step 1: Prepare Your Pans and Oven
First things first, preheat your oven to 180°C (350°F) to get it nice and hot. Butter two 8-inch round cake pans, including the sides and bases, then dust them lightly with cocoa powder—this prevents sticking and complements the cake’s subtle chocolate flavor perfectly.
Step 2: Combine Dry Ingredients
Sift together the cake flour, cocoa powder, baking soda, and a pinch of salt into a bowl. Whisk them to ensure an even mix. This step is key to guaranteeing that every bite of your cake has consistent flavor and texture.
Step 3: Cream Butter and Sugar
In a separate large bowl, beat the softened butter and caster sugar with an electric mixer or stand mixer fitted with a paddle attachment. Aim for a smooth, well-blended mixture—this adds lovely lightness to your cake’s crumb.
Step 4: Add Eggs One at a Time
Beat in the eggs individually, making sure each one is fully incorporated before adding the next. The batter might look a bit curdled at first, but keep going until it smooths out—it’s supposed to do that!
Step 5: Mix in Wet Ingredients and Food Colouring
Next, add your vegetable oil, white vinegar, vanilla extract, buttermilk, and the vibrant red food colouring. Beat together until everything is blended and the batter has that iconic, glossy red look.
Step 6: Incorporate Dry Ingredients
Gently beat in your sifted dry ingredients until just combined. Don’t overmix here; a few small lumps are perfectly okay and will help keep the cake tender and light.
Step 7: Bake Your Cake
Divide the batter evenly between your prepared pans. Pop them in the oven on the same shelf and bake for 25 to 30 minutes. You’ll know your cakes are done when a toothpick inserted in the center comes out clean with no batter clinging.
Step 8: Cool the Cakes
Once out of the oven, let the cakes rest in their pans for about 10 minutes. Then carefully turn them out onto a cooling rack and let them cool completely before frosting.
Step 9: Prepare Cream Cheese Frosting
Beat together the softened Philadelphia cream cheese and butter until creamy and smooth. Add vanilla, then gradually sift in the icing sugar, beating until light, fluffy, and just right for spreading.
Step 10: Assemble and Frost
Place one cake layer on your serving plate, spread a generous layer of the cream cheese frosting on top, then add the second cake layer. Cover the top and sides with the remaining frosting using an offset spatula for a smooth or textured finish—your choice!
How to Serve Red Velvet Cake with Cream Cheese Frosting Recipe
Garnishes
Decorate this cake with fresh berries like raspberries or strawberries to add a fresh, tart contrast to the creamy frosting. Or sprinkle on some finely chopped nuts or white chocolate shavings for a bit of fun texture and elegance.
Side Dishes
This cake pairs beautifully with a dollop of whipped cream or a scoop of vanilla ice cream to balance its richness. For an adult twist, consider serving with a cup of robust coffee or a glass of dessert wine.
Creative Ways to Present
Try cutting the cake into petite squares or layers for mini cake bites at parties. Alternatively, make a layered trifle with cake pieces, a swirl of cream cheese frosting, and fruit for a stunning dessert centerpiece.
Make Ahead and Storage
Storing Leftovers
Wrap leftover cake in plastic wrap or store in an airtight container and keep it in the refrigerator. It will stay fresh and moist for up to 4 days—perfect for indulging in a sweet treat anytime.
Freezing
You can freeze unfrosted cake layers wrapped tightly in cling film and then placed in freezer bags for up to 2 months. Thaw in the refrigerator overnight before frosting. You can also freeze the cream cheese frosting separately in a container and thaw as needed.
Reheating
Since the cake is best enjoyed chilled or at room temperature, reheating is generally not recommended. If you prefer a slightly warmer slice, let it come to room temperature from the fridge before serving for optimal texture and flavor.
FAQs
Can I use buttermilk substitutes in this Red Velvet Cake with Cream Cheese Frosting Recipe?
Absolutely! If you don’t have buttermilk, you can mix 1 cup of milk with 1 tablespoon of lemon juice or white vinegar. Let it sit for 5 minutes before using. It mimics the acidity and tang that buttermilk brings to the cake.
What if I don’t have red food coloring? Can I skip it?
While the red color is iconic for red velvet, you can skip or reduce the coloring if you prefer a more muted tone. Just know that the vibrant red is part of what makes this cake so special and eye-catching.
How do I prevent my cream cheese frosting from being too runny?
Make sure your cream cheese and butter are softened but not overly soft or melted. Also, sift your icing sugar to avoid lumps and add it gradually, beating well to reach a thick, spreadable consistency.
Can I make this recipe dairy-free?
It’s a bit tricky because cream cheese is central to the frosting’s flavor and texture. However, dairy-free cream cheese alternatives exist, and you can substitute with plant-based milk instead of buttermilk and butter, but results may vary.
What’s the best way to get even cake layers?
Use a kitchen scale to divide the batter evenly between pans. You can also gently tap the pans on the counter before baking to release air bubbles and encourage even rising for flat tops that are easier to frost.
Final Thoughts
This Red Velvet Cake with Cream Cheese Frosting Recipe is one of those treasures you’ll come back to again and again. With its perfect balance of flavors, stunning color, and creamy frosting, it’s sure to become a beloved favorite in your baking repertoire. Go ahead, give it a try—you deserve a slice of happiness today.
Print
Red Velvet Cake with Cream Cheese Frosting Recipe
- Prep Time: 30 minutes
- Cook Time: 25 minutes
- Total Time: 55 minutes
- Yield: 10-12 servings
- Category: Dessert
- Method: Baking
- Cuisine: American
Description
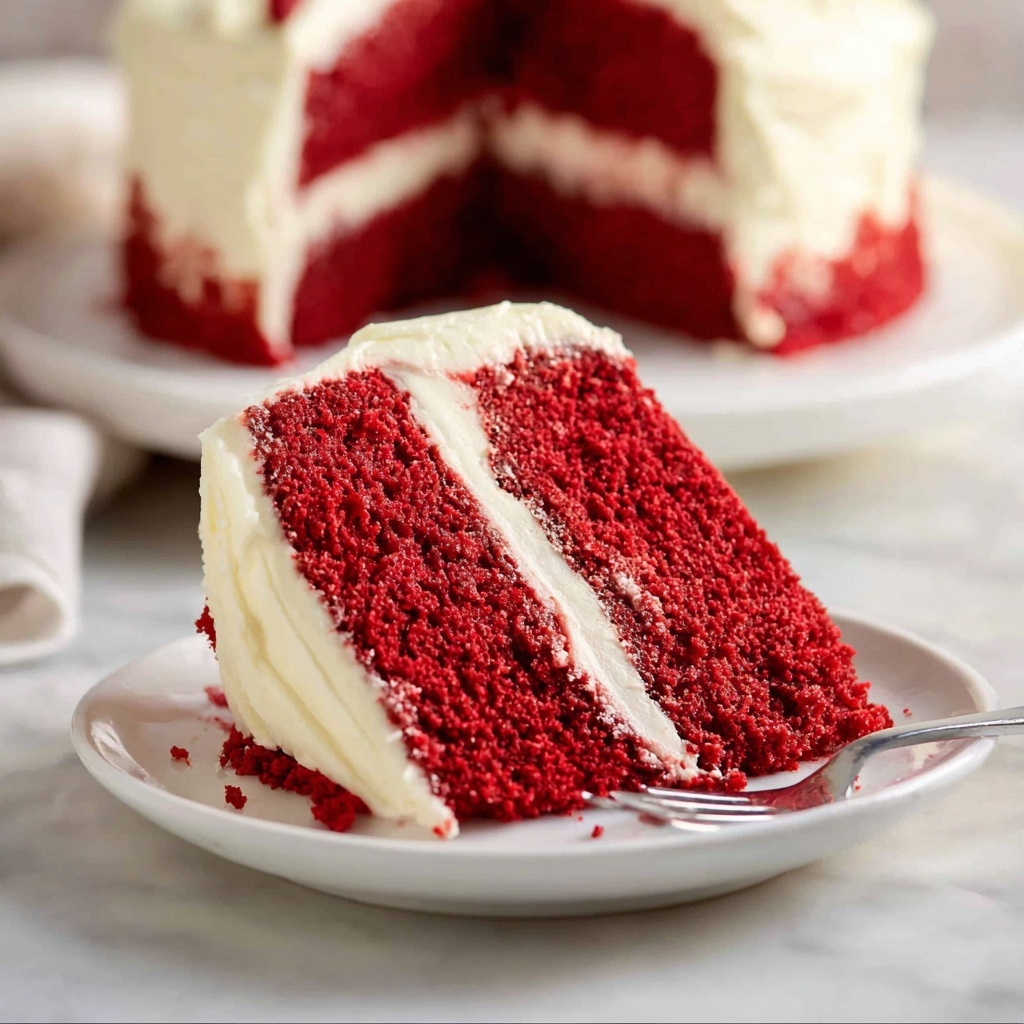
This classic Red Velvet Cake recipe features a moist, tender cake with a subtle chocolate flavor and vibrant red color, complemented by a luscious cream cheese frosting. Perfect for celebrations or a delightful dessert treat.
Ingredients
Cake
- 2 2/3 cups (400 g) plain cake flour
- 2 tbsp (10 g) unsweetened cocoa powder
- 1 tsp (5 g) baking soda (NOT baking powder)
- Pinch of salt
- 1/2 cup (115 g) unsalted butter, softened (1 US stick)
- 1 1/2 cups (330 g) caster/superfine white sugar
- 2 eggs, at room temperature (around 2 oz / 60g each)
- 1 cup (250 ml) vegetable oil
- 1 tsp white vinegar
- 2 tsp vanilla extract
- 1 cup (250 ml) buttermilk, at room temperature
- 2 1/2 tbsp red food colouring liquid (gel recommended)
Frosting
- 14 oz (400 g) Philadelphia Cream Cheese, block, softened but not too soft
- 1/2 cup (115 g) unsalted butter, softened but not too soft
- 1 1/2 tsp vanilla extract
- 4 cups (450 g) soft icing sugar/powdered sugar, sifted
Instructions
- Preheat and Prepare Pans: Preheat your oven to 180°C/350°F. Butter two 8-inch round cake pans on the sides and bases, then dust them lightly with cocoa powder to prevent sticking.
- Mix Dry Ingredients: Sift the cake flour, cocoa powder, baking soda, and salt into a bowl. Whisk well to combine and set aside.
- Cream Butter and Sugar: Place softened butter and caster sugar in a mixing bowl. Using an electric beater or stand mixer with paddle attachment, beat until the mixture is smooth and well combined.
- Add Eggs: Add eggs one at a time, beating well after each addition. The batter may look curdled initially; continue beating until smooth.
- Incorporate Wet Ingredients: Mix in vegetable oil, white vinegar, vanilla extract, buttermilk, and red food colouring. Beat until the mixture is smooth and evenly combined.
- Add Dry Ingredients: Gradually add the sifted dry ingredients to the wet mixture. Beat just until combined; some small lumps are okay to avoid overmixing.
- Bake the Cakes: Divide the batter evenly between the prepared pans. Bake on the same oven shelf for 25-30 minutes, or until a toothpick inserted in the center comes out clean.
- Cool the Cakes: Let the cakes rest in the pans for 10 minutes, then turn them out onto cooling racks. Allow them to cool completely.
- Make the Cream Cheese Frosting: Beat the softened cream cheese and butter together until smooth and creamy. Add vanilla extract and mix well. Gradually add sifted icing sugar, beating until you have a smooth, spreadable frosting.
- Assemble the Cake: Once the cakes are fully cooled, spread a layer of frosting on top of one cake layer. Place the second cake layer on top and frost the top and sides evenly. Chill if desired before serving.
Notes
- Cake flour yields the best texture for this cake; use all-purpose flour if unavailable but expect a denser crumb.
- Baking soda is essential for the cake’s rise and acidity balance; do not substitute with baking powder.
- Caster or superfine sugar dissolves more easily, helping to create a finer crumb.
- Ensure buttermilk and eggs are at room temperature for better mixing and texture.
- Using gel-based red food coloring is recommended for a vibrant color without altering batter consistency.
- Baking time can vary slightly by oven; test doneness with a toothpick.
- Do not overmix batter as this can lead to a dense cake.
- For best results, chill the frosting slightly before applying to maintain stability.


